UBERLEVELS
You can complete the game on the hardest difficulty with one hand while watching television? These levels are much harder than any regular level, and will challenge even the strongest heroes.
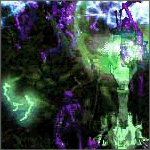
1/7 Kurast 3000 BA
DIFFICULTY: EASY
Location: Arachnid Lair (Spider Forest)
This uberlevel is a recreation of the newly founded town of Kurast, 3000 BA (Before Akarat), located at the Kehjistani frontier during the Mage Clan Wars between the Ennead, Annuit and Vizjerei clans. Kurast, a neutral town allied with the Taan, was seized by the Ennead and used as a military outpost. Can you destroy the magical fortifications and liberate the town?
Strategy: This first uberlevel features large numbers of skeletons in fighter, archer and mage varieties, and totems that emit an invulnerability shield aura and summon additional skeletons. Kill the totems first.
The Ennead Necromancer bosses cast a slow moving but powerful Bloodstar spell and the dangerous Nightmare curse which slows you down and reduces your combat ability.
Loot: The best loot is dropped by the Ennead Necromancers, of which there are three on the level. Being a level 121 area on Destruction (Hell) difficulty, you can expect good items from even regular monsters.
> On all difficulties, the Ennead Necromancers drop blank class charms in addition to their regular drop, which can be upgraded if you meet the Attribute Challenge or Level Challenge requirements.
> Also, on Terror and Destruction difficulty they may drop the Hard Mode Charm, an experimental charm that increases game difficulty and magic find. This charm is for advanced players only.
* +1 Increased Difficulty gives monsters a bonus to attack rating, damage and life. You can cube the charm with a healing potion to increase difficulty and magic find, or cube it with a mana potion to reduce both.
* See THIS PAGE for more information about the Hard Mode Charm.
> Finally, on Destruction difficulty, the Ennead Necromancers have 1/12 chance to drop the Hammer of the Taan Judges.
Drop Bias
Set items are more likely to drop here than in
other areas.
Sacred sets and uniques can drop here on Destruction difficulty.
2/7 Island of the Sunless Sea
DIFFICULTY: MODERATE
Location: Drifter Cavern (Glacial Trail)
'Your curiosity will be the death of you!'
Thousands of years ago, two religions competed with one another. The Cathedral of Light, founded by the angel Inarius. The Temple of the Triune, worshipping three self-proclaimed holy spirits - Mefis, Dialon and Bala.
The Island of the Sunless Sea, the place where angels watch, the staging ground of the angelic legions, changed hands many times. From the forces of the High Heavens to Baal and back and then to the Temple of the Triune and its leader, Primus, also known as Lucion, son of Mephisto.
You may encounter some tough opposition in the gloomy ice cave, but the stakes are high - taking out Lucion would remove him as a threat in the present day. Get to it, time traveller.
Strategy: The regular monsters are almost tougher than the bosses on this level. Many foes are invisible, and all have high damage and chance to hit.
Be wary of Malics Messenger at the entrance gate. The familiar is not dangerous on its own, but explodes on death, creating a shockwave that pushes you back, possibly into unexplored territory.
Malic is a priest with a powerful rain of fire and a Punisher spell. This slow moving doom bolt pretty much takes off all your life when it hits you, leaving you poisoned at 1 life. On the bright side, it is easy to avoid.
Lucion emits an unholy invulnerability aura that makes nearby enemies immortal. Try to separate him from his minions or kill him first. He also has a lethal melee attack that poisons the victim for a long time.
Loot: Malic drops good items on all difficulty levels. Defeat Malic on Destruction difficulty to get the Six Angel Bag.
Loot: Lucion drops good items on all difficulty levels. Defeat Lucion on Destruction difficulty to get the Sunless Crystal Bird.
Sacred sets and uniques can drop here on Destruction difficulty.
3/7 Khalimgrad
DIFFICULTY: TRICKY

Location: Infernal Pit (Frozen Tundra)
Heaven. Nirvana. Celestia. Call it what you will. Home of the angelic legions, who almost destroyed the taint on Creation that is the mortal plane twice and allowed it to get overrun by the forces of Hell. Far from being the beings of love they are believed to be by the common folk, the angels of the High Heavens present a clear and present danger to Sanctuary. It may be better to strike first.
Strategy: The Ethereals are the physical manifestations of common angels. They attack furiously, but when you kill one of them, it shatters, weakening other nearby enemies. This does however enrage them and they will swarm you at the speed of a lightning bolt.
The untargetable Lightwells cast Punisher spells at you at a rapid rate. Try to avoid them, because a direct hit deals incredible amounts of poison damage. Their location changes from game to game.
The main targets to take out are Zakarums Avatars watching over the battle. You can only attack Zakarum's Avatars when their resistances are lowered.
Loot: Zakarum's Avatars drop good items on all difficulty levels. On Destruction difficulty, they have 1/12 chance to drop the Zakarum's Ear.
Drop Bias
Rare items are more likely to drop here than in other areas.
Sacred sets and uniques can drop here on Destruction difficulty.
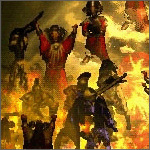
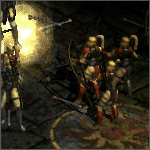
4/7 Tran Athulua
DIFFICULTY: HARD
Location: Halls of the Dead Level 3 (Dry Hills)
The capital of the Amazon nation, Tran Athulua, is almost impossible to take by land or sea. After a humiliating defeat at the hands of the Amazon defenders, a band of pirates hired you to assassinate the Priestesses and steal their expensive shinies.
The uberlevel features amazon archers and three Priestesses, devoted to each of the three elemental gods. Philios serves Hefaetrus, god of fire. Skovos serves Karcheus, god of ice. Lycander serves Zerae, goddess of vengeance and storms.
Strategy: The common Amazons deal lots of damage, so keep moving to avoid Guided Chain. Otherwise the arrows will keep returning and doing damage many times over.
The Priestesses are very hard due to their Phalanx and Tremor spells. Phalanx can be dodged by staying at the northwest or southeast of the Priestess; this prevents the Phalanx archers from lining up and whacking you with 20 arrows per second. There is no way to mitigate Tremor damage, because it is percentage based. You can easily recognise the Priestess in a large pack by her heavy armour.
Loot: The Priestesses drop decent items on all difficulty levels. Defeat the respective elemental Priestesses on Hatred difficulty to get the Sunstone of Fire, Sunstone of Ice and Sunstone of Thunder.
On Destruction difficulty, the Priestesses have 1/6 chance to drop the Sunstone of the Gods.
The Priestesses also have 2% chance to drop a trophy on Destruction difficulty. Cube the trophy with the charm for a small bonus.
Drop Bias
Unique items are more likely to drop here than in other areas.
Sacred sets and uniques can drop here on Destruction difficulty.
5/7 Fauztinville
DIFFICULTY: VERY HARD
Location: Stony Tomb Level 2 (Rocky Waste)
Warning: To get to this uberlevel in Terror and Destruction, you need to get through the Stony Tomb Level 1 heroic level.
After the destruction of the Worldstone, a new era of peace and prosperity began, eventually evolving into what we call the modern age. Humanity has all but forgotten how to deal with demons. Until out of nowhere an evil force beneath the metropolis of Fauztinville begins to corrupt the machinery and pets, turning them against their masters. Overwhelmed by the assault, the army employs its new experimental time machine to request help from the heroes of the past. Will you answer the call?
Once a humble settlement founded by the mage Fauztin, the city has grown to over ten million inhabitants after the destruction of the Worldstone. All have died or left the city in the face of an onslaught of demonically twisted robots and demons bursting from the city's neon signs.
The invasion is led by five warped robots, Alpha, Beta, Gamma, Delta and Epsilon. These are your targets. Terminate them.
Strategy: The main difficulty of this level is the onslaught of ranged enemies. A shield helps, but you will need a seriously fast block speed or you will get block-locked. Minions can separate the pack, but beware the Harpylisk's bouncing blade attack.
The five Robot Bosses can be hard to find. Look for dead-end streets and hidden passages through buildings. One of the five requires a teleport skill to access; if you do not have Blink or Divine Apparition, use an item with charges of Blink or Jitans Gate, like the runeword Pax Mystica or the reward charm for the Lord Aldric Jitan uberquest.
Loot: The Robot Bosses drop good items on all difficulty levels. There is no charm reward for completing this uberlevel, however in Destruction difficulty they are very likely to drop uniques, sets, rares and runes, and may be your main source of runes.
> On Terror difficulty, the Robot Bosses drop their electronic Brains. These are required for the Black Road challenge.
> Fauztinville on Destruction difficulty is the only place in the game where you can find the three Great Runes. These runes are required for the most powerful runewords.
|
| Taha | Level 100 | Weapons : +40 to Maximum Damage Armor : +20 to Maximum Damage Shields : +20 to Maximum Damage |
|---|---|---|---|
|
| Ghal | Level 100 | Weapons : +15 Energy Factor to Spell Damage Armor : +5 Energy Factor to Spell Damage Shields : +5 Energy Factor to Spell Damage |
|
| Qor | Level 100 | Weapons : Requirements -12% Armor : Requirements -12% Shields : Requirements -12% |
Drop Bias
Runes and portable shrines are more likely to drop here than in other areas.
Sacred sets and uniques can drop here on Destruction difficulty.
6/7 Ghosts of Old Bremmtown
DIFFICULTY: EXTREME
Location: Pit of Acheron (Arreat Plateau)
You ended the demon invasion of Fauztinville... fast forward another few thousand years. Following a global demon apocalypse, the city is in ruins. Lilith, once banished to the Plane of the Dead, broke free and worse still, corrupted the sons of the cosmic dragon Trang-Oul.
The draconic death god is the ruler of the Plane of the Dead. Weakened by his battle against the angelic and demonic legions at the end of time in the far future, Trang-Oul was unable to stop Lilith from capturing and possessing his drakes.
The shadowy Dark Star Dragons were unleashed upon Sanctuary by Liliths forces. There is no hope for humanitys resistance forces unless these creatures are eliminated. The old time machine was put into action once again... Will you help out Fauztinville a second time?
Strategy: The Howling Spirits materialise directly on top of you when you approach their hiding spots. You have no choice but to take some hits unless you have inhuman reflexes. Defence is very important.
The Dark Star Dragon on the level has a dual rotating energy beam attack that slays anyone it touches. Use the ruins and debris to avoid the beam. He also summons more Howling Spirits when threatened. You will need to deliver as much damage as fast as possible, because the Dark Star Dragon has a very fast regeneration ability.Loot: The Dark Star Dragon drops good items on all difficulty levels. There is no charm reward for completing this uberlevel, but there is something else
If you kill the Dark Star Dragon on Destruction difficulty within 3 minutes after entering the level and without dying, you can cube your class charm with an Arcane Crystal while the red swirls are on you to add powerful modifiers.
This upgrade recipe adds the following bonuses:
Amazon: uses Sacred Sunstone
+500 Crafting Points
Maximum Skill Level Increased by 1
+500 to Life
Assassin: uses Shadow Vortex
+500 Crafting Points
Maximum Skill Level Increased by 1
+500 to Mana
Barbarian: uses Worldstone Orb
+500 Crafting Points
Maximum Skill Level Increased by 1
Enhanced Weapon Damage +50%
Druid: uses Caoi Dulra Fruit
+500 Crafting Points
Maximum Skill Level Increased by 1
+1000 Defense
Necromancer: uses Soulstone Shard
+500 Crafting Points
Maximum Skill Level Increased by 1
+15% Bonus to Summoned Minion Resistances
Paladin: uses Eye of Divinity
+500 Crafting Points
Maximum Skill Level Increased by 1
5% Chance to Avoid Damage
Sorceress: uses Nexus Crystal
+500 Crafting Points
Maximum Skill Level Increased by 1
+50 Energy Factor to Spell Damage
Sacred sets and uniques can drop here on Destruction difficulty.
7/7 Kingdom of Shadow
DIFFICULTY: IMPOSSIBLE
Location: Crypt (Blood Raven's Graveyard)
The radiant city of Ureh, thought to be a gateway to Heaven in ancient times. As it turned out, Diablo had taken the form of an angel and deceived the city wizards, tricking them into casting a spell that doomed the city.
Ureh and everyone within are now trapped between the mortal plane and Hell, appearing in this world only once every two thousand years, when the shadow of Mount Nymyr falls upon the ruins.
Be there.
Strategy: This is zombie city. Worse, this is immortal zombie city. Do not bother attacking the ghost citizens, because you cannot. Keep moving at all costs to avoid the undead hordes.
This is a huge level, there is no minimap, the lighting is very dim and the boss is located in a distant corner. Please run around like a damsel in a zombie film until you find the narrow bridge leading to King Juris Khan.
Raw firepower is almost useless in this level, because very few enemies can be killed at all. Do equip all the run speed and hit recovery bonuses you can get, try to get some minions and a teleportation spell, either natively or granted by an item.
The most dangerous part is the narrow ledge leading to King Juris Khan. Do your best to get a teleportation ability. If your class cannot teleport, get a source of Blink or Jitans Gate. Blink can be found on the runeword staff Pax Mystica, Jitans Gate appears on the Lord Aldric Jitan uberquest reward.
Loot: Juris Khan drops good items on all difficulty levels. Defeat Juris Khan on Destruction difficulty to get the Eternal Bone Pile.
Juris Khan also has 2% chance to drop a trophy on Destruction difficulty. Cube the trophy with the charm for a small bonus.
Sacred sets and uniques can drop here on Destruction difficulty.
X/7 Duncraig (Bonus quest)
DIFFICULTY: IMPOSSIBLE
ONLY IN PATCH 1.90 AND LATER

Location: Cave Level 2 (Cold Plains)
The powerful demonlord Assur is on the move, burning a wake of destruction through the Western Kingdoms and turning the inhabitants of the towns he razes into mindless minions on his side. He is rumoured to be invincible thanks to a powerful Rune of Invulnerability, but perhaps you can liberate the secret from his henchmen among the ruins of Khanduras' capital?
How to solve: This is a multistep uberquest.
> The first thing you need to do is collect the five mystical Seals from Assur's lieutenants. There are five: Skinrender, Spinecracker, Eyegouger, Fleshcutter and Bonehexer. The twisted layout of Duncraig does not help matters, and the streets have been barricaded in a futile attempt to ward off Assur's army. You may need a teleportation ability.
If your class cannot teleport, get a source of Blink or Jitans Gate. Blink can be found on the runeword staff Pax Mystica, Jitans Gate appears on the Lord Aldric Jitan uberquest reward.
Note that the seals can only be found on Destruction difficulty.
> Once you have the five Seals, kill the regular Lost Soul enemies until a Ring of the Five drops. This unique ring is nothing special, until you put it into the Horadric Cube with the Seals! You will get Assur's Bane.
> Put your newfound ring around your finger and seek out Assur, then select your ring's Purify spell. This spell bypasses Assur's invulnerability and will take him out in a few hits. Congratulations!
Strategy: There are several variants of the common Lost Soul enemies. Most are mindless zombies with a melee claw or blade attack. Most.
Some of them, however, rush at you with lit powder barrels! They can throw the barrels over great distances, then light the fuse. When the flame reaches the barrel, a very big boom follows. Run away from the barrel when you see the burning fuse approaching.
Others throw hexed bone shards that explode on the ground, emitting lethal poison clouds. This is powerful enough to kill anyone, but being undead, their aim may be off, allowing you to get out of the way.
Loot: Assur drops good items on all difficulty levels. Defeat Assur on Destruction difficulty to get Demonsbane.
Assur also has 2% chance to drop a trophy on Destruction difficulty. Cube the trophy with the charm for a small bonus.
Sacred sets and uniques can drop here on Destruction difficulty.