SUMMONING UBERQUESTS
To attempt a summoning uberquest, you need a Book of Summoning. To make one, buy three Victim's Hearts and three Meditation Candles and cube them.
The Book grants you a new skill icon. Select the icon and cast the skill in the right area to summon the boss.
Btw. Using the Book will lock out your skills with spell timers for 30 seconds.
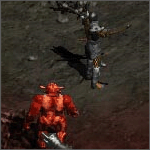
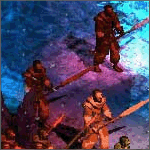
1/7 The Butcher
DIFFICULTY: EASY
Summon at: The Hole Level 2 (Black Marsh)
Returning from his hellhole beneath Tristram, the Butcher is back and out for new blood. He is slow and easy to avoid, but hits hard and fast and if he catches you, you are dead meat.
Strategy : The Butcher is slow, but hits very hard and has a high attack rating. The basic strategy is simple - do not get hit. Luckily, the Butcher's room is fairly large, making it relatively easy to avoid his cleaver. Bring a ranged attack if you have one.
Loot: The Butcher drops decent items on all difficulty levels. Defeat the Butcher on Destruction difficulty to get The Butcher's Tooth.
2/7 The Binding of Baal
DIFFICULTY: MODERATE
Summon at: Valley of Snakes
This uberquest reenacts the capture and imprisonment of Baal by Tal Rasha and his Horadrim, with you playing the role of Baal.
To protect their leader, the Horadrim weave warding spells that make Tal Rasha immortal until the last of his soldiers has died and their spirits have faded.
Strategy: During this uberquest, you morph into Baal when you are near Tal Rasha. The archmage himself is immune to all damage until you get rid of his escort by parking them or separating Tal Rasha from his allies.
Being Baal gives you some protection against the attacks of the Horadrim, but these are some of the most powerful mages of Sanctuary and can concentrate their fire to bring down even a Prime Evil.
You may want to stack your resistances, because the Horadrim possess the ability to reduce your effective resistances, making you that much weaker.
Loot: Tal Rasha drops good items on all difficulty levels. Defeat Tal Rasha on Destruction difficulty to get the Scroll of Kings.
3/7 Assault on Mount Arreat
DIFFICULTY: TRICKY
Summon at: Arreat Summit
In ages past, Diablo himself attempted to invade Mount Arreat to corrupt or destroy the Worldstone and was repelled by the Bear tribe defenders. This is a recreation of that battle on the peak of Mount Arreat, with you as Diablo.
The shamanic powers of the Bear tribe protect their king with an ancient spirit shield until the last of the defenders has fallen.
Strategy: Much like the Tal Rasha encounter, the key target to take out, Shaman King Koth is immune to all damage until you kill all of his minions. The difference is that this fight is mainly physical and you need to focus on defense and life to survive.
Beware the piercing Bear Claws which stun you at range. If you let a pack of Bear Shamans catch you, you may get locked in perpetual stun until you die.
Loot: Koth drops good items on all difficulty levels. Defeat Koth on Destruction difficulty to get the Sacred Worldstone Key.
4/7 Akarat
DIFFICULTY: HARD
Summon at: Kurast Causeway
This uberquest involves summoning and defeating the ghost of the prophet Akarat and his band of Followers. The spirit is ritually summoned in the fortress city of Travincal by the church fathers four times a year or during times of trouble. Because Travincal is irrepairably tainted by Mephisto, it may be a better plan to summon him at the bridge to Travincal, just outside the walls.
Although Sanctuary owes many years of relative peace to the founder of the Church of Zakarum, both the motives of the Church and the plans of the archangels behind it are fairly dubious. Sanctuary would be better off without interference from both the Burning Hells and the High Heavens.
If you have problems defeating Akarat, remember that a religion is nothing without followers, and the death of his apostles may be a particularly hard blow to Akarats spirit.
Strategy: As an emissary from the Heavens, the prophet Akarat is immune to all damage. However, when you kill one of his Followers nearby, all other enemies within range have their resistances reduced by -200%. This gives you a five second window of opportunity to damage Akarat.
Loot: Akarat drops decent items on all difficulty levels. Defeat Akarat on Destruction difficulty to get the Visions of Akarat.
Akarat also has 2% chance to drop a trophy on Destruction difficulty. Cube the trophy with the charm for a small bonus.
5/7 Lord Aldric Jitan
DIFFICULTY: VERY HARD
Summon at: Nihlathak's Temple
Driven mad by nightmares, the Western aristocrat Lord Aldric Jitan hopes to summon a terrible demon. Stop him before he does.
Strategy: Another encounter with immunity shields. Jitan comes with an army of 20 guardsmen, which need to be killed before you can harm Jitan.
The tricky part is that the enemies possess a healing spell, and will use it when low on life. You may want to focus on a guardsman and keep pounding him until he dies, otherwise he will just heal himself.
Their Guard Tower attack will pummel the living daylights out of you if you stand still for too long. Keep moving and the towers will vanish behind you.
Also bring some resistances, because the enemies inflict fire, cold and lightning damage.
When any enemy dies, a vortex of shadow spawns at the location of the deceased fighter. Do not run into it, or you will die instantly. Use a weapon with a long reach and keep your finger on the Shift key.
Loot: Jitan drops good items on all difficulty levels. On Destruction difficulty, Jitan has 1/6 chance to drop the Moon of the Spider.
Jitan also has 2% chance to drop a trophy on Destruction difficulty. Cube the trophy with the charm for a small bonus.
Sacred sets and uniques can drop here on Destruction difficulty.
6/7 Legacy of Blood
DIFFICULTY: EXTREME
Summon at: Tower Cellar (Black Marsh)
'When you get to hell maggot, tell them that I am coming to rule!'
Bartuc, the Warlord of Blood, was once Horazon's brother in the Vizjerei mage clan. Whereas Horazon wanted to summon demons to enslave them, Bartuc chose to worship them and traded his soul for demonic power. Their conflict eventually led to a civil war that shattered the mage clan. Although Bartuc was eventually destroyed by the very powers he sought to control, his soul and power have been claimed by the forces of Hell.
It may be possible to summon Bartuc's spirit in the crypt where his cursed armor was buried...
Strategy: Bartuc and his summoned Blood Golems have ranged attacks and can hurt a lot in this tiny room. Compounding the challenge is the fact that the Blood Golems are only vulnerable for a brief moment after hitting you, and Bartuc can only be harmed after he uses his Wychwind attack.
The enemies use physical attacks and they hit hard. The most dangerous attack is Bartuc's Wychwind, which can kill you on the spot if you run into the rift field. Attack him after he uses this ability, because it also removes his immunities. Bartuc also summons more Blood Golems.
Loot : Bartuc drops good items on all difficulty levels. On Destruction difficulty, Bartuc drops the Legacy of Blood.
Bartuc also has 2% chance to drop a trophy on Destruction difficulty. Cube the trophy with the charm for a small bonus.
Sacred sets and uniques can drop here on Destruction difficulty.
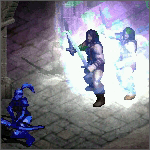
7/7 Judgement Day
DIFFICULTY: IMPOSSIBLE
Summon at: Inner Cloister
When Uldyssian sacrificed his life at the Cathedral of Vanity in the battle between angels and demons, his soul was thought to be blown to the far reaches of the universe.
But a malicious spirit in the High Heavens, watching over the battle from afar, snatched Uldyssian and his edyrem on their way to oblivion. Imperius, archangel and high warlord of the Crystal Arch, had his own opinions about Sanctuary and the human vermin inhabiting it. This taint on Creation had to be eradicated.
But his side of the argument, despite the support of Malthael, lost out in the Angiris Council due to the intervention of Tyrael, and the ensuing blood pact with Mephisto prevented him from intervening on the mortal plane at all. A puppet had to be found, and Uldyssian was just what he sought. After a thorough brainwashing, Imperius sent his harbinger Dark Uldyssian to Sanctuary with the mission to exact divine justice and destroy the world...
Strategy: Dark Uldyssian and his Fallen Edyrem are ghosts that exist only partially on the mortal plane and cannot be hit by mortal weapons and spells.
The war machine has one weak spot. When the army runs into trouble, Dark Uldyssian will summon an Avatar of Imperius or Malthael to aid them. This avatar is vulnerable. Kill it to sever the link.
An avatar will be summoned 1% of the time when Dark Uldyssian hits a victim. The Fallen Edyrem do not have this power. You can recognise Dark Uldyssian by his heavy armour. What they all have in common is their Divine Apparition ability which warps them next to their victim, freezing it.
The Avatars bear the secrets of Creation and can throw alchemical nuclear bombs from Heaven. They also have the ability to turn invulnerable for a short time. While in this state, they project lethal death bolts at nearby targets. Run away! Lastly, they summon more Fallen Edyrem at a rapid rate.
Loot: The Avatars drop good items on all difficulty levels. On Destruction difficulty, the Avatars drop the Crystalline Flame Medallion.
Imperius and Malthael also have 2% chance to drop a trophy on Destruction difficulty. Cube the trophy with the charm for a small bonus.
Sacred sets and uniques can drop here on Destruction difficulty.
Bonus quest
If you are exceptionally daring or suicidal, distract Dark Uldyssian until both the Avatar of Imperius and the Avatar of Malthael are summoned. Then kill them both within 30 seconds and transmute the Medallion in the cube while the red swirls are on your character to add some extra modifiers
This upgrade recipe adds the following bonuses:
Btw. You do have to kill two different Avatars, not the same one twice.
X/7 Brother Laz (Bonus quest)
DIFFICULTY: IMPOSSIBLE
ONLY IN PATCH 1.99 AND LATER
Location: Swampy Pit Level 3 (Flayer Jungle)
There are many religions in Sanctuary. Although they all tell very different stories, loremasters agree that since many of them seem to be effective and allow their faithful to work miracles, there has to be a common truth between them.
One particular element found in most religions is the creation of the world by a God or other deity, whether it be Zakarum, Inarius and Lilith or Trang-Oul or the Four Elements or even Kharos or Tiarna Dulra.
Some alchemical scientists even believe that the world of Sanctuary was shaped by an individual human on another plane, one 'Brother Laz' with a calculation engine powered by lightning. According to this cult, when humanity complains too much about the difficult living conditions in Sanctuary and the scarcity of divine weaponry, he may send his avatar to the mortal plane to deal with those who annoy him in person...
Strategy: The Groupies are just your average frenzied lunatics with throwing knives and should not be too hard to dispatch.
The boss, Brother Laz is something else. Do not stand still in his crosshairs or he will cast either Deathstrike or Singularity on you and destroy you.
If you keep moving, he will attempt an offensive teleport, summon more minions and may cast totems that kill you with Disintegrate if you go near them. If you take down the totems, you will receive an unholy death curse that kills you when you next receive damage, so avoid doing this at all costs and give them a wide berth to avoid instant annihilation!
Brother Laz is also invulnerable to any damage. Use the Purify skill you acquired in Duncraig and keep hitting him with it until he dies.
Loot: Brother Laz drops good items on all difficulty levels. On Destruction difficulty, Brother Laz has 1/6 chance to drop the Glorious Book of Median.
Brother Laz also has 2% chance to drop a trophy on Destruction difficulty. Cube the trophy with the charm for a small bonus.
Sacred sets and uniques can drop here on Destruction difficulty.
Secret: Inarius' Revenge
DIFFICULTY: TRICKY
Summon at : ??? -- Find it yourself!
In his vanity, fallen angel Inarius made the fatal mistake of raiding one of Mephisto's black temples on mortal soil and killing the dark monks there. The Prime Evils had previously ignored this rebellious angel, but this was an insult they could not leave unpunished. Mephisto invaded Inarius' cathedral of vanity, burned it to the ground and captured Inarius and his followers, warping and mutating them into flabby and horrible creatures - the Overlords - instilling them with eternal hatred for the still beautiful creations of Zakarum, humans.
You may be able to summon Inarius' ghost at a place of great significance for the fallen angel...
Strategy: Inarius' ghost and his minions hit very hard and almost always hit. This fight is most similar to the Butcher, but with multiple enemies. You figure out the rest...
Loot: Inarius' ghost drops good items on all difficulty levels. Defeat Inarius' ghost on Destruction difficulty to get the Spirit of Damnation.
Sacred sets and uniques can drop here on Destruction difficulty.