 |
 |
|
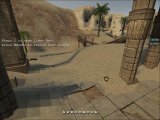
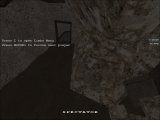
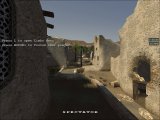
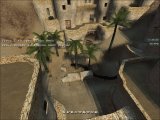
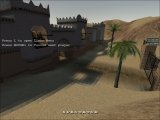
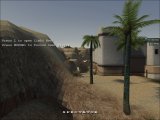
Allied Camp |
Oasis water pump |
 |
|
|
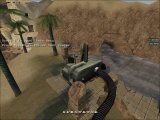
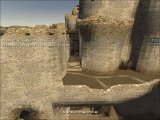
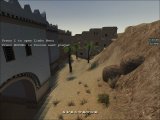
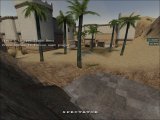
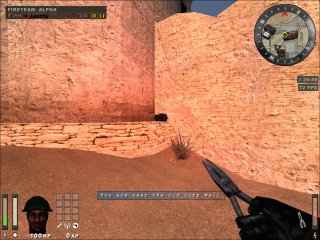
Routes to old city |
Oasis
Strategies
Summary
Oasis is one of my favorite maps. It's well-designed and can be suitable for either pub play with long campaigns or short competitive stopwatch matches. It doesn't tend to favor one side much more than the other.
Map layout
In this section, we'll go through the names of all the locations on the map, so you know what we're talking about when we refer to them.
The Allies start out in the "Allied camp", and can attack from 3 routes. You can repair the water pump and go through the water cave, or you can go through the low tunnel or high tunnel.
|
|
|
|
Allied Camp |
Oasis water pump |
|
|
|
|
Routes to old city |
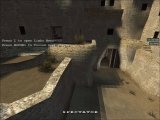
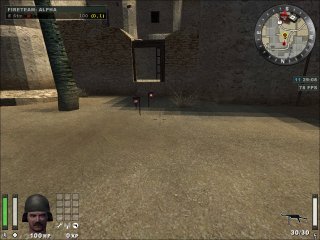
If you go through the tunnels, then you again have 3 choices of which route to take. Probably the most common is the low route, which just goes through a doorway and into the old city. You could also go through the command post area and then go into the left route, which takes you through some tunnels. These provide pretty good protection because you're not out in the open, but they are also very easy for the axis to camp. The high route can also be taken from the command post area, and is often a good choice if you can make it there without getting shot up since you will be running out in the open. Finally, you could also try just going straight up the hill on the main route- this is seldom done though, because then you are an easy target for MG's or pretty much any enemy who spots you.
 |
 |
|
Low route |
Side route |
 |
 |
|
High route |
Main route |
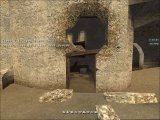
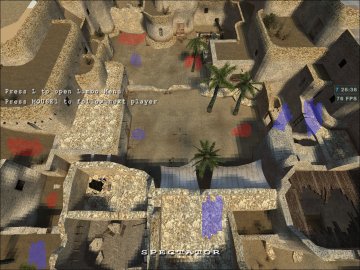
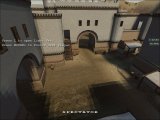
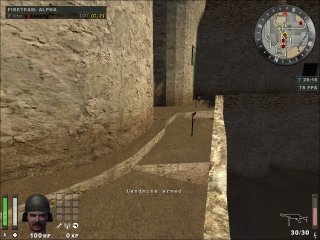
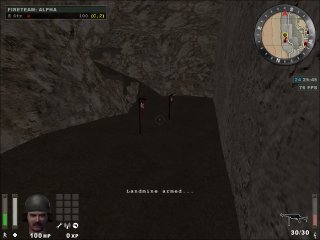
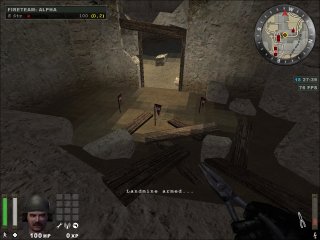
Finally, you will arrive in the old city. In the picture below I've highlighted some common landmine spots (red) and spots where enemies might be (blue).
After you take the old city and blow the old wall, you have 3 choices of what route you can take to get to the old city. The first is to go through the water caves. The other two are the low and high tunnels which are located beyond the old wall. Sometimes these are called the "dual tunnels".
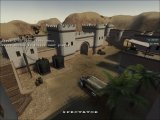
Now finally we get to the Axis Garrison, a huge fort which houses the anti-tank guns. It's good to understand your map on this point: just remember, the anti-tank guns point EAST. Based on that, hopefully you can figure out most directions.
The north wall of the garrison is the one where Allies will probably be coming to. It's a bit hard to see in the picture below, but the north wall includes the main spawn exit, and the garrison entrance which leads to the north anti-tank gun. The south wall is where Allies will probably go if they come from the water caves. From here they can enter in to the south anti-tank gun area, or continue around to the back of the anti-tank guns (the East wall) and lob grenades or airstrikes in to protect dynamite. Finally, there is the west wall, i.e. the wall which connects the dual tunnel exit and the water caves exit. Some Allies who come out of the dual tunnel exit will take the west wall route to get into the base.
 |
 |
|
North wall |
South wall |
 |
 |
|
East wall |
West wall |
Now let's take a closer look at the Garrison and see what landmarks are there... There's the water cave exit, where you should set up some defense on people coming through. Then there's the Axis spawn... If you're on Allies, a good route to take is to go through here, and up the stairs. This way you can get to the 2nd floor of their base, and either go to the north gun, south gun, command post, or the ledge above their spawn. The inner courtyard is the name I made up for the place where the anti-tank guns are located. Finally, there is the "box room", which is the room the stairs in the Axis spawn lead to. This is a good room to defend because then you can stop enemies trying to come up the stairs. You also have a quick route to either gun in case you need to fall back.
 |
 |
|
Water cave exit |
Axis spawn |
 |
 |
|
Inner courtyard |
Box room |
Allies Strategy
Stage 1 - Blow the old city wall
This part can be very difficult if the Axis is any good. You should expect some sort of heavy weapon camping the tunnel exits (panzer or MG), in addition to lots of SMG gunners positioned on high ground at various places within the old city. Some Axis may even try to come into the tunnels (usually the lower tunnels) and camp you from there. If you build the water pump, an enemy engineer may try to come and mine it up.
The side route is pretty good especially if you're a medic. You'll get shot up like crazy the moment you come out the upper tunnel exit (out of the room which has the command post), but once you get down into the passageways of the side route, you can often stop and heal yourself (assuming no enemy is camping that spot).
The low route is also very good and you can usually make it through without getting camped so badly. However, when you go through the doorway on the way to the old city, the small room on the way there tends to be landmined, so be careful to jump over the dirt areas.
The water cave is also a good route since the Axis tend to leave it somewhat unguarded. If they are guarding it, they will probably only expect 1 or 2 Allies to occasionally come from there, but would not be prepared for a rush.
It's probably best to be as unpredictable as possible. Your team could divide themselves among all the routes for example, and then suddenly all attack one route.
Try to capture the flag as close to the spawn time as possible. For example, if there are 5 seconds left, wait til the very last second. However, if there are say, 20 seconds left, then capture it right away. You can't just sit and wait for 20 seconds- the Axis will spawn some time during that wait and clobber you. One good tactic is that if you manage to capture the flag with only 2-5 seconds left, and you're CONFIDENT that the Axis will not reclaim the flag, tell everyone on your team to /kill. That way you can all spawn at the flag and then it will be very difficult for the Axis to recapture the flag.
As soon as you claim the flag, engies need to plant dynamite at the wall. Expect plenty of landmines right next to the old city wall. Don't assume the friendly covert ops has spotted them all for you- just crouch and walk slowly, defusing landmines as you go until you are right up near the wall.
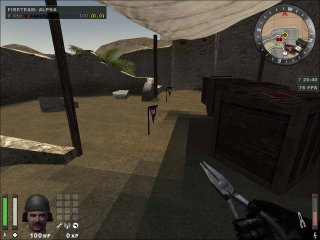
The best way to plant, actually, is to avoid the landmines altogether. Notice there's a ledge running along the left wall. You can run along that ledge and then plant the dyno at the point where the ledge meets the wall, as shown in the picture below. That way, you never even have to run on the parts which might be mined.
There are lots of different strategies you can use on this part. You could try repairing the Old city water pump WITHOUT capturing the old city and then swimming to the Axis garrison to plant dyno while no one is there. (You'll usually get caught though!) Or you could try planting the dyno and holding it without even worrying about capturing the flag. There's also the infamous "Oasis walljump" that lets you jump over the wall in the first place. Try to observe how your enemy's defense is set up and then choose a strategy based on that.
Stage 2 - Blow the Anti-Tank guns
Once you blow the old city wall, expect heavy resistance in the area near the dual tunnels entrance. While the dyno was ticking away, the Axis was probably busy setting up a strong defense. Things to expect include rifle nades, panzers, MGs, rambo medic, and field ops with lots of arty. In short: hell.
So the first thing you need to do is clear the way. Panzers, airstrikes, and nades are good for this. If you're having trouble breaking through, a smoke nade can also be useful.
Once you've shaken their defense around the dual tunnel entrances, you should start pushing those tunnels hard. You want to keep pushing so you can get engies into their base (escorted by medics ideally), and also by pushing, you prevent THEM from coming thorugh the dual tunnels. The last thing you want is for field ops to start appearing and calling arty on your spawn.
You should also push the water caves early, doesn't have to be a huge force but at least a couple of guys. This way you can hopefully keep the cave clear of mines. You might even be able to sneak into their base if they don't have a defense set up early on the water caves, although this is rare.
Be careful of artillery, don't just run into it blindly. Either wait for it to end, or modify your route.
This map requires lots of teamwork. Travel with teammates, but don't cluster up and become easy bait for panzers. If you're running somewhere and you're alone, use your command map and get to where everyone else is. They could probably use your help, especially if you're a medic. Try to coordinate what everyone is doing. For example, if you have an engy going to plant, he can tell the team so anyone near the east wall can get there to defend the dyno with nade spamming, people inside the base can seize the crew-served MG and use it against the Axis, etc.
Coverts should be spotting landmines, destroying their command post, and assassinating people on Axis. Destroying the command post is helpful because then Axis can't call artillery as often, and it distracts enemy engineers. Don't let this become an obsession though- only bother to do it if it won't take too much work. Assassination is a good idea- this is one of the strengths of covert ops but so few people understand this point. If you can use your stealth skills to take out specific enemies like a field ops, a mortar, or enemy engineers, that really helps your team because you might be able to stop an artillery from being called, or stop them from defusing dynamite because their engineers are dead, etc. Note this all mainly applies to covert ops on pubs, in a clan match you won't have the luxury of sneaking around and assassinating enemies, etc.
If you are a high-level engy planting dyno, try to plant on top of the gun (by jumping from the crate) first, then plant one dyno on the ground. This way, if an engy walks into the room he'll see the 2 dynos and go for the easier defuse first (the one on the ground). This forces him to defuse in the wrong order. Also, if you get killed while doing the second plant, at least you'll have put the 1st one in a tough spot.
Keep in mind it takes about 13 seconds to get from the Axis spawn to the north gun and defuse, and about 17 seconds for the South gun. So, if you can plant when the enemy's respawn time is around 15 seconds, then that means reinforcements won't have time to defuse, because by the time they spawn 15 seconds will pass, and then they'll spend another 15 seconds getting to the dyno and trying to defuse it.
Axis Strategy
Stage 1 - Defend the Old City
This stage can be easy if you set up your defense well, but if your team is uncoordinated, then it is extremely hard.
Firstly, try to spread out. If everyone goes and defends the side route but leaves the other routes unguarded, you will lose. Also try to keep at least 2 guys staying back and playing defense. The biggest mistake is that everyone runs out and plays outer D, then some guy pokes a hole in your outer D and gets through without any opposition. Then he seizes the flag right at 1 second til respawn and suddenly that 1 dude who got through has screwed your entire team.
Avoid running out of ammo in this stage. If you are a medic, go to the ammo cabinets and pick up 1 or 2 extra packs.
The guys who play inner D can find some high ground from which they have a good view of incoming Allies. You want at least 1 guy defending the doorway to the old city, since any Allies attacking from the water caves, the low route, or the high route will come through here. At least 1 more guy should be near the area above the spawnpoint, defending against Allies coming from the side or main route.
For your outer D, you will definitely want some heavy weapons, probably both an MG and a panzer if you can afford having both of those on your team. They can camp the low and high tunnel exits. An engy or two should plant mines on major routes, including the water caves if they have been repaired. Hopefully you can discourage the Allies from using this route so your team can concentrate all their fire on the upper and lower tunnel exits. A field ops should call artillery on the area near the lower tunnel exits. Finally, medics should be distributed over the area, supporting each major defense sub-team.
If your team has some good gunners, you can have some medics and field ops shooting with their SMGs from across the map, concentrating fire on the tunnel exits. People who can shoot well from a distance are thus very useful for defending the side route and helping to "thin out" the enemy before they get very far. If you are more effective at a close range, then you could camp near the water cave exit, and catch any stragglers wandering into the Old city.
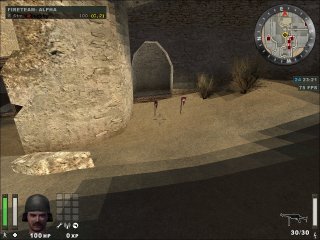
If you have a large team, one engy can spawn at the Axis Garrison and construct the command post. If your team is 8 ppl or less I'd say don't bother with it. Try to get plenty of mines up and let your team know where you are placing them. Here are some screenshots showing some good places for mines... Notice that I didn't bother putting any mines near the old city wall or the water pump. These are just stupid- as soon as the Allies capture the old city, they'll spot all those mines really fast anyways. Or just blow them up "manually".
So here are the screenshots of good mining spots:
Spot #1: This is always a good idea as long as your teammates aren't mine magnet noobs :) You can plant these before the first rush.
Spot #2: A couple of mines along the high route can discourage Allies from trying to come in through this sneaky path.
Spot #3: These mines can stop Allies coming in through the side route. Anyone your mines don't get, you can finish off with rifle nades or MP40. Be warned though: these are "high maintenance mines", meaning that the Allies are constantly going to be coming through this route so you'll either keep dying or have to replant these mines. However, if you do a good job here, you may be able to discourage the Allies from taking this route. Remember: the less avenues of attack they have available to them, the easier it is to camp the choke points.
Spot #4: This is a great spot, you can set a couple of these before the first rush. There's usually no reason for your own teammates to use this doorway, just let them know you're planting here just in case.
Spot #5: Planting a couple of mines above your spawn point can prevent people from sneaking down at the last second. You can also use this to catch would-be walljumpers.
Spot #6: These mines are kind of high maintenance, but assuming your team is staying back and playing defense like they should (instead of rushing into the tunnels), then these mines can help to discourage enemies taking this route. This isn't a great spot though because you're also vulnerable to your own team's artillery...
Stage 2 - Defend the Anti-Tank guns
A proper defense usually should focus on holding the choke points. There's 3 exits the Allies can invade from- the water cave exit and the dual tunnel exits. But since the dual tunnels are basically in the same place, that really only means it's 2 choke points you have to guard.
However, keep in mind that clan play may make defending these points difficult. Your enemies might use the fact that you are spread out over 2 areas against you, and exploit this by rushing all together on alternate points. For example, everyone will go through the water tunnel, then everyone will go through the main entrance, etc. Thus your strategy for inner D can become more crucial in this case.
For your outer D, MG's, panzers, medics, and field ops are crucial. Artillery on choke points plus MG fire will hopefully thin out the offense. Then between Panzers and SMG fire you can stop the rest of them. Each major defense sub-team should have 1 medic who tries to stay alive at all times and heals/revives teammates. Try not to let anyone through- as soon as they start penetrating your outer D, you'll end up getting trapped and falling back to inner D. At this point it can be really hard to ever break out and re-establish outer D.
Your inner D should mostly consist of medics and engies. A field ops or panzer may also be helpful for fighting and supplying you with ammo. Try to stay perched on the 2nd floor of the Axis garrison, so you have a height advantage if enemies get through. The best places to be if you're on inner D are somewhere on the 2nd floor near either of the guns, OR in the box room. As I've said before, the box room is a very good spot because from here you can catch enemies trying to sneak in through the staircase.
I wouldn't recommend constructing the crew-served MG in the inner courtyard. More often than not, the Allies just use it to their own advantage. I've rarely seen Axis use it properly, because you have almost 180 degrees of view to guard, and it's easy for an enemy to see you up on the MG and shoot you down before you have a chance to kill him.
The job of inner D is basically to plant mines, and be there if anyone gets through. Also, if there are 1 or 2 Allies sneaking around your East or South walls, you could go out and kill them before they build up and try to rush you. Make sure engies stay in good health, you never know when suddenly they'll get attacked.
The game style will vary a lot depending on how your enemy's offense is and whether you're on a pub or a clan. But, I think the style I've outlined here is a pretty good starting point, and in general it will work pretty well.
If the Allies plant at either of the guns, try to note what time the plant occurred, so you know when it will blow. If you're an engy or a medic, you definitely need to fall back to the gun. If you're some other class, you should fall back only if you are close enough to the gun that you can actually be of some help, or if one of the guns has already been blown. Try to note what time the dyno is planted. If you're dead at the time, but you know the dyno won't blow up until at least 17 seconds after you respawn, then you could switch classes to engineer. Usually at this point it's already too late, but it's maybe worth a shot.
Use your compass map to see if any teammate is in the gun room. If not, prime a nade and throw it in to clear it out. BE CAREFUL, you don't want to kill your own engy in the middle of defusing. If an engy gets in and starts defusing, then if you're a medic, stand outside, ready to revive him in case suddenly a nade goes off or something. No one should be inside the gun room except the engineer though- give him space to work. If you don't have anything to do, don't just sit and watch- go outside to the east wall and make sure no allies are there. The last thing you want is for the engy to start defusing, and then suddenly an ally lobs a nade inside the gun room and gibs him.
Another important note: if you are the engy going in to defuse the dyno, hopefully you have already mentally noted the time the dyno was planted. If you have time, wait a couple of seconds before you go in to defuse. Sometimes you might kill an Allied engy in the gun room, but while you killed him, he was priming a nade. That nade could still kill you if you charge in without any caution.