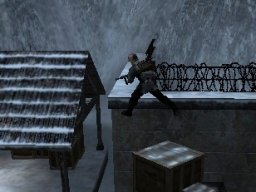
Fueldump jumps
Fueldump is a great map for trickjumping. There are of course the infamous depot jumps that let you get in and plant dyno
without a cvops... There are also tons of little jumps to get you around the map quicker, which are very useful to know.
- Part 1: First stage of the map (Area in front of the tunnels)
- Part 2: Second stage of the map (Tunnels to fueldump)
For people with slower connections I made two parts extra: Part 1 and Part 2
Part 1: First stage of the map
Getting on top of the health/ammo shack
Difficulty: Easy
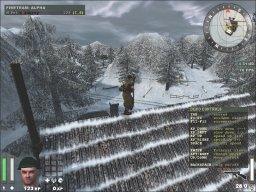 This is a neat little bunny hop that lets you get on top of the health/ammo
shack near the original Allies spawnpoint. From here maybe you could call arty,
snipe, or just impress all your noob friends :)
Download fueldump_shackjump.dm_84
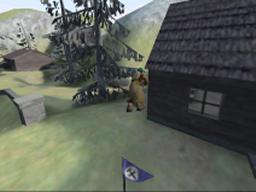
This one is kind of funny; you jump on to the
health/ammo shack, by jumping from the little blue construction flag for the
crew-served MG. Thanks to garraz for the jump.
Download fuel9.dm_84
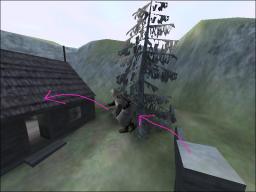
Another way to get onto the health/ammo shacks, thanks to garraz.
Just start at the stone pillar as shown above.
Download fuel12.dm_84
Jumping on top of Allies' spawn shack roof
Difficulty: Easy
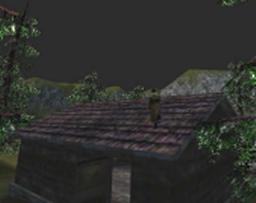 This jump is very similar to jump #1 (jumping on top of the ammo/health shack roof). Thanks to -=N[b]K=- DuNdEe and garraz for their demos!
Download fueldump_spawnjump.dm_84
Download fuel5.dm_84
Camping the Allies
Difficulty: Easy
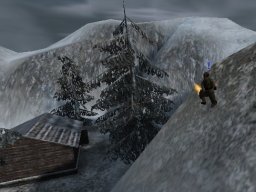 Nice camping spot by {Just-Me} near the first allied spawn.
Download Demo_Fueldump_21.dm_84
Getting to high ground on footbridge path
Difficulty: Easy
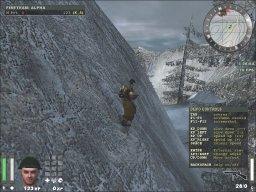 This isn't really a trickjump, just some place where you can run up a hill
to get to really high ground on the path from the Allies initial spawn to the
footbridge. This may not be too useful; however, sometimes suppose the Axis
start pestering you by coming down this route. You could perch up on this hill and panzer them, or lob nades.
Download fueldump_footbridgehill.dm_84
Panzer location from a rock, A
Difficulty: Easy
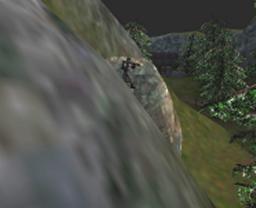
This lets you perch up high on this rock to keep the area surrounding the bridge clear!
Thanks to *PzZy for this demo.
Download PzZy10.dm_84
Panzer location from a rock, B
Difficulty: Easy
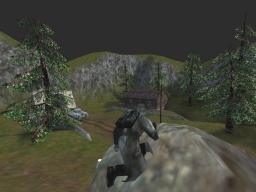 Here's a jump sent by *PzZy, to camp the Allied spawn behind
this big rock.
Download PzZy11.dm_84
Jumping across the frozen river
Difficulty: Easy++
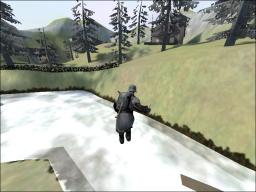
Nice jump by garraz which lets you get to the other side of
the river near the footbridge without touching the barbed wire.
Download fuel10.dm_84
{Just-Me} made other demos of this jump. His second demo is a variation where you come from the tunnel grate direction:
Download Demo_Fueldump_19.dm_84
Download Demo_Fueldump_18.dm_84
Jumping across the frozen river (2)
Difficulty: Easy++
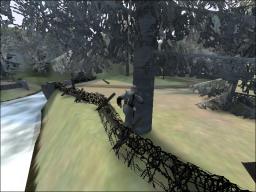
This by garraz lets you build up enough speed to cross the
barbed wire at this spot shown above.
Download fuel11.dm_84
Getting on top of the tunnel grate
Difficulty: Medium
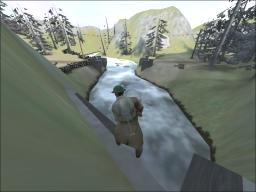
Brilliant jump by garraz
to get on top of the tunnel grate. This looks like an awesome spot for giving
engies cover fire and clearing this area of enemies.
Download fueldump_above_tunnelgrate[garraz].dm_84
{Just-Me} uses the tunnel grate to get on the other side of the river over the barbed wire:
Download Demo_Fueldump_02.dm_84
Insane spawn camping
Difficulty: Medium
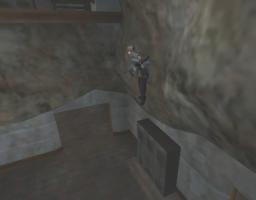 Whoa! Crazy jump sent to me by
garraz. Pure genius!!
Download fueldump_spawncamp.dm_84
Sneaking into the axis spawn
Difficulty: Medium++

Another brilliant jump by garraz
to jump right into the axis spawn area by going through the balcony above the tunnel doors. This is a huge jump consisting
of several bunny hops, starting all the way from the axis MG tower at the top of the hill.
Download fueldump_into_spawn[garraz].dm_84.
{Just-Me} and K_O_G_Fleshy made other demos of this great jump:
Download Demo_Fueldump_20.dm_84
Download fueldump_ToAxisSpawn.dm_84
Jumping out of spawn
Difficulty: Medium
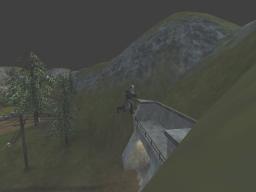 Here's an interesting jump submitted by Pzych0, on how to jump out of the initial spawn area as Axis,
down on to the balcony below.
Download Fueldump-JumpFromLNA.dm_84
Getting down from the first axis spawn
Difficulty: Easy++
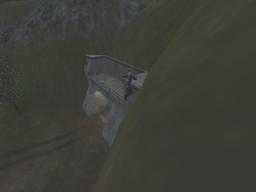 Here's another jump sent by garraz.
This lets you get down from the axis spawn quickly without taking any damage.
Download fueldump_fastdown.dm_84
Part 2: Second stage of the map
Getting on top of the Allies Garage HQ
Difficulty: Easy
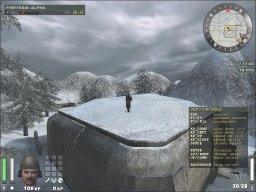 With 2 bunny hops you can land yourself on top of the Allies garage HQ (the
building which houses the Allies command post). The best way to do this jump is
to hug the edge of the slope as you jump down, and in fact "slide" along the
slope. However, it's not necessary, so below you can download either version -
with or without sliding.
A. With sliding
Thanks to
.Rasta.fari.
for this jump. This is the better way to do the jump (less prone to failure). Just start out with a CSJ to the right,
stick to the mountainside, then when you land, bunny hop and you'll end up just sliding on to the top of the garage HQ.
Download Fueldump_CP_Rastafari.dm_84
B. Without sliding
Again, here you do the jump in 2 hops, except this time you don't slide on the slope. The trick here is, be careful not to go
too far on the 1st jump, or you'll just crash down and hear your legs crunching beneath you. However make sure the 2nd jump
is a proper CSJ.
Download fueldump_garage_hq.dm_84
Side MG to garage
Difficulty: Medium
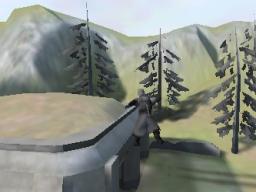
Impressive jump by garraz.
Here are two variations of this jump:
Download fueldump_sidemg_to_garage1[garraz].dm_84
Download fueldump_sidemg_to_garage2[garraz].dm_84
Garage to side MG jump
Difficulty: Easy++
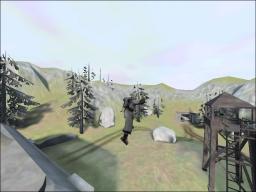
Jump by garraz to jump on to the ladder and climb up the MG tower.
Download fuel4.dm_84
Camping in a tree near the garage HQ
Difficulty: Medium
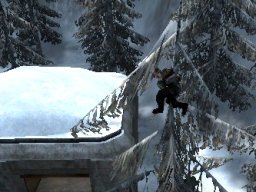 {Just-Me} made a demo how to get up the tree near garage HQ. Nice camping spot. Should take a while until the enemy discovers you!
Download Demo_Fueldump_15.dm_84
Camping on high ground inside the tunnels
Difficulty: Medium
 In this demo by {Just-Me} you can see how to get on high ground inside the tunnels. Nobody would expect you there!
Download Demo_Fueldump_03.dm_84
The other demo by aNti*n0ob shows a faster way to get there, he uses the lamp only for hopping:
Download fuel_tj_an_high_tunnelcamp.dm_84
Fast hopping
Difficulty: Easy
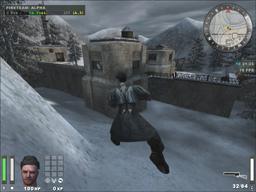
Jumping down the hill quickly, by
.Rasta.fari..
Pretty easy jump, but useful for getting around the map quickly.
Download fueldump_hill_to_door_Rastafari.dm_84
Camping at the Axis fueldump door
Difficulty: Easy
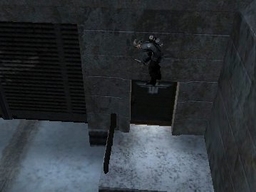 {Just-Me} shows you how he camps the Axis at the fueldump door. Useful if the main entrance isn't blown yet.
Download Demo_Fueldump_06.dm_84
Jumping out the MG window
Difficulty: Easy
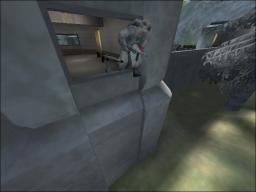
Useful shortcut to get down from the MG window, demo by garraz.
Download fuel1.dm_84
Getting inside the fueldump near the MG window
Difficulty: Hard
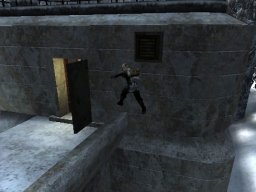 {Just-Me} made a demo how to get inside the fueldump near the MG window... Wow.
Download Demo_Fueldump_07.dm_84
Getting inside the fueldump - the infamous fueldump roofjump
Difficulty: Hard
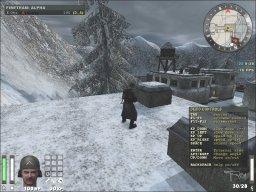 This is probably the hardest trickjump I've seen. This allows you to jump on
to the roof of the fueldump, so if you are an engy, you could get into the
fueldump without the entrances being blown, and without a covert ops.
The standard way to do this jump is using 2 bunny hops. I can't do this jump myself, so Rein Inze has kindly
contributed a demo showing how to do it. This demo uses standard etpro settings, so it is completely authentic:
Download fueldump_roofjump.dm_84
Here is another demo of the same jump, by MarceL:
Download fueldump_roofjump[marcel].dm_84
{Just-Me} and 24thSyzygy do this jump as a circle jump combined with sliding:
Download Demo_Fueldump_10.dm_84
Download fueldump_roofjump_escariot.dm_84
Another way of getting inside the fueldump by Tropsy:
"Basically, you stand as far into the shadow of the tree as you can,
and sprint with an angle slightly to the right (check the demo for a
better picture). Then, right before the floor curves downwards (again,
just check the demo) jump to the left strafejumping with the left
strafe key, landing to right to the left of the "spots" on the
mountain, and bunny hop pressing left strafe again, while looking
towards the fueldump roof (this will make you get some extra height
while still moving pretty fast towards the roof because of the angle
used). At some point (check demo for timing) you just look left
towards the mountain and change to strafing right instead of left, to
get the extra bit of movement you need to get on top. I know it sounds
very complex, but once you understand how it works it's actually much,
much easier to pull off than the "standard" way, since it needs less
precision. I hope that was of some help, and I'm sorry about the
slight delay from the beginning of the demo until I actually jump.
"
Download fueldump_roofjump_tropsy.dm_84
And last but not least, the Fueldump roofjump backwards by <se> !KENT! Astonishing
Download fueldumproofjumpback.dm_84
Getting up the fueldump wall from inside
Difficulty: Medium
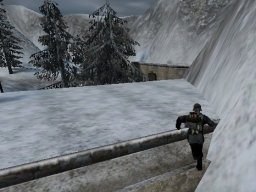 In these demos garraz and {Just-Me} show you how you get to the fueldump roof from inside. Good for playing defence when you don't want to waste time using the stairs.
Download overspawnfuel.dm_84
Download Demo_Fueldump_09.dm_84
Getting on high ground on the fueldump wall
Difficulty: Easy
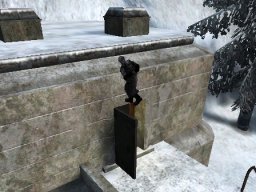 Here {Just-Me} shows you how to get on high ground on the fueldump wall. Same spot as above, other way to get there...
Download Demo_Fueldump_11.dm_84
Camping the Axis at their spawn exit at the East defenses
Difficulty: Easy
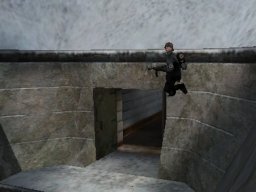 {Just-Me} made a demo how to get up the door of the Axis spawn exit near the East defenses. Great camping spot!
Download Demo_Fueldump_01.dm_84
Jumping over the East defenses
Difficulty: Medium
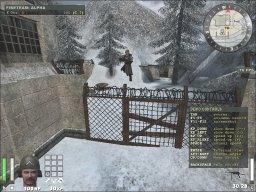 This jump consists of several jumps on to walls and ledges, and then finally over the east defenses.
Be very careful not to hit the barbed wire as you go in, otherwise you will lose 25 HP each time you hit the wire.
For the most part, avoiding the barbed wire isn't too hard, until you get to the very last jump,
where you actually jump over the east fortifications. The key here is to jump
over the lowest part of the barbed wire, as shown in the green arrow below (avoid the red arrow):
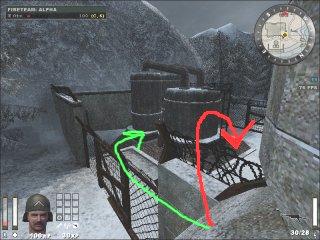 Now, there are a couple of ways to do this
jump. The best way to do it was submitted by both Pzych0 and *PzZy,
and it allows you to get over the wall without taking ANY damage:
Download PzZy2.dm_84
Download Fueldump-ToFueldumpWithFullHP.dm_84
There's also another way which might be slightly easier to do, but it involves walking over the barbed wire, so you will
lose at least 25 HP this way. Here is a demo which shows it, although I was a
bit sloppy so I actually hit the wire twice:
Download fueldump_eastdefenses.dm_84
Jumping up the fueldump roof near the East defenses with a bounce jump
Difficulty: Medium
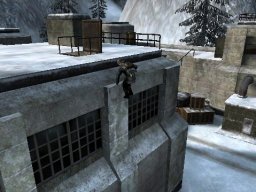 In this demo made by {Just-Me} you see how you can get up the fueldump roof with a bounce jump from the barbed wire at the East defenses.
Download Demo_Fueldump_08.dm_84
Bounce jump up the fueldump roof from the fueldump wall
Difficulty: Medium
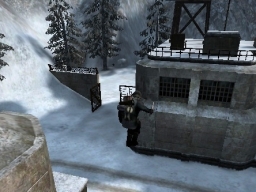 With this interesting jump you can get from the fueldump wall up the fueldump roof. Cool action recorded by {Just-Me} and K_O_G_Fleshy:
Download Demo_Fueldump_00.dm_84
Download fueldump_BounceJump1_Fleshy.dm_84
Bounce jump along fueldump wall
Difficulty: Medium
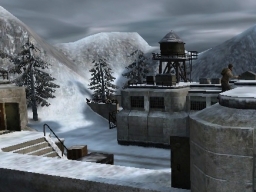 This jump has a similar concept as the previous: You jump up the ledge to bounce up to the roof. Great camping spot for Axis. Thanks to K_O_G_Fleshy and {Just-Me} for the demos:
Download fueldump_BounceJump2.dm_84
Download Demo_Fueldump_05.dm_84
Jumping down from the roof of the fueldump
Difficulty: Easy++
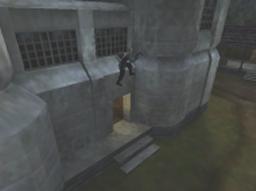
Here's a jump by garraz
for jumping down to the ground from the roof of the fueldump.
Download fueldump_fastdown6.dm_84
Jumping down from the tower
Difficulty: Easy++
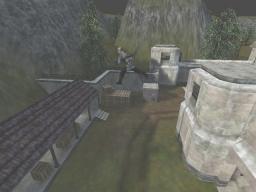 You can jump from the tower on the roof of the fueldump all the way down to the roof of the "crate house"
in just 2 huge bunny hops. I can't think of too many situations where this jump would be necessary,
but in any case it's a fun jump to practice with. Thanks to *PzZy
for this demo:
Download PzZy1.dm_84
Getting down from the tower to the fuel tanks
Difficulty: Easy++
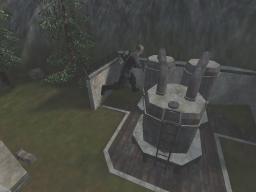 Thanks to garraz for this jump, which lets you get down to the
fuel tanks, from the tower. Here are demos which show 2 different ways of doing it:
Jumping to the ladder:
Download fueldump_fastdown2.dm_84
Download safewaydown2.dm_84
Jumping on the pipes:
Download fueldump_fastdown5.dm_84
Jump from the tower into the entrance to the roof
Difficulty: Easy++
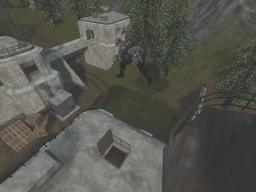 This is an interesting jump, which might save you some time. Again, thanks to
garraz for this jump!
Download fueldump_fastdown3.dm_84
Jumping down from the tower to east side of base
Difficulty: Easy++
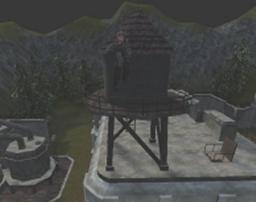
Another jump by garraz
which shows you how to jump down from the tower, to the east side of the base in three variations.
Download fueldump_fastdown4.dm_84
Download safewaydown.dm_84
Download safewaydown3.dm_84
Jumping from the tower to the fueldump wall
Difficulty: Easy
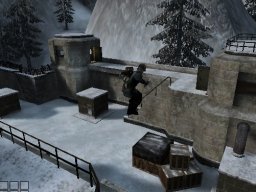 In this demo by {Just-Me} you see how to get very fast from the fueldump roof to the fueldump wall. Saves you a lot of time!
Download Demo_Fueldump_04.dm_84
Jumping from the fueldump roof to the fueldump wall
Difficulty: Easy
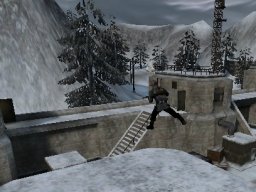 Here {Just-Me} shows you how to get quickly from the fueldump roof to the fueldump wall near the MG window.
Download Demo_Fueldump_14.dm_84
Getting out of the fueldump
Difficulty: Easy
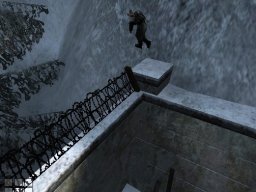 {Just-Me} shows you a way how to get outside the fueldump using the planks at the wall. Useful if you fell in accidently or some engy built the defenses while you were inside.
Download Demo_Fueldump_12.dm_84
Getting on high ground near the crate house
Difficulty: Easy
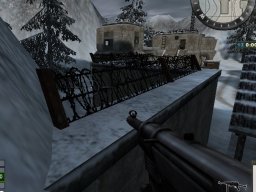 Here you see how you get quickly on the most westward wall of the fueldump and from there up the crate house and outside the base. Demo by {Just-Me}
Download Demo_Fueldump_13.dm_84
Jumping up the crate house and out of the base
Difficulty: Easy
 {Just-Me} shows you here how to jump out of the base near the crate house. Like in the previous jump you go over the barbed wire. But here you start at the fueldump wall.
Download Demo_Fueldump_16.dm_84
 This is a neat little bunny hop that lets you get on top of the health/ammo
shack near the original Allies spawnpoint. From here maybe you could call arty,
snipe, or just impress all your noob friends :)

 This jump is very similar to jump #1 (jumping on top of the ammo/health shack roof). Thanks to -=N[b]K=- DuNdEe and
  Nice camping spot by
  This isn't really a trickjump, just some place where you can run up a hill
to get to really high ground on the path from the Allies initial spawn to the
footbridge. This may not be too useful; however, sometimes suppose the Axis
start pestering you by coming down this route. You could perch up on this hill and panzer them, or lob nades.
 Here's a jump sent by *


 Whoa! Crazy jump sent to me by

 Here's an interesting jump submitted by Pzych0, on how to jump out of the initial spawn area as Axis,
down on to the balcony below.
 Here's another jump sent by
  With 2 bunny hops you can land yourself on top of the Allies garage HQ (the
building which houses the Allies command post). The best way to do this jump is
to hug the edge of the slope as you jump down, and in fact "slide" along the
slope. However, it's not necessary, so below you can download either version -
with or without sliding.


 In this demo by


 This is probably the hardest trickjump I've seen. This allows you to jump on
to the roof of the fueldump, so if you are an engy, you could get into the
fueldump without the entrances being blown, and without a covert ops.
 In these demos
  Here
Here 
 This jump consists of several jumps on to walls and ledges, and then finally over the east defenses.
Be very careful not to hit the barbed wire as you go in, otherwise you will lose 25 HP each time you hit the wire.
For the most part, avoiding the barbed wire isn't too hard, until you get to the very last jump,
where you actually jump over the east fortifications. The key here is to jump
over the lowest part of the barbed wire, as shown in the green arrow below (avoid the red arrow):
 Now, there are a couple of ways to do this
jump. The best way to do it was submitted by both Pzych0 and *
 In this demo made by
  With this interesting jump you can get from the fueldump wall up the fueldump roof. Cool action recorded by
  This jump has a similar concept as the previous: You jump up the ledge to bounce up to the roof. Great camping spot for Axis. Thanks to
 You can jump from the tower on the roof of the fueldump all the way down to the roof of the "crate house"
in just 2 huge bunny hops. I can't think of too many situations where this jump would be necessary,
but in any case it's a fun jump to practice with. Thanks to *
 Thanks to
  This is an interesting jump, which might save you some time. Again, thanks to

 In this demo by
  Here
Here 
 Here you see how you get quickly on the most westward wall of the fueldump and from there up the crate house and outside the base. Demo by