DUNGEON UBERQUESTS

Small dungeons inhabited by a greater evil just waiting for you to enter its realm. Prepare well before entering an uberquest area.


1/12 Creature of Flame
DIFFICULTY: EASY


Level
Hatred : 60
Terror : 115
Destruction : 120

Location
Ancient Tunnels (Act 2: Lost City)

Lore
Horazon the Summoner summoned a powerful demonlord that was too strong and overwhelmed him. He managed to trap it in his arcane sanctuary, but could not defeat it and it almost killed him. To save his own life, Horazon split off the prison zone from the rest of his sanctuary and banished it to earth where it now sits in a subterranean dimension. Breaking in and defeating the demon may yield great rewards.

Strategy
Heed the familiar's holographic warning. The Creature of Flame ignores a percentage of all attacks and strikes with the force of a collapsing mountain, killing the unwary adventurer instantly. Luckily, the enemy of your enemy is nearby. The Astral Guardians protecting the area will defend it from the likes of you, but their magical attack phases you into the astral plane, weakening you to subsequent magical damage but also granting immunity to physical damage. This is exactly what you need to protect you from the Creature of Flame's physical death touch.

Reward
Defeat the Creature of Flame on Destruction difficulty to get Horazon's Focus.

Horazon's Focus
Horazon's Focus
Keep in Inventory to Gain Bonus
Required Level: 40
(3 to 5)% Life stolen per Hit
(3 to 5)% Mana stolen per Hit
-50 Defense
+(21 to 25) to all Attributes

2/12 Infernal Machine
DIFFICULTY: MODERATE


Level
Hatred : 65
Terror : 115
Destruction : 120

Location
The Pit Level 2 (Act 1: Tamoe Highland)

Lore
Who knew the fallen clans were technologically adept? This rickety contraption contains wooden clockwork mechanisms and the necessary runes to open a gateway to any location in the Burning Hells and protect itself against any attackers. This enables it to summon hellish creatures at a rapid rate and strike enemies down with powerful rune magic upon being attacked. Move quickly, because time is against you.

Strategy
The tower summons a selection of dangerous elite monsters. Try to reach it as quickly as possible, avoiding or teleporting past elites. Beware the elites with a slowing attack: Marbled Frog, Basilisk and Unseelie Dame. Constantly change positions when attacking it, because it will retalliate with deathstrike.

Reward
Defeat the Infernal Machine on Destruction difficulty to get the Optical Detector.

Optical Detector
Optical Detector
Keep in Inventory to Gain Bonus
Required Level: 60
+200 Crafting Points
+(5 to 15) to all Attributes
All Resists +(10 to 15)%
+2 to Light Radius

3/12 Death Projector
DIFFICULTY: MODERATE


Level
Hatred : 70
Terror : 115
Destruction : 120

Location
Swampy Pit Level 3 (Act 3: Flayer Jungle)

Once you enter, you cannot go back trough the stairs.

Lore
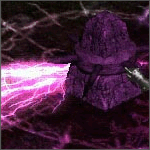
The Swampy Pit serves as testing grounds for Mephisto's latest siege weapon. The Death Projector slowly rotates, firing a devastating energy beam in a full circle, annihilating anything in its path.

Strategy
The siege tower is tended to by trained Zakarumite techpriests. Its magitech shield is impenetrable to all weapons, but when it senses a Mechanic nearby, it lowers its shield to enable maintenance. In this state, the Death Projector can be damaged, though its fortified outer shell still harmlessly deflects a percentage of all incoming attacks. The Mechanics themselves carry portable gap generators and are impossible to hit or kill. Damage the Death Projector while avoiding Mechanics until the devilish device finally falls.

Reward
Defeat the Death Projector on Destruction difficulty to get the Laser Focus Crystal.

Laser Focus Crystal
Laser Focus Crystal
Keep in Inventory to Gain Bonus
Required Level: 80
Increase Maximum Life 10%
Increase Maximum Mana 10%
+(6 to 15)% to Experience Gained

4/12 Azmodan
DIFFICULTY: TRICKY


Level
Hatred : 75
Terror : 115
Destruction : 120

Location
Forgotten Reliquary (Act 3: Upper Kurast)

Lore
The Lord of Sin walks the earth. In his weakened state, he hides in the catacombs of Kurast, feasting on the dark rituals of Mephisto's chosen. Destroy him before he becomes a threat.

Strategy
Azmodan is accompanied by a legion of elites and emits a black magic aura that grants unholy invulnerability to nearby demons and 50% all resistances to himself. The tight confines of the temple area make it hard to get past the immortal monsters blocking your way and reach Azmodan himself. He should be easy to kill in his weakened state, but beware his powerful Pentagram attack which may require maximum fire resistance to survive.

Reward
Defeat Azmodan on Destruction difficulty to get Azmodan's Heart.

Azmodan's Heart
Azmodan's Heart
Keep in Inventory to Gain Bonus
Required Level: 100
All Resists +(31 to 40)%
+5% to All Maximum Resistances
Reduces Vendor Prices 10%

2% chance to drop a trophy on Destruction difficulty. Cube the trophy with the charm for a small bonus.

Azmodan Trophy
Azmodan Trophy
Cube with the Azmodan's Heart...
+150 to Life
+150 to Mana

5/12 Rathma Square
DIFFICULTY: TRICKY


Level
Hatred : 80
Terror : 115
Destruction : 120

Location
Ruined Fane (Act 3: Kurast Causeway)

Lore
Back in the days when Kurast was the centre of civilisation and black magic was not yet frowned upon, this was where the priests of Rathma - the necromancers - practiced their art. The place was abandoned when the religion of Zakarum took over the city and banned pagan magic, making it the perfect hiding place for an ancient evil bent on taking out the Church from within. Primus, son of Mephisto, was the leader of the Cult of the Triune in ages past before its destruction. His efforts to rebuild the Triune were shut down by the crusaders of Zakarum, but he remains a formidable foe, doubly so in the home city of the Zakarum.

Strategy
Primus himself is not particularly hard, despite his powerful ranged Bladestorm attack. The blades track your position, but do less damage than his normal attack and can be avoided, blocked and dodged. His guard dogs are the real challenge. After several millennia in and around Rathma Square, his Gore Crawlers can raise themselves from the dead. Shattering the corpse does not stop this, but the resurrection takes 10 seconds, during which you can attempt to run away and ditch them.

Reward
On Destruction difficulty, Primus drops the Spirit Trance Herb (1/6 chance).

Spirit Trance Herb
Spirit Trance Herb
Keep in Inventory to Gain Bonus
Required Level: 100
10% Increased Attack Speed
10% Faster Cast Rate
(21 to 150)% Bonus to Attack Rating
Regenerate Life +(11 to 40)

2% chance to drop a trophy on Destruction difficulty. Cube the trophy with the charm for a small bonus.

Rathma Square Trophy
Cube with the Spirit Trance Herb...
10% Chance of Uninterruptable Attack

6/12 Cathedral of Vanity
DIFFICULTY: HARD


Level
Hatred : 85
Terror : 115
Destruction : 120

Location
Underground Passage Level 2 (Act 1: Stony Fields & Dark Wood)

Lore
According to religious myth, the mortal plane – Sanctuary – was created by the fallen angel Inarius and the demon Lilith to serve as a refuge from the Eternal War. The two created a race of servants from the earth which were to worship them for all eternity. However, humanity broke free from its shackles when a small group of farmers rediscovered their birthright and ancient powers inherited from their supernatural parents. As the edyrem army grew, Inarius descended into megalomanic madness and was eventually destroyed along with his golden cathedral of vanity. It is whispered that the ghosts of Inarius and his closest worshippers still roam the cathedral….

Strategy
The Crystal Ball is the last of the cathedral’s magical defences. The tower exudes a holy invulnerability shield to protect nearby revelers and casts a searing beam of angelic lightning that destroys anything it touches. Destroy the Crystal Ball to dispel the immortality from the other enemies.

Reward
Defeat Inarius on Destruction difficulty to get the Idol of Vanity.

Idol of Vanity
Idol of Vanity
Keep in Inventory to Gain Bonus
Required Level: 100
15% Increased Overall Speed
Cannot Be Frozen

2% chance to drop a trophy on Destruction difficulty. Cube the trophy with the charm for a small bonus.

Cathedral of Vanity Trophy
Cube with the Idol of Vanity...
+10% Bonus to Summoned Minion Life
+10% Bonus to Summoned Minion Damage

Bonus quest
Inarius' cathedral of vanity was ultimately destroyed by Mephisto, and Inarius and his followers were captured, mutilated and deformed to grotesque Overlords to serve the forces of Hell. One may be able to summon the tormented ghost of Inarius, defeat him and steal his power...

See THIS PAGE for more information about Inarius' Revenge.


7/12 Toraja
DIFFICULTY: VERY HARD


Level
Hatred : 90
Terror : 115
Destruction : 120

Location
Abaddon (Act 5: Frigid Highlands)

Lore
Now nothing more than overgrown ruins, Toraja once stood proud as a medium-sized city in ancient times, and has become legendary as the city where the nephalem Uldyssian recruited most of his edyrem to spearhead the uprising against the infernal Cult of the Triune. This battle is where the time portal leads you. Aid the edyrem in their battle against Lilith and the Triune’s minions.

Strategy
Because you are not directly allowed to interfere with the flow of time, you cannot damage the enemies at all. Bring the Crystalline Flame Medaillion which you acquired during the Judgment Day uberquest and use its special ability to summon a batallion of edyrem, fighter-mages who have the ability to dispel the immortality wards off the enemies. Although they are vulnerable to the supernatural onslaught of the Triune, they have the power to cast an invulnerability shield of their own, allowing them to close in and remove the immunities. Defend them well and lead your army of edyrem to victory!

Reward (requires the Crystalline Flame Medaillion)
On Destruction difficulty, when you kill Lilith, you have 30 seconds to cube the Crystalline Flame Medaillion with an Arcane Crystal to upgrade it.

Crystalline Flame Medaillion + Arcane Crystal → returns Crystalline Flame Medaillion with added bonuses

This upgrade recipe adds the following bonuses:

Maximum Skill Level Increased by 1
All Resists +10%
Regenerate Life +100

See THIS PAGE for more information about the Crystalline Flame Medaillion.

Toraja (and Yshari Sanctum) on Destruction difficulty is the only place in the game where you can find the following three Great Runes. These runes are required for the most powerful runewords and their chance to drop ratio is 3:2:1, from first to last.

Krys Level
100
Weapons : Target Takes Additional Damage of 100
Armor : Target Takes Additional Damage of 25
Shields : Target Takes Additional Damage of 25
Auhe Level
100
Weapons : Regenerate Mana +15%
Armor : Regenerate Mana +5%
Shields : Regenerate Mana +5%
Sha'ad Level
100
Weapons : +30% Enhanced Damage
Armor : +30% Enhanced Defense
Shields : +30% Enhanced Defense

See THIS PAGE for more information about the Yshari Sanctum.


8/12 Kabraxis
DIFFICULTY: EXTREMELY HARD


Level
Hatred : 85
Terror : 115
Destruction : 120

Location
Disused Reliquary (Act 3: Kurast Causeway)

Lore
The Thief of Hope and the Banisher of Light is a demon lord summoned by a very powerful Vizjerei magi, long ago. He used his intelligence and power to form his cult and rule the lands. People followed his philosophy, 'walked' the Black Road he created, and soon his power grew so much, that even the Prime Evils feared him, so they imprisoned him within the portal he came from, between the Sanctuary and the Burning Hells. It is whispered among his remaining followers that there is a way to release him from his centuries-long prison...

Strategy
The Pillar of Skulls seals Kabraxis. It has a Heroic shield and fires Punishers when hit. Once you kill it, Kabraxis will be released. He has a heroic shield as well, and will pounce on you with various attacks, cast bone prison on you to trap you, summon his skeleton army of followers and cast broadside when hit.Your best hope is to keep running and killing the bone prison and skeletons as fast as you can, and not stand close to Kabraxis all the time.

Reward
Defeat Kabraxis, Thief of Hope on Destruction difficulty to get the Soul of Kabraxis.

Soul of Kabraxis
Soul of Kabraxis
Keep in Inventory to Gain Bonus
Required Level: 100
+1 to All Skills

2% chance to drop a trophy on Destruction difficulty. Cube the trophy with the charm for a small bonus.

Kabraxis Trophy
Kabraxis Trophy
Cube with the Soul of Kabraxis...
2% Reanimate as: Random monster (including Elites)

See THIS PAGE for the list of reanimates.

Elemental seals
If you're feeling like releasing more powerful beings, there are also 5 orb seals which used to seal Kabraxis once. Each seal is for one element: Fire, Cold, Lightning, Magic and Physical. When one is destroyed, it will unseal an Ultra Elemental, along with some normal elementals. The Ultra Elemental spawns new elementals, fires a powerful spell and takes damage only from it's own element - so be prepared to have a source of damage for every one of the elements. Once defeated, each element will drop a Great Gem. Transmute all 5 Gems with the Kabraxis' Soul to get additional bonuses.

Soul of Kabraxis + 5x Great Gems (different) → Soul of Kabraxis with added bonuses

This upgrade recipe adds the following bonuses:

50% Chance to cast level 49 Trinity Nova when you Die
+(0 to 5)% to Maximum Fire Resist
+(0 to 5)% to Maximum Cold Resist
+(0 to 5)% to Maximum Lightning Resist
+(0 to 5)% to Maximum Poison Resist
+20 Required Level

9/12 Vizjun
DIFFICULTY: IMPOSSIBLE


Level
Hatred : 95
Terror : 115
Destruction : 120

Location
Disused Fane (Act 3: Kurast Bazaar)

Lore
Vizjun, the mechanised home city of the Viz-Jaq'Taar buit on the ruins of a magical war, recently ran into a major system error. The artificial intelligence, the Master Control System seems to have developed evil sentience as Diablo approached. The computer then constructed a large army of robots to take over the city, its missile silos and from there the world. Those seeking to retake the compound will have to contend with its arsenal of combat drones, minefields and electro-pulse generators.

Strategy
Vizjun features melee robots, laser robots and machine-bolter robots. You should know what to do by now. But watch your step: Vizjun's automated defences will periodically deploy additional robots, chaingun sentries, minefields and even nuclear MIRV strikes when you enter the protected zone. The computer voice warns you of any incoming attack. The level boss, MCS has plasma interference shields and is invulnerable to normal damage. To destroy it, use the handy Purify skill you acquired in Duncraig. A few shots should be enough.

Reward
Defeat the MCS on Destruction difficulty to get the Cold Fusion Schematics.

Cold Fusion Schematics
Keep in Inventory to Gain Bonus
Required Level: 100
5% Chance to cast level 10 Time Strike on striking
100% Chance to cast level 59 Blast Wave when you Die
+(11 to 50) to Strength
+(11 to 50) to Dexterity
+(11 to 50) to Vitality
+(11 to 50) to Energy

2% chance to drop a trophy on Destruction difficulty. Cube the trophy with the charm for a small bonus.

MCS Trophy
MCS Trophy
Cube with the Cold Fusion Schematics...
+(1 to 20) to Strength
+(1 to 20) to Dexterity
+(1 to 20) to Vitality
+(1 to 20) to Energy

Drop Bias
Increased chance to drop jewels.


10/12 Uldyssian
DIFFICULTY: IMPOSSIBLE


Level
Hatred : N/A
Terror : N/A
Destruction : 120

Location
Act 2: Duriel's Lair

Lore
Uldyssian ul-Diomed, son of Diomedes, was once a simple farmer who had a younger brother and some good friends and they all lived their life in a very small village named Seram. After some time and manipulation from Lilith, discovers that he is gaining strange powers that he is trying to manipulate in a positive way, but some of his deeds become evil because of Lilith.

Uldyssian has Nephalem ancestry within him and has some of their powers. He can do almost anything from changing weather, causing people to explode, creating shields or simply creating a simple ball of light to see through the dark with. He can also teleport himself and others among amping his strength and healing powers as well as transmuting objects. These powers are based on his will, the more desperate and angry he gets the more powerful his abilities are.

To stop Demons and Angels from taking over Sanctuary, Uldyssian created the Edyrem, made up of Nephalem descendants. These Edyrem consisted of citizens of Partha, Toraja, and some from Hashiri and Istani. Uldyssian's main purpose was to relinquish the existence of the two major sects in Sanctuary, the Temple of the Triune and the Cathedral of Light.

Uldyssian moves through Sanctuary, gathering followers and ravaging temples of the Cathedral of Light and the Triune. In the end, when the battle between the forces of Hell and Heaven reaches its climax, Uldyssian utilizes his superiorly developed powers to sacrifice himself and save Sanctuary.

Memories
You have to go through many stages before fighting the real Uldyssian, Dark Edyrem King.

Reward
Defeat Uldyssian's Legion and then Uldyssian, Dark Edyrem King himself, on Destruction difficulty, to get the Uldyssian's Sword.

Uldyssian's Sword
Uldyssian's Sword
Keep in Inventory to Gain Bonus
Required Level: 120
5% Chance to cast level 1 Uldyssian's Time Freeze when Struck
+(0 to 2) to All Skills
All Resists +(11 to 30)%
Level 1 Purify (100/100 Charges)

2% chance to drop a trophy on Destruction difficulty. Cube the trophy with the charm for a small bonus.

Uldyssian's Trophy
Uldyssian's Trophy
Cube with Uldyssian's Sword...
(1 to 5)% Deadly Strike

Drop Bias
Uldyssian will drop 2 to 3 Unique items.


11/12 Startled Witch
DIFFICULTY: IMPOSSIBLE


Level
Hatred : 85
Terror : 115
Destruction : 120

Location
Flayer Dungeon Level 3 (Act 3: Flayer Jungle)

Lore
A violent death often leaves a spirit or poltergeist behind. Most spirits are weak, manifesting only as a sobbing on the wind or dancing ghost lights at night. Some grow stronger in death and guard their final resting place with unholy fury.

Strategy
To get to the Startled Witch, you will first have to pass trough two upper levels which are no walk in the park themselves. You can distinguish between three types of different monsters there.
First and most basic of all: Zealots. They are immune to fire, cold and lightning. They are not a big threat, however other type of enemies will aid them. There are two advanced structures with different functions: nests and traps.
Nests will, obviously, spawn more zealots. However these nests are not so easy to take down, they are immune to physical/magic damage and have considerable regeneration.
On the other side, we have the Traps. These will spam inoffensive bolts while they are bored. However, if a Zealot perishes, they will resurrect him. So, unless you want to fight the Zealots forever, you better try to take these statues down first of all. The statues are immune to all elements, but they will die from 1 Purify. Notice that no monster is immune to Magic.

After you enter the third level, you will find yourself in a small room. There is a corridor, so follow it, but be careful. Even though this level has no randomly spawned monsters, there are stationary witches over all the map. Unlike other witches, these don't move, and will cast a timered deathstrike - this is easier to avoid than Pounce, because its a delayed 1-hit KO.
Okay, avoiding them is not hard at all. The first large corridor is simply walkable while you avoid the witches. The second large corridos is a bit more narrow, so you need to dodge while your teleport timer cools down. You might want to use a town portal just in case something happens!
Now, once you finished the second large corridor, you will be in a big room. This room is basically a room inside another one, around five times. You can teleport, but it is recommend you walk so you become familiar with the witches' locations. This is a small maze, because each room has a door in a different location.

Eventually, you will arrive to the central room. Take a deep breath, and walk a bit closely (action music here). There... there she is. Upon startling her, she will wake up. She spawns more Nests at a rapid rate, casts deadly spells, attacks and teleports. She requires Purify to kill.

Reward
Defeat the Startled Witch on Destruction difficulty to get the The Sleep.

The Sleep
The Sleep
Keep in Inventory to Gain Bonus
Required Level: 120

This empty charm allows you to add a powerful enchantment to it by transmuting it with any one of the 17 existing trophies (except the Triune trophy). Each trophy adds an unique bonus, but only one trophy can be applied, only once, so choose carefully.

The Sleep + Trophy (any except Triune) → The Sleep with added bonuses

This upgrade recipe adds the following bonuses:

Akarat Trophy:
50% Faster Run/Walk
(6 to 10)% Mana stolen per Hit
(6 to 10)% Life stolen per Hit
+(1 to 3) to Light Radius


Astrogha Trophy:
+(0 to 1) to All Skills
(41 to 50)% Chance of Open Wounds
Slows Target by (6 to 10)%
(21 to 30)% Curse Length Reduction


Azmodan Trophy:
(41 to 50)% Bonus to Buff/Debuff/Cold Skill Duration
+(51 to 100) to Life
Replenish Life +(51 to 100)
+(51 to 100) to Mana
Half Freeze Duration


Brother Laz Trophy:
50% Increased Attack Speed
50% Faster Cast Rate
Increase Maximum Life (6 to 15)%
+(1 to 2)% to All Maximum Resistance


Cathedral of Vanity Trophy:
+(21 to 30) Energy Factor to Spell Damage
+(1 to 5)% Bonus to Energy Factor
+(21 to 30)% to Spell Damage
Increase Maximum Mana (6 to 10)%


Duncraig Trophy:
+(101 to 150)% Damage to Demons
+(101 to 150)% Damage to Undead
+(101 to 150) to Life
+(41 to 50) Life on Striking in Melee


Judgement Day Trophy:
+(6 to 10) Enhanced Stance Radius
+(11 to 20)% Bonus to Summoned Minion Resistances
+(41 to 50)% Bonus to Summoned Minion Life
+(41 to 50)% Bonus to Summoned Minion Damage


Kabraxis Trophy:
-(1 to 15)% to Enemy Lightning Resistance
-(1 to 15)% to Enemy Cold Resistance
-(1 to 15)% to Enemy Poison Resistance
-(1 to 15)% to Enemy Fire Resistance
Kingdom of Shadow Trophy:
50% Faster Run/Walk
50% Faster Block Rate
Adds 25-50 damage
Regenerate Mana +(11 to 15)%


Legacy of Blood Trophy:
+(21 to 30) to Strenght
+(21 to 30) to Dexterity
+(21 to 30) to Vitality
+(21 to 30) to Energy


Lord Aldric Jitan Trophy:
+(201 to 250) Crafting Points
(1 to 5)% Deadly Strike
(21 to 30)% Chance of Uninterruptable Attack
Poison Length Reduced by 25%


MCS Trophy:
(41 to 50)% Faster Hit Recovery
+(101 to 500) Defense
Damage Reduced by (1 to 5)%
Total Character Defense Plus (41 to 50)%


Quov Tsin Trophy:
All Resists +(15 to 20)%
+(1 to 5) Cold Absorb
+(1 to 5) Lightning Absorb
+(1 to 5) Fire Absorb


Rathma Square Trophy:
(101 to 150)% Bonus to Attack Rating
(11 to 20)% Chance of Crushing Blow
(1 to 5)% Bonus to All Attributes
Reduces all Vendor Prices (11 to 20)%


Tran Athulua Trophy:
Adds Strength Damage Bonus: (50/256 per Strength)%
Adds Dexterity Damage Bonus: (50/256 per Dexterity)%

(201 to 250)% Extra Gold from Monsters
(41 to 50)% Better Chance of Getting Magic Items


Uldyssian Trophy:
Adds 200-300 fire damage
Adds 200-300 cold damage
Adds 200-300 lightning damage
(0 to 1)% Reanimate as: Destroyer Shaman


12/12 The Void
DIFFICULTY: IMPOSSIBLE


Level
Hatred : 110
Terror : 115
Destruction : 120

Location
Forgotten Temple (Act 3: Upper Kurast)

There are more than one variant of this level, each required to finish it. Re-roll the map to have a chance of getting another one. You can do so by, for example, changing difficulty.

Lore
With the creation of the Sanctuary by the angel Inarius and demoness Lilith, the demons and angels who wanted to avoid the Great Conflict between the High Heavens and Pits of the Burning Hells came with them and settled it. The first humans were created as their offspring by mixing the demonic and angelic – the Nephalem. At first they seemed to be nothing like their parent, but quickly it became evident that they wield latent magical powers possibly even greater than their ancestors. Finding this out, Inarius decided to kill them all, but Lilith wanted to make an army to fight the Heaven and Hell. They began fighting, and Lilith, defeated, was banished into the Void – an utterly empty and black space, a prison for various beings – to be eternally trapped there.

Rathma, their son, had avoided the slaughter that followed, and became the servant and student of a mystical dragon-guardian of the Sanctuary – Trag'Oul. After a thousand years, Lilith escaped the Void in the middle of the Sin War events, faming Uldyssian and making him fight the Triune and various related demons with his companions - one of them being Mendeln, his brother. Rathma took in Mendeln, and trained him as his apprentice – the two of them being the first Necromancers, following the teachings of Trag'Oul.

Eventually, Rathma was found and sent to the Void by Inarius, but Trag'Oul sent Mendeln to retrieve Rathma at a great risk. Before the end of the Sin War, Lilith, too, was sent to the Void again, by Inarius. Uldyssian, defeating Inarius, now literally stopped and banished the angels and demons single-handedly – finishing the Sin War. Trying to restore the Sanctuary to it's previous state, he took in all the destruction and damage it suffered during this war, and was guided by Trag'Oul to the Void to release it.

After these events, Rathma and others pleaded with the Heavens and Hells to spare Sanctuary and the humans. Finally a deal was struck to keep Sanctuary and humanity in existance – with no war on either side allowed there.

Enemies
Darkness – melee. Eternal Ghost – long ranged missiles that curse you and rapidly drain your life to one. Dark Chest – follows you and releases Darknesses upon reaching you and opening. Invisible curses that might damage you seemingly randomly.

The Sin Innerspace
In this deep nothingness, look within and explore your very existance until you come to your soul. Being so bare out here, take a voyage in your mind and fight your 7 deadly sins in unfamiliar locations, each conjured anew every time you visit them with your though.

Once you have beaten them all, cube their remnants to get the Sigil of the 7 Deadly Sins.

Sigil of the 7 Deadly Sins
Quest Ring

Required Level: 120
+1 to Mage Rage
+(26 to 50) to All Attributes
+200 to Life
+200 to Mana
+(6 to 15) to Light Radius

Then use your Mage Rage to release your inner rage and clear yourself from sins, expunging them to nothingness. With enough power, it is possible to, in this way, temporarily create small figmets of reality or summon a similar powerful moment – now long gone.

Bosses
Doing so, you might come upon Rathma, disciple of Trag'Oul and Mendeln, Apprentice of Rathma – the first necromancer.

Reward
Defeat Rathma, Apprentice of Trag'Oul on Destruction difficulty to get Rathma's Supremacy.

Rathma's Supremacy
Rathma's Supremacy
Keep in Inventory to Gain Bonus
Required Level: 120
+(5 to 10) to Light Radius

Bonus quest
It seems this item has the markings of a powerful necromantic container. If only you knew how to trap a soul in it, like the first necromancer, Mendeln, did first so long ago...

To upgrade it, cube it while you have swirlies from having killed both Rathma and Mendeln at the same time.

Rathma's Supremacy → Rathma's Supremacy with added bonuses

This upgrade recipe adds the following bonuses:

+2 to All Skills
+50 to All Attributes
+(3 to 7) to Teleport

Enchanting Crystal
While dispatching monsters from existence, you might come by Enchanting Crystals, which drop only in this level. You can use them to re-roll Sacred Unique items:

Sacred Unique item + Oil of Enchantment + Enchanting Crystal → reroll to SU/SSU/SSSU (same item type and rarity ratio)

Drop Bias
Increased chance to drop shrines.