

You have heeded the Call of Duty and it's time to drop into France and kick Nazi tail all the way back to the Fatherland. Call of Duty offers three different perspectives on the way, taking you into battle first as a U.S. airborne infantryman, then as an elite British commando, and finally as a Russian peasant trying to defend his country. No matter which campaign you find yourself in, one thing remain constant -- you'll be fighting Germans, and you'll be outnumbered.
Controls
For a full list of controls, you
can check out the game manual included with your copy of Call of Duty or you can
check out the Options menu. There are quite a few commands that are left
unbound, meaning that you can't use them unless you want to assign them to a
key. Most of the unbound commands are simply different ways of doing something
you can already handle with another key. For example, there is already a command
to toggle your stance to a crouch (C), but you can also set a command so you
need to hold down a key to crouch and when you let go, you'll stand. Look at the
unbound commands and see if there are any you'd like to have in your control.
You begin Call of Duty with some training. Use that opportunity to see if there
are any commands you want to switch to a different key.
HUD
Your Heads-Up
Display shows some very important information. Get used to glancing at
the corners of the screen to keep track of your objective location and your
ammo.
Compass: Not only will your hand compass show you true north, but the
star on the outer edge indicates the direction of your objective. Keep in mind
that most objectives can't be reached in a straight line, but it's a good
indicator of where you need to move.
Stance: Shows if you are
standing, crouching, or lying prone. Stance is very important if you want to
avoid taking a bullet to the head.
Target Reticle: This shows where you're aiming. The
clearer and more certain the shot, the tighter the reticle.
Ammo: The first number
indicates how much ammo is loaded into your current weapon. The second shows how
much total ammo you have left (not including what is loaded).
Health: The most important
meter of all. If you're in the green, you're golden. Once you hit orange,
however, you're in danger of ending up at Arlington National Cemetery. Any time
your health is more than halfway down, start looking for a health pick-up.
Stance
Your life may
very well depend on how you stand in the field of battle -- literally. There are
three stances in Call of Duty: Stand, Crouch, and Prone. The lower you are to
the ground, the harder you are to hit and the slower you move. While you can
more a lot faster standing, you won't more at all when you're dead. Standing is a rare luxury
in Call of Duty, don't expect to use the stance often. However, if
you absolutely need to get somewhere quickly (say a grenade just landed two inches
from your feet) go ahead and stand and run.
 Most of the time, you'll be in a crouch. You move at about
half the speed as when you're standing, but you reduce visibility to the enemy
and you can hide behind most cover in a crouch. The prone position is by far the
slowest, as you're crawling on your belly. However, it's hard to see and hit
someone in this position unless you have some elevation, so it's good to use
when there are bullet flying everywhere and you need to sneak away to try and
flank the enemy. If you're a good sniper, the prone position allows you to hide
in bushes and pick off enemies from a distance.
Get used to changing stances often. Sometimes you will crouch behind cover and won't have a shot at an enemy without standing. Stand, fire, then crouch again. You should always assume a safe position (even if that means going prone) when reloading your weapon.
Movement
Though you will sometimes be pinned down by the enemy, much of
your time in Call of Duty will be spent on the move. Never assume you
are safe, as there are enemies everywhere (after all, you are the invading force). Always move from
cover to cover. Never wander around in the open. Check out your environment and you'll
see abandoned cars, sandbags, bunkers, foxholes, ditches, trees, and walls that can be used
as cover. Think of movement as quick trips from point A to B, instead
of long trips to a single objective.
Though it may feel like you have lots of open territory to run around in, levels are very structured and have very specific boundaries (usually in the form of barbed fences). If you get lost or confused, look at your compass. The objective marker shows where you need to be. Sometimes you can't make a straight line as the path may be blocked by a wall or fence. If that's the case, make your way back the way you came and look for an alternative path that will get you headed back towards the objective marker.
Cover
Taking cover is the only thing that will keep you
alive. You can find cover just about anywhere and any solid cover (a car or a
wall, for example) can withstand just about every kind of punishment. Sometimes
cover offers no protection except for keeping you out of the enemy's line of
sight. Look for bushes. You can use them to sneak up on enemies. A snipe from a
bush is a wonderful thing. Remember, when you reload you want to drop down even
further into cover. Since you are temporarily vulnerable, it's a good idea to
drop down one level when reloading. So, if you are crouching behind a wall, drop
to the prone position and reload, then hop back up and do your business.
It's not enough simply to hide behind a wall to avoid fire, you still need to get shots off. Look for holes in fences and walls where you can aim the muzzle of your gun over but still get maximum coverage. You can also lean left or right, even in the prone position. Lean, take your shot, let go of the key and you snap back behind full cover. Lean is also a good way to peak around corners without getting shot to hell. Anytime you come around a corner and all seems quiet(especially inside buildings) move against the wall and lean out for a look-see.
ADS
No, it's not some new-fangled term for why kids suck at
school. Aiming Down the
Sight lets you pull up your weapon and look through
the sight. This allows for much better aim and any weapon with a scope will give
you a magnified view of your enemies, but it does slow your movement
considerable. ADS is not to be used when you are out in the open. Use it when
you are behind cover and not needing to move.
Teamwork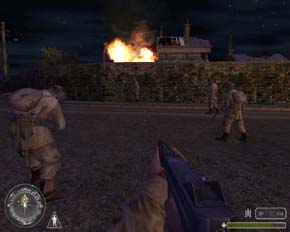 In war, combat is prevalent. You can expect almost non-stop
action. However, you are not alone. Your squad, your band of brothers, are not
useless CPU chumps. These are trained men who know how to do their job and if
you sit back and watch, they can take care of some situations without your help
at all. Of course, you'll always want to lend a helping hand, unless your some
kind of jerk. And you're not some kind of jerk, are you?
While you can't give commands to your buddies, you should try to pick up on what they are doing. If you have friends trying to gain position, you can follow them or you can stay back and offer suppressing fire (keep shooting in the general direction of enemies to force them into cover) to give you buddies a better chance of making it to safety. You can also find a good camping spot and try to snipe enemies moving to meet the other men in your squad.
Remember that the men fighting with you are an asset and not a nuisance. As much as you need to help them, you also must let them help you. Running into every situation without support and trying to make like your Max Payne will only earn you maximum pain. Don't be stupid. Teammates draw enemy fire, for one thing, and provide suppressing fire to allow you to move to cover.
Friendly
Fire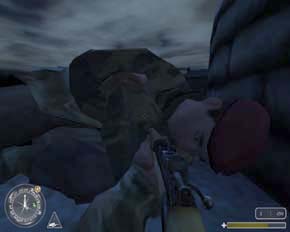 With the chaos of war, shooting the good guys is
inevitable. However, if you do it maliciously, the mission will immediately
fail. Any time your reticle moves over a buddy, their name and rank pops up on
screen, along with a big green X. Rmember, the Germans wear grey and they shoot
at you. Your friends wear olive green and shoot ask for your assistance.
Weapons
You begin each
mission with a pre-determined stock of weapons and ammo. There are four slots.
Slots 1 and 2 are intended for rifles, Slot 3 is for pistols, and Slot 4, is for
grenades. Your main weapons will be the two rifles you have in Slots 1 and 2.
You'll come across lots of weapons in a mission, because you can always take a
gun from a fallen soldier. Check the Weapons Locker section of this guide to
determine if the gun on the ground is better than the one in your hand.
Ammo for your army-issued weapons will not be in great supply. For longer missions, you may be forced to pick up an enemy weapon, because German ammo is in heavy supply in every mission.
It's a good idea to fill your two rifle slots with two
different types of rifles. It really doesn't do much good to have two
machineguns, because that offers no versatility. Make sure one weapon is a heavy
auto-fire beast and the other is a good long-range rifle that can be used for
sniping.
Some weapons can be
switched from semi-auto to auto, increasing their rate of fire. Many of the
high-powered machineguns and rifles fall into this category. When running and
gunning or fighting large groups of Nazis, you should always use the highest
rate of fire possible for your gun. However, if you are sniping or popping out
of coverage for only one or two shots, the semi-auto setting will help you
conserve ammo and will slightly lessen the recoil when aiming down the
scope.
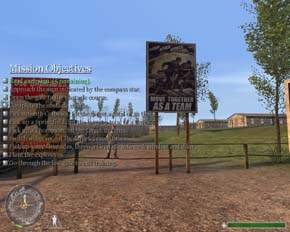 Objectives
Each mission
comes with a list of objectives you need to achieve in order to progress the
Allied Campaign. You can always check the list of objectives and your current,
highlighted, objective with the Tab key. Occasionally new objectives show up
based on in-game events. Like, say, when a tank suddenly shows up and starts
decimating your squad. Sometimes you'll need to ignore a firefight to get on
task and complete an objective. You have to trust that your buddies can handle
themselves and take down the competition while you complete your own task.
Tips