THE INFILTRATION ENVIRONMENT:
Though
Infiltration is a complex and comprehensive gaming experience, we
have tried to create a control system that is both intuitive and
easy to customize. Although Infiltration allows for a
wide variety of functionality,
it is not required to play
the game. As long as you can move around and reload your
weapon, the rest simply adds to the experience and can be understood
as time goes on.
This section will break down into the following areas:
MOVEMENT:
If you're familiar with playing Unreal Tournament, or most
other first person shooters on the market, you should be comfortable with your current
basic movement control scheme. (Moving forward and back,
strafing, mouse looking, etc.) There will be no need to change much of the
basics there, since you will still move about the map in a similar
fashion. But that is where tradition stops, and Infiltration
starts.
STAMINA & BULK:
Your stamina and bulk values are interrelated with each other.
Specifically, your bulk value represents how much equipment
you are carrying. The higher your bulk value, the less
your maximum stamina can be. You
can decrease your bulk value at any time by tossing out
weapons or ammunition you don't want or need. It will also decrease
as you rid yourself of expended magazines.
Stamina will degenerate quickly while sprinting or slowly while
jogging. Reloading while moving, or walking with your
weapon aimed will decrease your
stamina faster than the usual pace as well. As your meter decreases,
your soldier's ability to maneuver will worsen. To
regenerate your stamina, simply start walking or stop moving
altogether. You regenerate stamina faster by standing
still, even faster while kneeling, and faster yet
while lying prone.

Here you can see the angled stamina indicator, which sits above the bulk
meter. Stamina is a very important indicator to keep
track of at all times, as it can be the difference between
sprinting for cover quickly or dying in the attempt.
Also be aware that when your soldier gets hit, his current stamina will
decrease. If he becomes injured (for example, bullets
penetrate his armored vest) his maximum stamina will
decrease. When this happens, you won't be able to
regenerate as much stamina any longer. This also has the effect of decreasing the amount of bulk you
can carry while maintaining the same stamina as before.
WALKING:
Your default
movement speed is a slow paced walk designed with realism in
mind. While walking, your stamina will increase at its
slowest pace. At the same time, your footsteps will
be barely audible. Weapon accuracy is minimal depending
on the weapon you're using.
JOGGING:
If you need
to increase your speed without dramatically affecting your
stamina or easily giving away your position, you can toggle
your speed to a jog by activating your Movement key.
Press and release it again to return to walking. Jogging
will decrease your stamina over a long period of
time. Accuracy while jogging is horrible, and only
recommended in very close quarters or while laying down suppressive fire
while advancing or retreating. Note that aiming while jogging will decrease your stamina
faster than jogging while your weapon is hipped.
SPRINTING:
Sprinting
can be an extremely useful tool. To put yourself into a
sprint, simply press and hold your Sprint key. This will
automatically put you into a hard run forward without the need
to press the forward key at all. You can only sprint
straight ahead and your weapon will be forced to return to
the hipped position. All weapons other than pistols will also be brought against your chest and cannot be fired while sprinting.
Although you'll move at a very fast
pace, your accuracy will be horrible and your stamina will
decrease quickly. Sprinting is best used when you need
to exit a situation in a hurry or rush to your next cover
spot. When you release the Sprint Key, you will return
to a jog.
An important thing to remember when sprinting is inertia. As
in real life, you cannot stop yourself on a dime, nor can you
switch directions instantly. So give yourself a little
room to stop from a sprint to prevent your untimely death by
sending yourself off of a ledge or out of control past the enemy position.
LEANING:
One of
Infiltration's unique features is the ability to lean around
corners. This brings all kinds of new options into your
game play experience. You also have complete control
over how much you lean to the right or the left.
Re-centering your view is quite easy as well, and happens either
automatically if you walk or run or by pressing the center view key. Choose your leaning
keys carefully, as they can add immeasurably to your stealthy tactics.
NOTE: Though you can dictate how much you lean in first person, to keep things fair
online, anyone else will see you lean fully in third person.
LYING PRONE:
Have you ever
wanted to sneak up on your target, in the cover of the high
grass, finally putting your camouflage to good use? Now is your chance. To
get yourself into the prone
position, press the Prone key. To get out of the prone
position, press your Prone, Jump, or Kneel keys. It
takes approximately 1.5 seconds to get out of the
prone position, so keep that in mind.
While in the prone position, you will be subject to a fairly subtle collision system that
detects the length of your body. Because of this, you
should always be aware that if your legs are up against a
surface, you won't be able to rotate your body further.
Keep in mind that moving to prone or up from prone will take a few moments. Also, you can
crawl while prone, but you will not be able to fire while crawling, as it requires both arms
to crawl. If you crawl (or swim) for more than 4 seconds while in jog mode your weapon will be lowered from view.
top...
WEAPON CONTROL & AIMING:
Infiltration boasts one
of the most unique weapon systems in any first person shooter.
It's an experience that grows on you, and can make it difficult to
go back to the normal style you see in a lot of other "realistic"
games.
To start with, understanding your weapon is probably the most important
aspect of the game. True practice is required for each
weapon. Using this system, a soldier can take those
skills with them anywhere in the game and literally become the
class of soldier they wish to be.
One of the most obvious features of Infiltration is the lack of a
crosshair. In order to get an accurate shot you must
aim your weapon by pressing and releasing your alt-fire button
(it is suggested you use the right mouse button), which brings your weapon up to your "eye" enabling you to
use the actual iron sights or scope. This is not an
optional feature. Furthermore, your accuracy degrades
both while aiming and from the hip the faster you move.
Your highest accuracy occurs from lying still in the prone position and aiming your weapon.
However, the lack of a crosshair alone is not what makes our system so different from others. In standard FPS games, your weapon is pointing at the center of the screen, locked into one position. In Infiltration your weapon has a free movement zone within the screen that moves independently of your view. This allows you to
position your weapon without your view changing at all. If the edges of this area are reached your view starts to follow. The iron sights of our weapon models show you exactly where you are aiming and so the weapon model itself is essentially a free moving crosshair. Of course aiming your weapon and bringing your iron sights in alignment is much more accurate than firing from the hip guessing where you are aiming at.
Another unique characteristic is the Breathing System. Normal breathing is a
simple up and down motion that varies in rate based on your
stamina level. The lower the stamina, the more quickly you
breathe. You can, however, control this breathing by
simply pressing and holding the Alt-Fire button. After a
moment or two, the breathing becomes minimal, allowing you to
take more accurate shots. The length of time you can
control your breathing is dependent on your stamina
level. As leaning is an unstable position, both standing and while crouched,
you are unable to control your breathing at that time. You can, however, control your
breathing while leaning and prone, as that is a stable position.
Note: The breathing system on a whole is more of an issue when dealing with
sniper rifles, and the impact is rather minimal with other weapons.
Finally, another very unique feature in the Infiltration environment is the Weapon Collision
System. Essentially, this means that your weapon is a real object and will
collide with everything around you if you are not careful. As in real life, you will need to position your weapon out of the way of an object if you're right up
against it in order to rotate around it. For example, if you
stood in a narrow alley, you could rotate your weapon into the
walls, preventing you from rotating further. To get around
this, simply lower or raise your weapon out of the way. This effect is decreased considerably
by hipping your weapon.
top...
WEAPON KEY FUNCTIONS:
 Watch your ammo, and
reload wisely...
|
Reload Key:
Though this is
nothing new, we've done our best to ensure the reload
animations and timing are true and accurate. In a
firefight, care must be taken when it comes time to reload, as
you have to consider how long it takes and if switching
weapons is a better option.
When you do reload a weapon, if the current magazine is empty, the soldier
simply drops it to the ground. However, if it's not empty, the magazine is
placed back into your inventory as is- not combined with other
partially full magazines. New magazines are chosen based on how full they are, with
the fullest magazine being selected automatically.
|
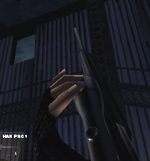 Weapons Feature Key:
Turning the scope illumination on for the PSG1.

M203 showing different grenade types.
|
Weapon Mode Key:
Many of the
weapons featured in Infiltration are designed to push
usability and functionality to the limit. Some weapons
feature full-automatic fire, but can switch to burst fire, or
even semi-automatic mode. This key is assigned to
perform these kinds of functions. It also serves as the
zoom adjustment key for sniper weapons. Investigate your
weapons closely, as many of them will have direct uses for
this key.
Your grenades even make use of
this key by allowing you to set it to High, Low, and
normal. Normal mode means the longer you press and hold the fire or
alt-fire button, the greater the distance of the
toss. High mode will toss the grenade as far as you can
upon release of the fire or alt-fire button. Low mode
will toss it a minimum distance.
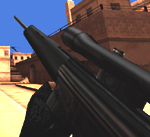
If you have the M203 selected with your M16-A2 the weapon mode key key will allow you to change the type of grenade you wish to reload
between High Explosive (HE) and White Smoke (WS). (This can also be done with the HK69, but with the Activate Attachment Key.) If you switch grenade types and then hit your reload key, you will
remove the currently loaded grenade type and replace it with the new one. The currently selected grenade type to
reload is shown in white on the HUD. If the already loaded type differs from the current reload selection then it
will be shown in yellow right above the white entry. Note that if you change grenade types and reload the currently
loaded one will drop to the ground where you will have to pick it up if you wish to put it back into your loadout.
With the Robar, the weapon mode
key will make it so that the bolt will not automatically be
cycled, but must be done by using the reload key. This can be
helpful if you want to confirm a kill or don't wish to have the bolt cycled
automatically when you fear an enemy may be near.
|
| |
Activate
Attachments Key:
This key lets
you switch between attachments, such as your M203 grenade
launcher, Laser Aiming Module, Flashlight,
etc.
This key will also allow you to change between magazines and drums with the AKMSU,
alternate between STANAG magazines and boxes with the M249, and switch between semi- automatic and burst fire with the FA MAS G2. In addition it will allow you to change grenade types
with the H&K69A1 just like the weapon mode key does with the M203 attachment for the M16.
However, if you change grenade types and reload, the currently loaded one will not be dropped to the ground and will be put back into your loadout properly.
|

Quick Action Key
displaying a mk23 SOCOM.
|
Activate Quick Action Key:
Here you can
quickly switch to a lighter weapon when you're in those
emergency situations. For example, if you've just run
out of ammo and you know the enemy is charging for you, whip
out your pistol and finish him off! More information on
this is available in the section below.
|
top...
EQUIPMENT:
Claymores:
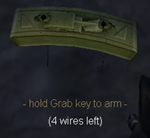 Arming a claymore.
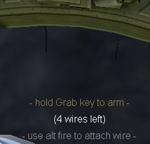
Starting a claymore tripwire.
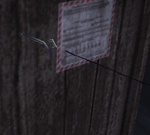 Claymore tripwire attached to a crate.
|
You can get claymores in
two ways, either by adding them to your loadout or from crates located in certain maps.
Placing and Arming Claymores:
To place a claymore, go to Equipment in your QA menu and select Claymore. If you have more than
one claymore it will tell you how many you have. Selecting a claymore
from this sub-menu will allow you to place a claymore. The blast direction for the claymore will
be the same direction as that in which you are facing when you drop
the claymore.
To arm the claymore, look down at it and hold the Grab/Use key until the timer gets to 0. It
takes 15 seconds to arm a claymore. Once it is armed, a message will
be sent to the rest of your team warning them. To disarm a claymore,
use the same procedure as for arming them. After disarming a
claymore you can pick it up and re-use it by grabbing it as you
would any other weapon (grab/use key pressed not held). They can be rendered
inoperable if damaged enough.
To detonate a claymore you have two options as well. You can use either the Equipment menu in the
QA menu and select "Detonate claymore" (note: this option will only
appear if you have a claymore armed.) or select the Claymore as your
QA weapon. If the claymore is selected as your QA weapon, simply hit
your QA weapon button to detonate your claymores. All claymores that
are currently armed by YOU will be detonated when you use either of these
detonation methods. You can not selectively detonate them nor claymores armed by teammates. Claymores will detonate in a
random direction if another explosive is detonated near enough.
Placing Tripwires:
Claymores can also be set up with tripwires in addition to remote detonation. This can be handy for setting traps or simply as an intruder alert. Tripwires can be strung from either armed or unarmed claymores.
To begin the process you must first switch weapons to your trusty Ka-bar knife. This will allow you to cut the wires and place them as needed. To begin a new wire, crouch close to the claymore and use your alternate fire key while wielding the knife.
You will see an indicator on your HUD indicating you are able to begin a new wire using the alternate fire key. You can then move to the location to which you would like to attach the wire. Again, use your alternate fire key while looking at the place you wish to attach the wire. Attachment location is based on your position and view, so if you want to place the wire low, either crouch or go prone and look down when you click the alternate fire button.
You may continue this process until you reach approximately 30 meters of wire length or 4 wire segments. When you are finished stringing your tripwires, hit your primary fire key or button to stop the process. You have a 6 second grace period after running wires, during which if you touch them, they will not go off. You may run up to 4 individual wires from any claymore.
They may also be strung together with the wires by using the same technique, causing all connected to explode when a single wire is crossed or one of the claymores connected is remotely detonated by any player using the QA Menu or QuickAction key. This includes all connected claymores even the ones another teammate or even the enemy has armed. Of course, only armed claymores will detonate using either remote or wire. The chain reaction will be stopped by an unarmed one if no other way in form of a connected wire can be found towards the next claymore within the chain. Be careful as claymores can also have sympathetic explosions if they are close to another that goes off. So even if not directly connected using a wire two claymores placed next to each other can detonate its neighbour causing the next chainreaction if wired and connected to another claymore.
If you have enough time to set this up you can build several ways for a heavy chain reaction using multiple claymores. Or even a fast setup with two or more grouped claymores covering a full room using some wires guarding/securing each entrance.
|
Smoke Grenades And CDs:

|
Smoke grenades can be useful for marking locations
that need to be seen from a distance, either as a call for help or to indicate a position for team
mates to assist in attacking. They can also be used to help obscure your position from the enemy. They come in two different colors, red and white. There are two ways to toss a smoke grenade: Either go to the
Equipment section in your QA menu and select the type of smoke grenade you wish to toss or select the smoke grenade of your choice as your QA weapon. If you have more than one of a particular type of smoke grenade it will tell you how many of you have. Note that you are unable to place too many smoke grenades in one location.
|

|
From this menu you can drop the CD
if you are carrying it. An alert message will not be sent to the other team if
you drop a CD manually like it will be if you are killed while carrying the CD. This can be
very handy if you are either out of stamina or almost dead and wish to hand the CD off to a team mate.
|
top...
QUICK ACTION MENU:
The Quick Action Menu (QA Menu) can be accessed by pressing the button you have assigned
to your QA Menu (similar to UT's voice menu). Pressing this
button will force a simple menu to appear from the left side of the
screen during game play. This powerful little menu interface
acts as a link between actual game play and the main menu, allowing
you to alter certain features without forcing you to restart the
mission or leave a server. The following are descriptions of
the options provided.
Commands- These are general phrases made by you, a soldier, in response to a situation
or to help coordinate with your team. Any of these commands
can be bound to a key from within the Input menu. See the
appropriate page within this manual for more information.
Note: Orders and other communication between you and your teammates will be indicated by the addition of the "(radioed)" text next to the person's name on the screen. For example, Player(radioed): Go Go Go!
Orders- With this menu option, you can provide specific orders to your team. Any
of these commands can be bound to a key from within the Input
menu. See the appropriate page within this manual for more
information.
Vote- The voting option splits into four additional subsections:
-
Change Location- Offline, the soldier can vote which map he or she would rather be
playing, and immediately after, the game restarts into the
selected map. Online, a soldier's vote is recorded.
All soldiers, alive or dead, can vote for a new map. Once a
majority of soldiers have voted for a map, it will be locked in as
the next map in rotation. Soldiers can change their votes
anytime, but can only vote for each map once. However, the
map doesn't switch until either the round ends or the Restart
Round voting option is chosen.
-
Restart Round- Offline, the round will simply restart as is, and can prove to
be very useful in times when bots aren't quite completing the
mission as you would hope. Online, only living soldiers can
vote for this option. Once greater than 50% of living
soldiers have voted to reset the round, it occurs
immediately. If a majority of soldiers have chosen a new map
as well, then a new mission starts.
-
Kick / Ban Player- For those obnoxious soldiers who a majority feels are being
detrimental to the game, they can be kicked off the server.
This is a team-specific vote however.
-
Switch Teams- If you'd like to quickly balance the teams or if you're setting up a
clan match, this option will let you do that easily. Simply
choose the team (A or B) that you want to be on and when the round
switches or resets, the change will be made. This option can
be used in conjunction with the Restart Round vote.
Switch Loadout- Truly one of the powerful features of the QA Menu is the ability to
change the loadout you have without requiring you to jump off a
server and back to the main menu. Once you choose a new
loadout, it won't be switched until you either respawn, a new round
starts, or a new game starts.
Switch Quick Action Weapon- Here you can choose a light weight weapon as your QA
Weapon that you can use for special situations. For example,
if you need to access your grenades quickly, and your QA Weapon is
set to grenades already, you can press your QA Weapon key rather
than scrolling your mouse wheel or searching for the appropriate
weapon number.
Equipment- This is where you access any equipment or ammunition you might be carrying.
From this menu you can place a claymore or drop a flare. If you have more
than 1 claymore or flare it will tell you how many of you have. Selecting a claymore from this
menu will allow you to drop the claymore at your feet. Once a claymore has been placed and
armed, you can also use this menu to detonate it. All claymores that are currently
armed will be detonated when you select this option. You can not selectively detonate them. From this menu
you can also drop items that are part of the EAS objectives, such as CDs, as well as any ammunition
you might be carrying, even for weapons you do not have in your loadout. This will allow you to carry
ammunition for others in your squad in order to help reduce their bulk load.
top...
HUD:
Infiltration uses a completely redesigned HUD. The changes are subtle, but powerful.
Position indicators, stamina gauge, bulk gauge, damage points, and
weapon indicators are all there. Not to mention the quick
action weapon icon.

Note the "Auto, Burst,
and Semi" modes for the MP5.

Crouching

Prone

Compass showing 1 objective waypoint and one extraction waypoint

Compass showing 2 objective waypoints.

Compass showing 1 objective waypoint and 1 secondary waypoint.
|
Important HUD elements:
The first important area is your
weapons display, located on the bottom of your
screen. Here it lists each weapon in your
inventory, and once selected, how many magazines you are
carrying.
If you move to the lower right corner of the screen, you will see a small soldier
icon with two bars underneath. The soldier represents
your current stance and movement mode. The icon itself will show whether you are in walk,
jog or sprint mode. If you are in jog or crouch mode, and are currently in jog mode as well, you
will see lines indicating movement to the right of your soldier icon.
The next area is your stamina indicator. It's very important to be aware of what your
stamina level is at all times, especially in a firefight where
sprinting forward or falling back quickly may be a matter of
life and death.
Under this value is your bulk indicator, which represents how much equipment you
are carrying. If you are carrying a lot of equipment, this bar will be very short,
indicating that you can't carry much more. As you use up your ammo or drop your
weapons, the amount you are carrying will decrease and thus be reflected in both your bulk
value and your stamina. If you pick up more weapons or ammo, the
opposite will occur.
In the lower left corner of your screen is the compass, which shows you several useful
pieces of information. The direction you are facing is indicated by the rotating compass
tape and the two thin grey lines in the middle of the compass. Objective waypoints are
indicated in either Olive or Tan. Olive waypoints indicate an objective to be taken or
defended, depending on which side you are on. Beige waypoints indicate the extraction
target area. The smaller, rounded points on the compass indicate goals that are not
essential to the mission, but that often will give one team an advantage, such as advancing spawn points.
These waypoints make learning new maps very easy as goals
are more easily located. Tan waypoints indicate an extraction area.
In EAS mode there is another icon that shows up in your HUD, above the soldier icon. For the attackers, this icon is a flag, for the defenders it is a laptop. If you are an attacker,
the flag starts waving if the CD is captured. For the defenders, the laptop starts to animate
if the laptop or other goal, such as a keypad, gets accessed. The laptop will face forward and open if the CD is captured.
The final area of importance is
your Quick Action Weapon (QA Weapon). Located on the
middle left of your screen is an icon displaying a light
weight weapon that can be accessed quickly by pressing your QA
Weapon key. Weapons available for this slot are pistols,
grenades, claymores, and knives.
|
top...
SCORE:
The way
scoring is handled in Infiltration is also unique. If one team wins both rounds
by both completing their objectives when attacking and then defending the objectives successfully when defending then they are overall winner. If each team won one round then the total number of reinforcements available to each team will be compared, including those for a possible overtime. The team with the higher number of reinforcements left will be the winner at that point. This way of counting reinforcements and not only players gives each single life the same value and not only the last one. So if you commit suicide it affects the scoring results. So it can be of value to play on further wounded rather than committing suicide or trying to reach the enemy base as a living grenade. At first glance this might seem to be unfair as defenders have overtime reinforcements and therefore more to work with. However, keep in mind that the only way that this comparison will be the basis for winning is
when both teams win as defenders or both teams win as attackers. This ensures that neither team is given an advantage in this comparison. This way of counting reinforcements gives each single life the same value and not only the last one. If this number of reinforcements is also a tie, then the time to complete the objective or eliminate the other team is used as the basis for comparison, with the team taking the least amount of time being the winner. Again, this can only be the basis of comparison if both teams complete the objective or both teams defend successfully. If the time to complete the objectives is also equal then the result of the match is a tie. Camouflage for the attackers and defenders will remain the same for both teams for each map, so pay special attention in the second round as you will now be wearing the camouflage the enemy wore in the previous round.
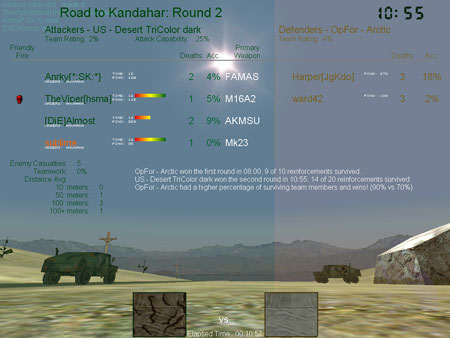
Here you can get a general idea how the scoreboard looks for a typical Specialist game.
We'll quickly go over what each part of the menu does so it's clear. This example shows the end of
the second round of a match.

(click to enlarge)
At the top you can see the name of the current location and the current round in the mission.
You will then see two columns, one for Attackers and one for Defenders. These labels include
names of the camouflage for each team. Under the Attackers you will notice a Team Rating and
an Attack Capability. Under Defenders only Team Rating is shown. Below these labels the players
for each side are listed.
On your side of the scoreboard, which will always be the left side, each member of your team
is listed in alphabetical order. In the Specialist game mode, the Specialist will be shown in orange.
To the left of the names, a Team Kill column is listed. Each time a soldier
kills a member of his or her team, a red skull is placed here.
This will make it easy to identify those potential trouble-makers
and boot them off the server, if necessary.
To the right of the names, you can see the overall health of each soldier.
To the right of this is the number of deaths that particular soldier
has accumulated throughout the mission.
Next to this is the soldier's accuracy. If you have an accuracy higher than
50%, it will start to add a few bonus points to your team's Team Rating score.
To the right of accuracy is the soldier's primary weapon. This
reflects which weapon that soldier is using the most.
Under the soldier names, you can see how many enemy casualties you have
been able to inflict as a team.
The Teamwork percentage is a unique indicator of how well your team is working
together. In essence, it reflects whether or not a kill was
made with at least one teammate within 10 meters (approximately 30
feet) of the person who made the kill. This statistic does
gives you an opportunity to earn bonus points for working
together, but it does not figure into the winner of the match in any way.
Finally, at the bottom you have a Distance Average statistic. This will
show you how many kills have been made from within specific distances.
At the end of a mission, you will see the enemy's overall efficiency as well. These
statistics do not affect the outcome of the match at all. They are simply shown to
give teams an idea of how well they are working together.
At the end of the first round for a location the scoreboard will display the winner of that round,
the time they took to win, and the number of reinforcements they had survive out of the total available.
At the end of the second round, it will display this information again, adding the winner of the second
round under it. This information is followed by an indicator of who won the match and by what criteria.
For more information on this, please see the Scoring section.
top...
MISSIONS AND OBJECTIVES:
Infiltration 2.9 includes the beginnings
of our planned Enhanced Assault (EAS) game mode system. Eventually, this system will
incorporate multiple realistic objectives that can co-exist in
the same mission. Two teams will fill attacker and
defender roles, yet both will have objectives to complete in
order to win.
In this release, the EAS system is still in it's early stages, yet very capable all the
same. While it is preferred to use maps created with EAS in mind, such as the official maps included in this release, standard CTF maps can be played as well whereas the CTF flagbases are turned into mission objectives.
Both modes have been created with a wide range of playing styles in mind. Games can be either fast or slow-paced, depending on settings and preferences. Our Reinforcement Wave system allows for a simulation of waves of attackers or defenders if a slightly faster pace is desired. Combined with Overtime Reinforcements, this style is exciting and tense. For those that wish for a slightly slower pace, a game without any reinforcements might be preferred. Every life counts in games of that nature, so stealth, cunning, and strategy are the key. We strive for flexibility in these game modes and how they are played, giving you and server admins the ability to craft the game as they wish.
Due to the inherent problem of spawn campers in most games with respawns, we have chosen to add snipers to protect spawn vulnerable spawn areas in our maps. If you enter an area protected by one of these snipers you will receive a warning message alerting you to that fact. These snipers fire all types of weapons and vary in accuracy, but they are quite effective in preventing this problem. They are, however, not fool proof. There are times you might be pinned down and have to get yourself out of the jam either by yourself or with the help of your teammates.
EAS:
In this mission style, the
attackers must search for and capture a Top Secret CD from a
laptop, returning it to an extraction point, which is
normally where they enter the mission. However, some
missions will provide you with alternative extraction
points. There are also other objectives that might have to be met in certain maps,
such as placing C4 charges, securing areas, or obtaining items other than a CD.
Anyone on the attacking team may capture the CD. Once in hand, the defenders are alerted to the fact that the CD has been stolen, but they have
no way to tell which player is carrying the CD until they actually spot him with it. Once spotted, either by direct site or through a scope, an alert is sent out from the player who spotted him to the rest of the defenders. When an attacker with the CD
is killed, he drops it to the ground where it can be picked
up by either side. If a defender picks up the CD, it
automatically returns to where it originated to prevent
defenders from hiding themselves, making it impossible for
the attackers to succeed. At the same time, the CD
will automatically return after a while just in case it
happens to fall to a place where it can't be
recovered. Players may also drop the CD in order to enable another teammate to pick it up.
This can be very handy if the person carrying the CD is close to death or very low on stamina.
Specialist:
In this mission style one
player on the attacking team is designated as the Specialist
and has an obvious vest texture on their body. Their name will also appear
in orange in the scoreboard. Again,
the information inside a laptop is an example of a possible target. The
Specialist is a skilled professional sent in to recover this
information, yet is not as highly trained as the rest of the
attacking team in combat. Therefore, his base loadout
is a pistol with 4 or 5 magazines, a couple of grenades, and
an armored vest. That's not to say he can't pick up or
be handed a better weapon any time during the mission, but
his bulk and stamina restrictions are stricter than the average
soldier.
The rest of the attacking team must escort the Specialist with extreme care. Getting
him to the laptop so he can capture the data and getting him
to the extraction point alive is all an attacker should be
concerned with. A Specialist must make sure he's able
to keep up with his teammates, so maintaining a high stamina
level can be critical when you're trying to get away
fast. For this reason, it might not always be wise for a
Specialist to pick up a heavy machine gun or sniper
rifle.
When a Specialist approaches the laptop, they simply press and hold the Use key.
While this is held down, the laptop will animate, and a
timer will start, showing how much more time the Specialist
needs until the data is captured. If the Specialist
moves too far away from the laptop or switches to another weapon,
the process will be interrupted, and he'll have to start
over again. And of course, the specialist must be in front of the laptop in order to use it. Another difference between normal EAS and Specialist modes is the fact that the defenders are not alerted to the fact that the CD has been taken in this mode and will only get the alert if the Specialist is spotted with the CD. If the Specialist drops the CD or is killed, any other attacker is able to pick it up and extract with it. The round will end when the Specialist is out of respawns and there are still objectives only he can accomplish or if the CD is extracted by any of the attackers. An example of an objective only the Specialist can accomplish is the extraction of the CD from the laptop.
As you can see, both mission styles are similar in that the attackers must capture
something of importance. However, both play very differently and require
very different approaches to the same location.
When both teams arrive into the mission, a quick briefing text will appear in their HUD
explaining what each side needs to accomplish for each goal in
an objective. If you need to bring up the briefing text
again at any time, press F3.
Once the objective is accomplished for either the attackers or defenders, the round
ends and both teams switch sides, replaying the mission from
opposite roles. Each mission is timed and the scoreboard
keeps track of who won the first battle as well as their
overall time to complete and the number of reinforcements lost out of the total available.
A time limit can be specified in the Mission Menu which will end the mission accordingly. Setting a time limit for a map also allows you to use the Overtime settings to allow for more reinforcements for the defenders after a set percentage of time has elapsed.
top...


