| Items
/ Power-ups
Here
you will find specific descriptions and strategies for using
the various items and power-ups in JKA.
Click
below to skip to a specific section:
***WARNING!
Read this before proceeding!*** Players
new to JKA should realize that the Multiplayer mode is substantially
different from the Single Player mode. In particular, the
weapons, items, power-ups, and other features are different
in many ways from their offline counterpart. We strongly recommend
playing against Bots (AI simulated multiplayer opponents)
as training for internet or LAN games, as they represent the
type of gameplay you will experience online. However, there
is no substitute for the unpredictability and inventiveness
of human opponents, so eventually you must venture out if
you expect to master the game! Players migrating over from
other FPS games will have many new challenges ahead, including
learning Force Powers,
the Lightsaber, as
well as the different nuances of the game. Even veteran players
of other Dark Forces series games (JK, MotS, etc) will
have many new things to learn. In short, you must "unlearn
what you have learned," to quote a wise Jedi Master.
; )
The
site will be presented with the assumption that players have
already read over the official JKA manual (that comes
with every legitimate copy of the game), readme documentation
and the in-game help ("Rules"). Some material
from these sources may be covered in more detail however.
Items and Power-ups are very important, as they can provide
all sorts of needed replenishments to your health, ammo, and
Force, as well as provide temporary enhancements and abilities.
These items respawn (repear after a certain amount of time)
just like weapons, and so you should know where items are located
in a map, and how long it takes them to respawn. If possible,
knowing which ones your enemies have taken may also help you.
Some
items, when picked up, are added to your personal inventory.
They are used by selecting them in your inventory (using the
inventory next/previous keys) and activating them by pressing
the "use item" key. A "hotkey" can also
be bound to the specific item, to use it instantly, without
having to fumble through the menus (which is why I highly
recommend binding keys to all your frequently used items).
Other items are activated instantly when you contact with
them with your body. Be aware of the effects of each item,
so you can use them effectively.
Remember
you start each game with only the Lightsaber
(or Melee if you didn't assign any Force Points to
Saber Attack), the BlasTech pistol (with infinite ammo), 25
shield points, and a full mana pool. Look for items immediately!
Note:
Pictures are enlarged for clarity, not necessarily to scale.
"Instant"
Med Pack 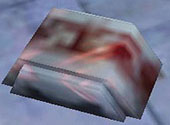
These
small white boxes (that occasionaly glow red) instantly restore
your health points (the red numbers featured on the lefthand
portion of your HUD) when you run over them. Each box restores
up to 25 lost health points, but will not go over your maximum
of 100.
Know
where health packs are and when they will respawn, so you
can always be assured of full health, saving yourself the
need to use the Force to restore health lost in battle. Since
health packs are so sought after, they are also excellent
targets for setting traps (see Weapons
section for details!).
Health
of course is the sustaining element that keeps you alive.
Being hit by dangerous objects that are thrown at you by your
opponent or environmental hazards deplete this precious commodity.
If your health goes to zero, you die, instantly! Be ever watchful
of your health, and always be thinking about where to get
more (or how to get more) when you are injured.
The
ground somersault (hold crouch while running, while holding
the Lightsaber) is an excellent
way to grab Med Packs quickly (by rolling over them). This
is applicable to all pickup items. Remember your enemies are
after them too! It may also be advantageous to guard health
pickups for your teammates.
You
begin the game with 125 health points. However, this total
counts down at a constant rate until you are at the standard
maximum of 100. Also notice how when a character "spawns"
into a game, he or she is surrounded by a green distorting
bubble for a few seconds. This and the extra health are meant
to prevent people from dying right away if they spawn into
a dangerous situation, before they have time to react.
Small
Shield Booster (small Armor pickup, shield battery)
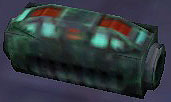
This
small rectangular object (that occasionaly glows green) will
restore up to 25 points to your Shields meter (the green numbers
located on the lefthand side portion of your HUD) but not
go over your maximum of 100.
Shields
are important in that they absorb the damage you sustain from
attacks.
Note
that Force Powers (except for Force Lightning which hits shields
first) and impact damage (from long falls, or being knocked
into walls by Force Push) do direct damage, making shields
useless against them. Shields are drained by damage from energy
weapons, projectiles, explosions and melee strikes (grapples,
punches, kicks).
When
a player recieves damage to his shields, his body will give
off a brief green flash or glow. If there is no glow when
he is hit by conventional weapons or explosions, then you
know he has no shields left!
By
default, you begin the game with 25 shields, barely enough
to protect you from harm, so it is vital to find more as soon
as you can.
Large
Shield Booster (aka "Personal Shield Recharge")
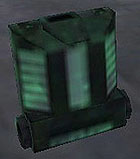
The
"big" version of the Shield Boost (aka "Super
Shield"), this back-pack like object (which occasionaly
glows green) will instantly grant you up to 100 Shield points
when touched. In JKA, you cannot have more than 100 Shield
points at a time.
This
item is of great value, and the locations of these should
be paid careful attention. Do your best to deny your enemies
access to these valuable power-ups!
Shield
Power Converter (aka "Armor Station")
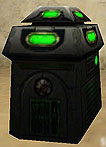
This
small green fire hydrant-like object is immovable, but when
touched and the "use" key is pressed, it will restore
Shield points to the user. Every press of the key restores
about 2 Shield points, and if the key is held down, they come
at a rapid rate.
The
Converter (found only in CTF or Siege games) has a limited
store of Shield Points, and it must recharge in order to get
more. It will make a distinctive sound when it is restoring
shields, and another when it is drained. It seems to restore
itself at about the same rate as it is drained (about 2 points
per 1/5 second). These generators hold roughly 200 Shield points at full charge, and are most often found strategically
placed near Flag bases in CTF maps (providing vital sustaining
protection for defenders, or replenishing fuel for returning
Flag Carriers).
In
JKA the Shield Power Converters (when looked at) show a yellow
status bar. This bar indicates the recharge time needed for
the station to be usable. When it is fully yellow, it's ready,
when it has become gray, it is depleted and needs time to
recharge. In Siege they are the only means of obtaining Shields.
While
sucking the Shield power from a Converter, you can crouch,
without interrupting the flow of energy, however if you look
away from it, the flow stops. Be aware that you are vulnerable
while stocking up on Shields, and the enemy may try to set
a trap for you! Due to the slow nature of the Shield restoration,
it may be better to grab nearby Shield Generators or Shield
Boosts before using the Converter.
Force
Boon 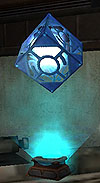
This
Holocron (a floating, box-like device that imparts Jedi wisdom
to the one you picks it up) is generated by a holographic
projector, much like the various Weapons
in the game. Once touched, it automatically activates and
a "sunburst" icon appears in the upper right corner
of the player's screen, with a number that counts down, showing
the amount of time before it wears off. It also imparts a
slight glow to the user.
While
the Force Boon is activated, the user's Mana pool will recharge
itself much more quickly than normal, (but it will not recharge
your Mana when certain toggleable powers are activated, such
as Speed or Seeing).
If
a player that posseses this item is killed, before their Force
Boon wears off, the item will pop out of their corpse, and
can be picked up by another player, with the time remaining
on it available to them for their own purposes.
Even
though the Force Boon accelerates your mana regeneration,
it doesn't help with toggleable powers (such as Speed, Seeing,
Absorb, Mind Trick, etc). When you grab one of these, make
use of instant powers like Heal instead. Be prepared to become
a sought after target once you pick up one of these.
Force
Enlightenment (Light and Dark versions)
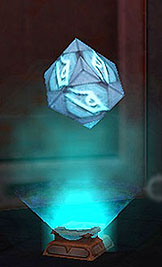 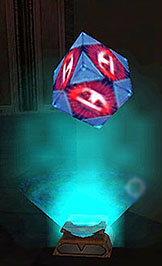
Much
like the Force Boon, this item is also a Holocron, holographically
projected, however there are two versions, one for Dark Jedi
(Dark Enlightenment)
and one for Light Jedi (Light
Enlightenment). As one might expect, the Dark
version is darker in color (with a red "eye" symbol)
than the Light version (with a softer blue and white "eye").
When grabbed, this item maxes out the levels on all Neutral
Powers and Lightsaber Enhancements, as well as granting maxed
out versions of all your side specific (Dark
or Light) powers.
This means that you have every power on your side, at Level
3, for the duration of the item!
This
power is incredibly valuable, as it can give you powers you
did not select, and temporarily enhance all of your powers.
While it is active, an icon with the same color as the Holocron,
with a picture of an eye on it will appear in the upper righthand
corner of your HUD, with the time remaining before it wears
off.
A
Light Enlightened player will give off bright glow, while
a Dark Enlightened player will cast a "dark" glow
(a shadow) until the power-up wears off.
As
one might expect, this is an incredibly valuable power, so
hoard it if you can, from your enemies!
Like
the Force Boon, when a player that posseses this item is killed,
before it wears off, the item will pop out of their corpse,
and can be picked up by another player, with the time remaining
on it available to them for their own purposes. Keep in mind
that a Dark Jedi cannot pick up the Force Enlightenment of
a Light Jedi, and vice versa. In fact, the version opposite
of your side (dark or light) will appear "gray,"
signifying that you can't use it. Note that if you lack a
Lightsaber, picking up this power-up will not grant you one
(you're still stuck with Melee).
Combined
with the Force Boon, a player becomes super powerful, and
will be a sought after target (to gain the power-ups). Know
ALL of the Force powers on your side of the Force, so that
when you pick up this item, you can make full use of its abilities.
Flags
(Red and Blue, for CTF games)
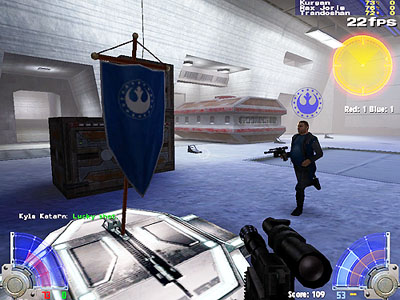
In
the teambased CTF (Capture the Flag) game mode, these
Flags will appear in the base corresponding to their color
(Red for the New Republic team; Blue for the Imperial team).
Running
over the enemy team's flag picks it up (your character is
shown with a huge flag attached to his back, and a flag icon
appears in your HUD). You are now a "Flag Carrier"
and your job is to take the flag and make contact with your
own flag at your own team's base, in order to score. Killing
a Flag Carrier makes them drop the flag they are carrying,
and tagging (by touching it) the dropped flag of your team,
you automatically return it to your base.
Note
that if you suicide (for example by typing 'kill' in the console)
while you are a Flag Carrier, the flag will automatically
be returned. The same applies if you fall into a bottomless
pit!
Click
here for a page
with tips on playing Capture the
Flag.
Weapon
Ammo
All
weapons, except for the Lightsabers,
BlastTech pistol, and Melee require ammunition to be
used. There are several different types of ammunition (Blaster
Pack Ammo, Energy Cells, Metallic Bolts, and Rockets) and
not all weapons use the same types. See the Weapons
section for descriptions of each weapon and its ammo types.
These ammunition restoring items are picked up by running
over them and instantly restore a certain portion of your
ammo count, for the appropriate weapon(s). By default, all
players (except in Siege Mode where
your class determines your starting equipment) begin with
the BlasTech pistol and Lightsaber. Note that once you have
a certain gun in your inventory, you cannot pickup an additional
gun except those dropped by killed players or by Force Pulling
them away from enemies. These guns will restore the amount
of ammo that was in the enemy gun to your own totals.
| 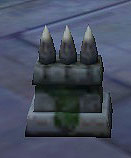
Rocket
Ammo |
|
| 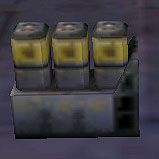
Energy
Cell Ammo |
|
| 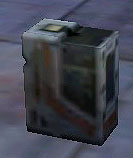
Blaster
Pack Ammo |
|
| 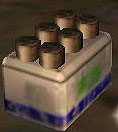
Metallic
Bolt Ammo |
|
Item
Name |
What
you get |
| Thermal
Detonator Belt* |
4
Thermal Detonators |
| Trip
Mine stacks* |
4
Trip Mines |
| Det
Pack pack* |
3
Det Packs |
| Merr-Sonn
Missile Launcher* |
3
Rockets |
| Rocket
Ammo |
3
Rockets |
| Bowcastor* |
100
Energy cells |
| Disruptor* |
100
Energy cells |
| DEMP
2* |
100
Energy cells |
| Energy
Cell Ammo |
100
Energy cells |
| ST
Rifle* |
200
Blaster Pack units |
| Blaster
Pack Ammo |
100
Blaster Pack units |
| Heavy
Repeater* |
100
Metallic bolts |
| Flechette
Launcher* |
100
Metallic bolts |
| Concussion
Rifle* |
50
Metallic bolts |
| Metallic
Bolt Ammo |
100
Metallic bolts |
*
See Weapons page.
| 
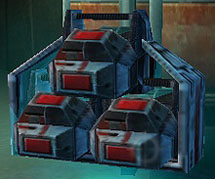
Thermal
Detonator Belt |
| 
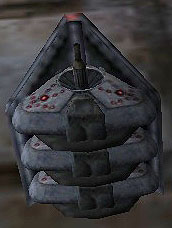
Det
Pack pack |
|
| 
Trip
Mine stack |
|
Note:
If you already have a certain gun, you cannot "pick up"
another one to get more ammo, unless it has been physically
dropped by a dead player (in which case you get whatever ammo
they had left when they died). Remember that players that
are killed only drop the weapon they were holding at the moment
of death (all their other weapons and items disapear) except
Melee, BlastTech pistol or any Lightsabers.
Explosives
(red) all have their own type of ammo, and you can always
pick up more, until you max out your units.
Maximum
Ammo Units Per Weapon
| Weapon
Name |
Max
Ammo |
| Thermal
Detonators |
10
Thermal Detonators |
| Trip
Mines |
10
Trip Mines |
| Det
Packs |
10
Det Packs |
| Merr-Sonn
Missile Launcher |
25
Rockets |
| Bowcastor |
300
Energy cells |
| Disruptor |
300
Energy cells |
| DEMP
2 |
300
Energy cells |
| ST
Rifle |
300
Blaster Pack units |
| Bryar
Pistol* |
300
Blaster Pack units |
| Heavy
Repeater |
300
Metallic bolts |
| Concussion
Rifle |
300
Metallic bolts |
| Flechette
Launcher |
300
Metallic bolts |
*Using cheats or on addon maps that enable this weapon.
Note:
The BlasTech pistol has infinite ammo. Melee weapons (Melee,
Lightsabers, etc) do not use ammo.
For
more information on how many units each weapon uses, head
on over to the Weapons
page.
In the Siege gametype, these values are slightly different. Note these refer to the normal starting values for weapons that are carried by various classes. You normally can't acquire new weapons, and ammo is re-supplied by Techs, Ammo Dispensers and Ammo Stations.
Maximum Ammo Units Per Weapon (SIEGE Only)
| Weapon Name |
Max Ammo |
| Thermal Detonators |
20 Thermal Detonators |
| Trip Mines |
10 or 20 Trip Mines |
| Det Packs |
20 Det Packs |
| Merr-Sonn Missile Launcher |
10 or 25* Rockets |
| Bowcastor |
300 Energy cells |
| Disruptor |
600 Energy cells |
| DEMP 2 |
600 Energy cells |
| ST Rifle |
300 or 600 Blaster Pack units |
| Heavy Repeater |
300 or 600 Metallic bolts |
| Concussion Rifle |
300 Metallic bolts |
| Flechette Launcher |
300 Metallic bolts |
*By picking up Tech dropped Ammo Dispensers, a character possessing the Merr-Sonn (Heavy Weapons) can acquire up to 25 rockets.
Force Power Holocrons 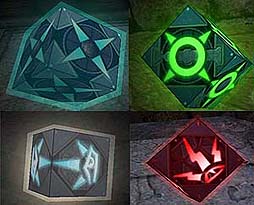
Available only in the Holocron Deathmatch (FFA) gametype (using a mod such as OJP), these Holocrons are inscribed with an icon, respresenting the Force Power they contain. When picked up, they impart upon the holder the ability to use that Force power at level 3 strength. If the player is killed, he drops the Holocron(s) he has picked up for others to use. You can only hold three Holocrons (default, the server can choose a number from 1-3 or "unlimited" but only three holocrons will be shown swirling around the player) at a time, and picking up another one, will cause you to drop the first of the three that you picked up in favor of the new one.
Dropped holocrons only last for a short time (20-30 seconds) before disapearing. They will of course respawn in their usual spots.
In addition to the usual Neutral, Dark and Light Side force powers (which you can mix and match) there are also holocrons for the various Lightsaber Enhancements.
Some interesting combinations appear. Of note is that Absorb or Protect cannot be combined with Dark Rage (either power forces Dark Rage to go into recovery immediately). Without a Holocron, players are limited to Level 1 Force Jump and Level 1 Saber Attack.
See the section Force section for details on individual powers.
Visit this page for tips on the Holocron gametype in JKA.
Once
you have become familiar with the various Items and Powerups
in the game, you should move on to the Weapons
and Force sections.
|