| The
Lightsaber
The
Lightsaber, "an elegant weapon, from a more civilized
age," as a wise Jedi Master once said, is by far,
the single most complicated weapon to master in JKA's multiplayer.
While
it is fun to use, and definately powerful and versatile (when
combined with the Force), I do not consider it the ultimate
weapon for all situations. In fact, I consider it folly to
use it in certain situations when better weapons are available.
Still, some players swear by it as their sole weapon of honor,
so do what you feel is best, according to your own playing
style. However, our strategies are designed to optimize your
chances of winning the game, if you take them to heart, so
bear that in mind.
This
section will take you through the basics of the Lightsaber,
various special abilities you gain when using the weapon,
and on to more advanced strategies and techniques.
There
are three types of Lightsaber weapons in the game. Skip ahead
to a section below:
***WARNING!
Read this before proceeding!*** Players
new to JKA should realize that the Multiplayer mode is substantially
different from the Single Player mode. In particular, the
weapons, items, power-ups, and other features are different
in many ways from their offline counterpart. We strongly recommend
playing against Bots (AI simulated multiplayer opponents)
as training for internet or LAN games, as they represent the
type of gameplay you will experience online. However, there
is no substitute for the unpredictability and inventiveness
of human opponents, so eventually you must venture out if
you expect to master the game! Players migrating over from
other FPS games will have many new challenges ahead, including
learning Force Powers, the
Lightsaber, as well as the
different nuances of the game. Even veteran players of other
Dark Forces series games (JK, MotS, etc) will have
many new things to learn. In short, you must "unlearn
what you have learned," to quote a wise Jedi Master.
; )
The
site will be presented with the assumption that players have
already read over the official JKA manual (that comes
with every legitimate copy of the game), readme documentation
and the in-game help ("Rules"). Some material
from these sources may be covered in more detail however.
Lightsaber
- Weapon Stats 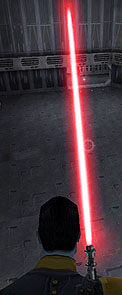
| Weapon
Type |
Melee |
| Ammo
Type |
N/A |
| Ammo
Use |
N/A |
| Primary
Fire |
Swing
blade (varies with stance and movement directions) |
| Secondary
Fire |
Saber
Throw (if Force points assigned to this power) |
| Rate
of Fire |
Slow
(Red stance) to Fast (Blue stance).
Saber
Throw: Slow to Fast (depends on how quickly saber comes
back) |
| Range |
Good
(Primary) to Medium (Saber Throw) |
| Damage |
Medium
to Very High (Low for a swinging saber merely brushing
a limb) |
| Danger
Level |
None.
Cannot harm user |
By
default, six colors can be chosen for the Lightsaber's energy
blade:
Blue,
Green, Yellow, Orange, Purple (actually Pink/Violet), and
Red. Ten hilt designs are also available.
The
colors and hilts have no affect on the actual performance
of the saber, and depend solely on player preference. In team
games, players will be forced to use a saber color that matches
their team color (red or blue).
The
Lightsaber is a very dangerous weapon. A mere touch of the
swinging blade can cause damage to enemies it touches.
Normally in JKA, a touch of an ignited blade does no damage
if an attack is not in progress. In most team games, your
saber cannot damage your allies, but it is considered rude
and is counter-productive to go about playfully striking your
teammates.
A
single well placed hit can kill even the most heavily shielded
foes, and fast, repeated blows can whittle down your enemies
in seconds. Powerful hits can send an opponent reeling. The
blade itself can block blaster shots and small projectiles,
even sending them back towards the player who fired them (this
skill varies depending on the angle of the shots and level
of Saber Defense that is assigned).
To
block shots with the saber, simply "aim" at the
enemy doing the firing, while not attacking. Focusing on the
head of the person firing helps increase the chance that you'll
get a good angle on them. But don't relax however, as your
opponent will try to vary the angle of their shots and aim
for your vulnerable areas (your non-saber side, your back,
and below the belt). An overconfident Saber-user is an easy
target for experienced gunners, so watch out! Close the distance
and slash your opponent down, disarming them if possible (with
Force Pull) and using your other Force powers to augment the
saber's strengths. Similar techniques are employed in blocking
other Saber blades. If someone throws their blade at you,
don't panic, this too can be blocked.
The
saber can be turned off (hit the "select saber"
key a second time) for purposes of stealth (since the Saber
gives off a bright colored glow around your character and
an audible hum, giving away your position). It will flare
up again if thrown or swung, ready for action.
First
Person Lightsaber (almost!):
It
IS possible to use the Dual Lightsabers in Pseudo Person POV
in multiplayer (by default you are limited to Third Person
only). However, since there is no semi-transparent skin, your
characters head still partially obscures the action. Go to
the console and type in this command:
CG_fpls
1
Now
the Dual Lightsabers will default to a Pseudo-First Person
viewpoint when used. Type the command again with a 0 instead
of a 1 and it will default back to normal. You can also bind
the command to a key or put it into a CFG file for easy access.
Decide for yourself if it's easier for you.
I
find that blocking blaster shots is somewhat easier to do
in this mode.
A mod that makes true First Person Lightsaber possible in Multiplayer is OJP mod, Check it out!
It
has often been said that any Lightsaber in the hands of a
beginner can be laughable, but in the hands of a master, something
to be feared. To help work your way from the former to the
latter, I advise reviewing and practicing the following techniques:
Acrobatic
Moves (Saber/Melee
Special Abilities)
These moves are performed
while holding a Lightsaber (of any type or stance, regardless
of whether your blade on (ignited) or not.
All
of these moves can be performed by a player that is in Melee
mode (fists), though some require the use of Force (and thus
cannot be used by non-Jedi) and a few require that g_debugmelee
1 be enabled for Melee users to perform them.
Melee mode of course can be chosen by Jedi by simply not assigning
any Force Points in your profile to Saber Attack.
Acrobatic
moves are generally used for navigating the world around you,
to confuse your opponent and out-manuver them in combat, and
to temporarily avoid dangers (though if timed poorly, these
moves may actually send you into more danger rather than away
from it).
Backflip
Jump
(while backing into wall)
Not
very useful, except to propel you back into a fight if backed
into a wall. You perform a mid-air somersault and use about
6 force mana points.
Requires Level 1 Force Jump.
Force
Jump, Force Flip, "Advanced Jump" & "Knee
Tuck"
Hold
Jump (this is a Force Jump as opposed to a normal jump, performed
by simply a quick tap on the key). These can all be performed
so long as you have Level 1 Force Jump or higher and some
amount of force mana left.
For
"Advanced Jump" hold a movement direction to run,
then jump, but as you do so release the direction key (rather
than holding both down). Moving forward you will spread your
arms outward and arch your body forward. If done to the left
or right (with the strafe keys) you'll arch your body in that
direction with your elbow out.
Advanced
jump really doesn't seem to help much, it just looks cool,
if you get bored of doing "Force Flips" (simply
a Force Jump + Direction) all the time or the boring "normal"
jump animation.
The
"Knee Tuck" is more useful for Single Player, but
it simply entails hold crouch at the height of your jump to
tuck your knees slightly, which can gain an extra inch for
your feet, allowing you to reach a ledge you normally don't
have enough clearance to swing your legs over and land on.
Rarely useful, but its there.
Tapping
jump lightly and repeatedly is very useful in JKA. Your regular
jumps are slightly higher than in Jedi Outcast (and so by
extension are your Force Jumps). Strafing forward while tapping
jump in this manner is sometimes called "bunny hopping"
or "strafe jumping/running." Combined with Speed
or Rage, this allows you to cover slightly more distance in
a shorter period. This gives you more mobility and makes you
a more difficult target to lock onto (useful in CTF or Siege
games). Even without Rage or Speed, "bunny hopping"
can be useful, especially when you're wishing to conserve
Force (often for that big burst of Speed later!).
Somersault
(ground roll) Hold
crouch while running forward, backward, or strafing to the
sides. You will roll in the chosen direction a few feet. This
can be used as you land from a jump to lessen the potential
damage from a fall, or as an escape tactic. Be careful you
don't roll off a cliff!
You
also cannot attack while the roll is being performed until
the roll is completed, in which time you can execute the "Roll
ing Stab" move. Uses no mana (unless
you do the "Rolling Stab" in which case you use
25 mana points).
It
is possible to control the direction of your roll,
by "looking" in the direction you wish to move with
your mouse (you can even roll in a circle).
Another
use for this move is to roll under the blue beams of Laser
Tripmines.
Knockdowns:
In
JKA you can be "knocked down" (onto the ground)
in a variety of ways.
You
can be kicked by Saberstaff or Melee users (the latter only
if the server allows g_debugmelee 1).
Certain
spinning moves done by Saberstaff or Dual Saber users may
cause you to be knocked down.
High
levels of Force Push or Force Pull used at the right moment
may toss you to the ground.
The
Secondary firing mode of the Concussion Rifle (see weapons
section for details) can toss your body into the air and leave
you flat on your back.
And
finally, if you approach a knocked down player, they may "kick
back" and knock you down as well.
When
knocked down you are vulnerable to virtually every attack
imaginable and won't get up automatically for several seconds.
It is thus advisable to get up and out of danger as rapidly
as possible.
Note
also that if you're in first person mode a quick tap of the
change Perspective/POV key may help you assess your situation
better as you try to get up, seeing all possible threats.
Jump
Kick From Knockdown
Rapidly
Tap Jump while knocked down (or hold forward or backward while
knocked down).
This
move causes your player to "flip up" into a standing
position from a knockdown, while kicking out with both feet
forward. If your enemy is standing over you, this can allow
you to knock them back or even down as well, turning the tables
on them!
Requires
Level 1 Force Jump.
Jump
Up From Knockdown
Hold
Jump while knocked down.
This
move causes your player to "hop up" faster than
waiting for you get automatically get up (which takes several
seconds). Usually though its more fun to Kick up than simply
to jump.
Requires
Level 1 Force Jump.
Roll
From Knockdown
Strafe
Left or Strafe Right while knocked down.
If
you're on the ground and you don't have time to flip or kick
up, use this move to "roll" away out of danger (giving
you more time to get up in a safer position).
This
move is an excellent way to avoid someone doing a Ground Attack
(stab downward) strike on your vulernable body. Be careful
not to roll off a cliff!
Be
prepared to execute a flip up or kick up after rolling, since
the longer you spend on the ground, the more chances for your
enemy to kill you more easily.
Run
Up Wall - Backflip
(aka
Backflip Off Wall)
Run
towards wall and hit Jump just before you hit it.
This
move, if timed correctly will allow you to run straight up
a wall for a short distance, then automatically backflip off
at the end. You can press Jump anytime during the run to do
the backflip portion immediately. Double tapping Jump as you
hit the wall (in the above execution) will seem more like
a regular Backflip off the wall.
This
can have use as a showy escape tactic (when otherwise backed
against a wall) or to perform some acrobatic feat in order
to manuver to another platform on the map that is otherwise
unaccessible.
Requires
at least Level 1(?)
Force Jump.
Side-Flip
Off Wall
Strafe
Left or Right While Parallel to Wall
Only
works on "straight" (not curved) walls. This move
causes you to flip sideways away from the wall. It uses about
6 force mana points
and requires at least Level 2 Force Jump. The mana it uses
usually has recharged by the time you land from the move under
normal "Full Force" settings (default mana regen
rate of 200, Force Mastery Level 7).
Wall
Grab Jump (aka
Wall Stick)
Jump, then Press and Hold
Jump again as you touch a wall
Only
works on "straight" (not curved) walls. This move
allows you to momentarily "sit" on a wall, then
push off in the opposite direction (and slightly upward).
The "grap" itself can be done from a normal jump
(not just a Force Jump) but the "pushing off" motion
uses about 6 force mana points
(which recharge quickly enough) and the move itself requires
Level 3 Force Jump.
You
can grab a wall from the side or back (with your back to the
wall) as well as from the front. As you approach in the air,
simply hold a direction towards the wall along with hitting
jump and you can stick facing whatever direction you desire.
If
the server has g_debugmelee 1 set,
you can do your best Spider-Man impression and stick to walls
forever (so long as you hold down the jump button)! Note that
you are highly vulnerable while sticking to the wall, but
this can be used to aide in ambushes or to hide from opponents
that lack Force Seeing.
While
sticking to a wall, you can only use certain Force Powers
(Absorb, Protect, Dark Rage, Seeing, Heal). Use of other powers
may cause you to automatically "push off" the wall.
You cannot switch weapons or attack and use of the move forces
your saber(s) to turn off.
Finally
(and this is especially important if you have g_debugmelee
1 turned on), your force mana will NOT recharge
while you are sticking to a wall!
Wall-Run
(aka Wall Dash)
Your
character will hop up on the side of the wall and jog along
it for a bit, a good escape manuver or to help you get over
a wall to a higher level easier.
A
simple move really, simply press Forward+Strafe+Jump while
parallel to a smooth wall (curved or sloping walls don't usually
work). You have some control over yourself while you are walking
(you can chain saber attacks or jumps with it).
Uses
about 5 force mana points,
requires at least Level 2 Force Jump. Can be used even if
you are out of Mana.
If
you hold the "backward" (aka backpedal) key while
performing a Wall Run you will only go half as far. This allows
you to limit the distance of your Wall Run if you so choose.
Lightsaber
Stances There
are three stances (or "styles") for the Lightsaber
(accessed by clicking the "change stance" key).
The current stance is shown on the right side of the HUD,
just above your Lightsaber icon and Force Mana Pool indicator.
The color shows the current stance. When a player starts the
game, Blue is selected by default. Get to know what each stance
looks like, so you can be ready to counter the moves of your
opponent.
Each
stance appears visually when the lightsaber is ignited and
the user is standing still. You can thus help hide what stance
you're about to use in a duel by turning your saber off momentarily
(dangerous, but sometimes useful) or running around.
The
three stances are (and from now on will be referred to by
their proper names):
Fast
(Blue):
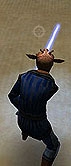
Fastest
swings, virtually unlimited chainable combos and lots of spin
moves. Best overall blocking ability for blaster shots and
projectiles. Blocking against Medium and especially Strong
stances are sometimes less effective. These swings also tend
to do the least amount of damage of the three stances. This
is the stance that all Lightsaber carriers possess by default.
The
official documentation recommends this stance for battling
non Lightsaber opponents (though I've found it can be quite
useful in dueling as well).
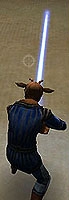
Medium
(Yellow):
Medium
speed swings, do medium damage, and have less spins and chainable
combos than Fast stance. More effective at blocking against
Strong stance.
The
official documentation recommends this stance for battling
multiple saber wielding opponents (though I've found it can
be useful in dueling as well).
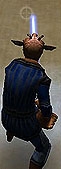
Strong
(Red):
Slow,
deliberate and powerful swings. The character treats the blade as if it is "heavy" leading some to nickname this "Heavy Stance." This stance has some of the
most damaging attacks of any weapon in the game. However there
is a wind-up and follow-through for many of them that makes
them easy to see coming, and avoid (or counter-attack). Use
with care! Can knock aside Fast blocks with ease, if done
properly. This style has the nickname "bat saber"
in some circles, in the way that some of the attacks have
the effect of a baseball bat on foes (knocking them around
or tossing them to the ground like rag-dolls).The
official documentation recommends this stance for battling
against a single saber wielding opponent.
You
can chain moves into combos with this stance, but far fewer
than the others.
The
game literature recommends Fast
stance when facing multiple opponents who lack Lightsabers;
Medium for facing
multiple Lightsaber wielding opponents and for general use;
and Strong stance
for facing one Lightsaber wielding opponent. It is possible
to use the Strong stance in a room full of enemies, with broad
swings to wipe them out, but this is very dangerous and should
only be attempted by advanced users. These
stances are not merely personal preference, but have different
strengths and weaknesses and work better in different situations.
Thus you may find yourself changing stances frequently in
battle, and this makes it important to learn all three. Your
enemies may also like to use certain stances, so you will
want to know what they are capable of.
In
addition to their various attributes, each stance has certain
moves unique to it.
Stance
Specific Lightsaber Moves As
the heading implies, these moves can only be performed while
in the specified stance.
Fast:
Uppercut
Thrust (aka "Lunge"):
Crouch+Forward+Attack
This
move produces an "uppercut" swing as your character
lunges forward and uses 25 force
mana points.
The
strike itself has poor range (like most Fast stance attacks)
compared to the other stances, but is a good suprise move,
if your timing is good.
Fast
Attack Kata:
Attack
+ Alt Attack
Press
Primary and Secondary Attack keys firmly together to do a
swirly series of fast strikes. Using 50
force mana points, it is an excellent move
to whittle down your opponent's health or to attack a group
of enemies, though it can be easily dodged.
Medium:
Flipping
Slash (aka "Yellow DFA," Flip Attack):
Forward+Jump+Attack
Perform
this move when your enemy is directly in front of you. You'll
flip into the air and strike, then do a flourish with your
blade when you land. This latter part of the move is rather
slow, but has a wide sweep, making it possible to take out
multiple enemies at once if done in a group melee. It also
leaves you vulnerable if it misses. Uses 25
force mana points.
Medium
Attack Kata:
Attack
+ Alt Attack
Press
Primary and Secondary Attack keys firmly together to do a
swirly series of medium strikes. An excellent move to whittle
down your opponent's health or to attack a group of enemies,
though it can be easily dodged.
Strong:
Lunging
Overhead Chop (aka "Death from Above," Jump Attack):
Forward+Jump+Attack
Character
leaps forward while swinging his blade directly overhead and
stabbing it to the floor. Using 25
force mana points, this can be an excellent
finishing blow, if timed properly, on a fallen opponent or
as a surprise move.
Somewhat
tricky to get the timing down at first, this move is done
by tapping the aforementioned buttons quickly. The move is
not that powerful and uses mana, but is unblockable.
With
practice, you can execute the move after coming down from
a jump, while running forward, etc, pretty much anytime.
If
done correctly, you'll see the move execute (with a whooshing
sound like Force Jump).
Mixing
up your swings is a good idea to prevent it being too easily
expected. You cannot change direction once the move has started
and are vulnerable for a moment as the move ends.
Strong
Attack Kata:
Attack
+ Alt Attack
Press
Primary and Secondary Attack keys firmly together to do a
swirling series of strong strikes. Using 50
force mana points, it is an excellent move
to whittle down your opponent's health or to attack a group
of enemies, though it can be easily dodged.
Lightsaber
Attacks The
Lightsaber has a variety of different attack swings. Think
of each "stance" as a seperate weapon. For each
stance, memorize what each swing looks like (noting its speed
and damage), and how it hits a target (practice on a wall
or other object where you can see it hit and make marks).
As in many fighting games, this technique for learning the
saber will make each move more automatic, and may help you
anticipate the moves of your opponent in order to better counter
them (in a saber duel for example). Keep in mind that the
same moves vary in strength, speed, and range as well as animation
depending on your Saber Stance (see that section for details).
Backstab
/ Backslash
Back+Attack
This fabled move has the air of "coolness" about
it. Your character leans back with a stab directly behind
him with the saber, running through anyone foolish enough
to be in the way.
To
do this move, press Back+Attack while the enemy is directly
behind you. It is somewhat slow and can be dodged, but is
seemingly impossible to block and can be deadly in one hit
if successful. A good surprise move, especially when being
"snuck up on" during a saber fight.
With
Fast stance, the move is a quick backstab. With Medium and
Strong stances, a spinning slash (or "back sweep").
Reportedly,
some players adopt the tactic of, for lack of a better term
"ass fighting" which is to say, they have their
back to their opponent for the majority of the battle, and
continually attempt to execute this move. I do not recommend
this tactic, as it makes your actions very predictable to
your opponent, and leaves you totally open to attack, while
your back is unprotected.
Forward
Vertical Slice Forward+Attack
OR Backward+Attack
A
quick top-down slash that can be good for hitting enemies
that are higher or lower than you.
Horizontal
Side-Swipe Strafe
Left/Right+Attack
If
you strafe to the right while swinging, you'll swing from
the opposite direction. Great for hitting a forward (and moving)
target. I find that sometimes it helps to rapidly strafe back
and forth while tapping the key (especially while using Force
Dark Rage or Force Speed) resulting in rapid sweeps back and
forth if your time is right, which can wear down an opponent
fast.
Be
careful however, since the big sweeps can be slow, leaving
an opening for your opponent to counter-attack.
With
Fast stance, holding strafe and the attack button can result
in your character spinning round and round with the saber
(which may or may not be useful, depending on the situation).
Diagonal
Downward Slash
Strafe
Left/Right+Forward+Attack
Great
for hitting a stationary target, this slash has limited range,
but is fast.
Diagonal
Upward Slash Strafe
Left/Right+Backward+Attack
The
opposite of the above move, it can be excellent against crouching
or jumping foes.
Attack
Kata
Attack
+ Alt Attack
Depending
upon the stance used, performs a series of swirling slashes,
sometimes with movement of the player's body. Devestating
if timed correctly, but leaves you open and is easily dodged.
Varies with stance (see each stance section for details on
variants).
Attack
Enemy on Ground Hold
Forward + Attack (near fallen enemy body)
This
is a "finishing move" which uses no mana, causing
you to leap into the air and land with downward stab through
the fallen opponent's body. Most of the time it is fatal,
considering the person is not blocking, however it is also
easily dodged.
A
fallen opponent can hold jump to get up quickly before the
move hits (in time to block), roll away using the strafing
keys or tap jump rapidly to "kick up" and knock
back the would-be ground stabber.
The
move also has the tendency to "miss" if you're not
lined up with the body properly.
Stab
Forward (aka
Roll Stab)
Crouch+Forward
then attack (as roll completes)
Uses
25 force mana points,
thrusting your blade forward after a roll. Can be dodged,
but is difficult (if not impossible) to block. Without sufficient
mana, the move cannot be performed.
Cartwheel
Strafe
Left/Right+Attack
Uses
25 force mana points,
and virtually identical to the move when used by a Single
Saber user, this move causes a sideways mid-air cartwheel
with blades extended. Not so much an attack as an escape move
to sidestep attacks or to hop over some terrain.
Saber
Challenges The
Saber Challenge is when, during a FFA (Free for All, that
is deathmatch) game, on a server where it is enabled, a player
targets you (from a short distance away, about Grip range)
and presses their Saber Challenge Key ('K' by default). When
they do this, text will appear on your screen showing you
have been challenged. To accept the challenge, press your
own Saber Challenge Key. You do not have to accept a challenge,
and you may need to do the procedure again if you wait too
long or get out of sight.
Once
accepted, the combatants will freeze in place, a short distance
apart, facing one another. They will begin to glow (with transparent
white auras from their Point of View, and with dark blue auras
from other players' POV), indicating that they are protected
from outside attacks. No other players may damage them during
the duel, however, they can "get in the way" which
is considered annoying and rude. Thus it is recommended that
Saber Challenges take place a safe distance away from the
general melee and firefights on a map.
To
start the battle, the announcer will say "Begin!"
and the fight begins (with both players sabers igniting simultaneously
if they are not already active). The battle continues until
one player dies, or the combatants get too far apart (text
will say that the duel was "severed").
During
the duel, Force Powers are limited (you can use Saber Throw,
Jump or the various Saber related special moves) and only
the Lightsaber weapons can be used. Also during the duel Saber
Locks are possible (see that section for details). The winner
of the duel will have their health restored to maximum, and
the gameplay will resume as normal.
One
thing to watch out for when getting ready to accept a duel,
is the fact that you can be hurt just before the battle begins,
and thus be at a disadvantage without full health or armor.
This can occur if your enemy takes a "cheap shot"
at you before accepting the challenge (watch out) or if an
outside player hits you by accident (or on purpose). It is
best not to whine when this occurs, but it could be pointed
out as a point of ettiquette, since that is the purpose of
a duel, to have a one on one battle (outside the FFA game
where anything goes). Still, with enough skill, you should
be able to win the battle, even if your health is not at maximum,
and it won't help anyone to whine and complain if you did
not choose a safe place to have your duel.
There
is something of a point of controversy about Saber Challenges
among some player circles. Most of the time, a FFA server
will have "Lightsaber Challenge" allowed. In most
cases, this means one set of combatants can engaged in one
of these duels at a time. What sometimes will occur is that
players will assume that the game revolves around waiting
for this duel, and that no one should do any fighting outside
of it. Some players prefer to keep their saber "off"
before engaging the Challenge. This however, leaves them ripe
targets for snipers, since they cannot block anything (and
they are still dangerous, able to whip out the saber instantly
in an attack). I feel it is a better approach to keep your
saber out when challenging, since it won't matter anyway once
the duel begins (both players activate sabers automatically).
If
you join a server and find that there are certain expectations
relating to Saber Challenges, and you do not agree, it may
be good to find another server, as some people can get quite
upset. If you are the host of the server, and present, I feel
it is incumbant on you to explain the rules to new players
joining. After all, not everyone will be familiar with your
own "house rules." Binding a key to a line of text
explaining the rules clearly and concisely can save you time
in this.
Personally
I find it much easier to run or join a Duel server than rely
on Saber Challenges, since it has all the benefits of the
Saber Challenge duel (you can observe those fighting when
its not your turn, in spectator mode; you can limit Force
to make battles last longer; you get access to Saber Locks;
no need to worry about being hit by people not involved in
the duel, etc) with other benefits. For example there is no
glow surrounding the fighters, and other players cannot "get
in the way." As in spectator mode (automatic when you
are not actually fighting) you can view the battle from the
POV of either combatant. However the Saber Challenge can be
a nice change of pace from the chaos of a deathmatch, or to
match the egos of players who can't seem to beat each other
using the rest of the weapons. =)
Unfortunately,
bots never accept Saber Challenges.
Saber
Locks
When
two players are fighting with their sabers (in either Duel
Mode, or during a Lightsaber Challenge), often a series of
close range swings or if players begin to touch each other's
blades, a "Lock" will occur.
At
first these locks may seem random, but in general, when two
swings collide at close range (regardless of the stances used)
a lock will occur.
The
two players face each other as their blades press against
each other and they strain to overthrow each other, with sparks
flying everywhere. Players tap their "attack" keys
repeatedly to try to win the struggle. The winner of a lock
will shove his opponent to the ground (much like the effect
of Force Push) and can set him up for a free hit or killing
blow.
A
saber lock will last a maximum of 10 seconds, with the result
being either the loser being thrown to the ground, or both
players being pushed back (in the case of a tie). During the
lock, the manual recommends using Force Push to give you a
chance of an advantage over your opponent. It is true this
is sometimes effective, breaking you out of the lock early
and beating your opponent.
Some
have suggested ways of winning locks that might be considered
cheating in some circles. For example many controllers have
a "rapid fire" setting or a script can be written
to have rapid attacks. However, even for these cases, it seems
that pure button mashing can still come out on top. I recommend,
if you are involved in many saber locks, to bind a key to
your keyboard (don't break your parent's/friend's keyboard!)
for attack, even if you already have attack mapped on your
mouse (as I do). That way you'll resist wear and tear on your
mouse, and you can pound it a lot quicker than clicking your
mouse.
Be
ready however, if you lose, to get back up again (tap jump
key repeatedly to get up faster) and be ready to use force
and whatever you can to avoid a death blow!
"...It IS possible to disarm your
enemy within a saber lock. Very easy. Your enemy just has
to be low on HP (>20?) and you have to win the saber lock.
It gives a pretty cool animation, the
hand gets chopped off and the person dies.
However it only works with very low
HP and after winning the saber lock which would result in
death anyway (knocked down + blue stance + low HP = dead).
" - Aeth S'kray, Academy
Jedi Knight
For
more info on dismemberment in multiplayer, see below:
Dismemberment
(Optional)
With
the Lightsaber it is possible to cut off an enemy's limbs
in multiplayer. However, both the server and the client must
have this feature turned on.
Add/modify
the following lines in your autoexec.cfg
file (or whatever cfg file you use for MP):
seta
g_dismember "100"
seta cg_dismember "3"
(note,
cg_dismember can be set higher, but only needs to be set to
0, 1, 2, or 3. 0 is no dismemberment and the default, 2 is
limited dismemberment with no heads or torso cuts, while 3
is full dismemberment allowed, at the probability set by the
server). Thanks
to Amidala of Chop Chop for the
details!
The
first one is for the server and equals the probability of
dismemberment occuring during saber kills. Thus "100"
equals 100% of saber kills will result in some kind of dismemberment.
Meaning
if people join your game and have the second line, they will
see full dismemberment. I find it adds just a little bit more
of a Star Wars feel to the game (though it doesn't affect
gameplay in the least).
Once
you have become familiar with the Lightsaber, you should review
the Force Powers and Weapons
pages in our other sections.
|

