|

Objectives: Photograph classified documents in library. Locate and set 3 explosive charges. The explosive charges aren't always in the same place, so it's wise to explore every inch of the level until you locate all three (the explosives are attached to flammable barrels). The walk-through will take you through the areas but won't describe each bomb site - since they can be different. There's a guard ahead of your position and an intelligence item (a note) attached to the wall to the left. Wait until the guard ahead is coming back toward you and take him out with a silenced pistol. Enter the bright door on the left. Move ahead slowly and listen to the guards' conversation. Lure them into your area and take them out (to avoid the camera spotting the dead bodies). Follow the corridor to the intersection. To the left is a guard standing behind a desk and a camera overhead; to the right is a warehouse. Several guards are also in the area. If the alarm isn't activated, attempt to lure the guards away from the camera before you kill them. There's also an intelligence item inside the room with the desk (or it may be inside the room with where the guards are talking).
You're overlooking another warehouse. Kill the guards below. Snag the intelligence item from on top of the crates. Exit via the garage door to the left (open the door with the switch on the right). There are a couple of guards out here and a camera on the other side of the van. Remember this location, as it's your eventual goal (the door behind the van). Enter the door to the left for now. Follow the hall to another door on the right. A guard stands on a catwalk. You can lure him with a coin to avoid detection by the camera. Battle through the area and locate the stairs on the far side. You will emerge outside near the padlocked gate you picked. Return to the area with the van. You should have activated all three bombs by this point. If not, explore the areas again to find the bomb you missed.
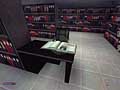
Exit the first library room, then go left and into the door on the right. You're now in the second library room. Pull out the sunglasses and take a picture of the second ledger. Objective: Rendezvous with Werner von Haupt and offer him a light. Go right from the library entrance, then head downstairs and through the double doors leading outside. Several guards are here with Werner on the left. Approach Werner and use your lighter to give him a light. Watch the cutscene. At the dialogue choice, respond with: "Sorry I did my best." Werner hands you an ID card to help you get past the scientists in the next area. Objective: Locate the hidden entrance to the facility. Return to the library. Search the upper floor for an intelligence item. Your goal lies in the basement. Open the door down there (it was previously locked until you talked to Werner). You may receive another objective to refresh your memory about your contacts' clues. Objective: In the basement of the library... behind the shelf. Locate the empty shelf and use the shelf to move it aside. The process reveals a secret passage. Enter the passage to proceed to scene 3.
|