| The
SaberStaff (aka "Lightstaff","Double Bladed
Lightsaber")
The
Saberstaff is an unconventional weapon even among the ancient
traditions of the Jedi. Its use has been primarily limited
to wild and legendary figures (often followers of the Sith
cult) such as Exar Kun, and Darth Maul. Whatever its origins,
it takes a different kind of mastery to use it effectively
in battle.
While
it is fun to use, and definately powerful and versatile (when
combined with the Force), I do not consider it the ultimate
weapon for all situations. In fact, I consider it folly to
use it in certain situations when better weapons are available.
Still, some players swear by it as their sole weapon of honor,
so do what you feel is best, according to your own playing
style. However, our strategies are designed to optimize your
chances of winning the game, if you take them to heart, so
bear that in mind.
This
section will take you through the basics of the saberstaff,
various special abilities you gain when using the weapon,
and on to more advanced strategies and techniques.
There
are three types of Lightsaber weapons in the game. Skip ahead
to a section below:
***WARNING!
Read this before proceeding!*** Players
new to JKA should realize that the Multiplayer mode is substantially
different from the Single Player mode. In particular, the
weapons, items, power-ups, and other features are different
in many ways from their offline counterpart. We strongly recommend
playing against Bots (AI simulated multiplayer opponents)
as training for internet or LAN games, as they represent the
type of gameplay you will experience online. However, there
is no substitute for the unpredictability and inventiveness
of human opponents, so eventually you must venture out if
you expect to master the game! Players migrating over from
other FPS games will have many new challenges ahead, including
learning Force Powers, the
Lightsaber, as well as the
different nuances of the game. Even veteran players of other
Dark Forces series games (JK, MotS, etc) will have
many new things to learn. In short, you must "unlearn
what you have learned," to quote a wise Jedi Master.
; )
The
site will be presented with the assumption that players have
already read over the official JKA manual (that comes
with every legitimate copy of the game), readme documentation
and the in-game help ("Rules"). Some material
from these sources may be covered in more detail however.
Saberstaff
- Weapon Stats 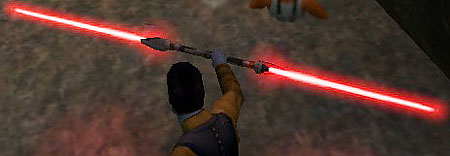
| Weapon
Type |
Melee |
| Ammo
Type |
N/A |
| Ammo
Use |
N/A |
| Primary
Fire |
Swing
blade (varies with stance and movement directions) |
| Secondary
Fire |
Kick
(melee attack) |
| Rate
of Fire |
Varies
with swing (slow to fast) |
| Range |
Good
(Primary) |
| Damage |
Medium
to Very High (Low for a swinging saber merely brushing
a limb). |
| Danger
Level |
None.
Cannot harm user |
By
default, six colors can be chosen for the Saberstaff's energy
blades:
Blue,
Green, Yellow, Orange, Purple (actually Pink/Violet), and
Red. There are also five hilt design choices.
The
colors and hilts have no affect on the actual performance
of the saber, and depend solely on player preference. In team
games, players will be forced to use a saber color that matches
their team color (red or blue).
The
Saberstaff is a very dangerous weapon. A mere touch of the
swinging blade can cause damage to enemies it touches.
Normally in JKA, a touch of an ignited blade does no damage
if an attack is not in progress. In most team games, your
saber cannot damage your allies, but it is considered rude
and is counter-productive to go about playfully striking your
teammates.
A
single well placed hit can kill even the most heavily shielded
foes, and fast, repeated blows can whittle down your enemies
in seconds. Powerful hits can send an opponent reeling. The
blade itself can block blaster shots and small projectiles,
even sending them back towards the player who fired them (this
skill varies depending on the angle of the shots and level
of Saber Defense that is assigned).
To
block shots with the Saberstaff, simply "aim" at
the enemy doing the firing, while not attacking. Focusing
on the head (with your crosshair) of the person firing helps
increase the chance that you'll get a good angle on them.
But don't relax however, as your opponent will try to vary
the angle of their shots and aim for your vulnerable areas
(your non-saber side, your back, and below the belt). An overconfident
Saber-user is an easy target for experienced gunners, so watch
out! Close the distance and slash your opponent down, disarming
them if possible (with Force Pull) and using your other Force
powers to augment the Saberstaff's strengths. Similar techniques
are employed in blocking other Saber blades. If someone throws
their blade at you, don't panic, this too can be blocked.
The
saber can be turned off (hit the "select saber"
key a second time) for purposes of stealth (since the Saber
gives off a bright colored glow around your character and
an audible hum, giving away your position). It will flare
up again if thrown or swung, ready for action.
First
Person Lightsaber (almost!):
It
is possible to use the Saberstaff in Pseudo Person POV in
multiplayer (by default you are limited to Third Person only).
However, since there is no semi-transparent skin, your characters
head still partially obscures the action. Go to the console
and type in this command:
CG_fpls
1
Now
the Saberstaff will default to a Pseudo-First Person viewpoint
when used. Type the command again with a 0 instead of a 1
and it will default back to normal. You can also bind the
command to a key or put it into a CFG file for easy access.
Decide for yourself if it's easier for you.
I
find that blocking blaster shots is somewhat easier to do
in this mode.
A mod that makes true First Person Lightsaber possible in Multiplayer is OJP mod, Check it out!
It
has often been said that any Lightsaber in the hands of a
beginner can be laughable, but in the hands of a master, something
to be feared. To help work your way from the former to the
latter, I advise reviewing and practicing the following techniques:
Saberstaff
Stances The
Saberstaff possesses one unique stance from all the others.
If one blade is turned off, the Saberstaff reverts to a specified
stance, until the blade is turned back on.
Medium
(Yellow): 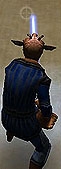
Medium
speed swings do medium damage and have less spins and chainable
combos than Fast stance. More effective at blocking against
Strong stance.
The
official documentation recommends this stance for battling
multiple saber wielding opponents (though I've found it can
be useful in dueling as well).
Lacks
the Flipping Slash
("Yellow DFA") and the Medium Attack Kata of the
Single Saber Medium Stance.
Stance
Specific Lightsaber Moves Medium:
Lacks
the Flipping Slash ("Yellow DFA") move and Medium
Attack Kata. Other moves are identical to the Single Saber
Medium Stance.
Saberstaff
Attacks The
Saberstaff has a variety of different attack swings. Think
of each "stance" as a seperate weapon. As with every
saber type and stance, memorize what each swing looks like
(noting its speed and damage), and how it hits a target (practice
on a wall or other object where you can see it hit and make
marks). As in many fighting games, this technique for learning
the saber will make each move more automatic, and may help
you anticipate the moves of your opponent in order to better
counter them (in a saber duel for example). Keep in mind that
the same moves vary in strength, speed, and range as well
as animation depending on your Saber Stance (see that section
for details).
Backslash
Back+Attack
This
fabled move has the air of "coolness" about it.
Your character leans back with a slash directed behind him
with the saber, hacking through anyone foolish enough to be
in the way. To
do this move, press Back+Attack while the enemy is directly
behind you. It is somewhat slow and can be dodged, but is
seemingly impossible to block and can be deadly in one hit
if successful. A good surprise move, especially when being
"snuck up on" during a saber fight. The backslash
is usable with either stance of the Saberstaff though varies
slightly in its animation/speed.
Reportedly,
some players adopt the tactic of, for lack of a better term
"ass fighting" which is to say, they have their
back to their opponent for the majority of the battle, and
continually attempt to execute this move. I do not recommend
this tactic, as it makes your actions very predictable to
your opponent, and leaves you totally open to attack, while
your back is unprotected.
Forward
Vertical Slice Forward+Attack
OR Backward+Attack
A
quick top-down slash that can be good for hitting enemies
that are higher or lower than you.
Horizontal
Side-Swipe Strafe
Left/Right+Attack
If
you strafe to the right while swinging, you'll swing from
the opposite direction. Great for hitting a forward (and moving)
target. I find that sometimes it helps to rapidly strafe back
and forth while tapping the key (especially while using Force
Dark Rage or Force Speed) resulting in rapid sweeps back and
forth if your time is right, which can wear down an opponent
fast.
Be
careful however, since the big sweeps can be slow, leaving
an opening for your opponent to counter-attack.
With
Fast stance, holding strafe and the attack button can result
in your character spinning round and round with the saber
(which may or may not be useful, depending on the situation).
Diagonal
Downward Slash Strafe
Left/Right+Forward+Attack
Great
for hitting a stationary target, this slash has limited range,
but is fast.
Diagonal
Upward Slash Strafe
Left/Right+Backward+Attack
The
opposite of the above move, it can be excellent against crouching
or jumping foes.
Backflip
Attack Back+Attack+Jump
A
simple "backflip" with a twirl of the saber as you
go. Slow, but uses no mana, and may be the edge you need when
hitting somebody who's jumping towards you from behind or
landing behind you. A possible escape tactic as well.
Saberstaff
Twirl
Crouch,
then press Forward+Attack
Using
25 force mana points,
this move does a rapid pattern of "twirls" (in a
'figure' 8 pattern) with the two ignited blades in front of
you, slicing and dicing any opponents in its path. Once the
move has begun, it cannot be stopped by the user and you cannot
move until it has completed (thus you are vulnerable from
the back and an opponent can easily dodge it).
Spinning
Kata
Attack
+ Alt Attack
By
pressing Primary and Secondary fire firmly together, this
move uses 50 force mana points
and does a spectacular mix of spinning kicks and saber slashes.
The kicks leave you vulnerable to attack but are unblockable
and can knock an opponent's body backward or onto the ground.
Once the move starts, it cannot be stopped by the user.
You
can "turn" with the mouse during the move, which
may or may not help you hit your foes better.
Attack
Enemy On Ground
Hold
Forward + Attack (near fallen enemy body)
This
is a "finishing move" which uses no mana, causing
you to leap into the air and land with downward stab through
the fallen opponent's body. Most of the time it is fatal,
considering the person is not blocking, however it is also
easily dodged.
A
fallen opponent can hold jump to get up quickly before the
move hits (in time to block), roll away using the strafing
keys or tap jump rapidly to "kick up" and knock
back the would-be ground stabber.
The
move also has the tendency to "miss" if you're not
lined up with the body properly.
Kick
Hold
direction + Alt Attack
A
slow move that is unblockable and has the capability to toss
an opponents body back or onto the ground (to set them up
for a killing blow). Kicks do little damage, but this knock
down ability makes them very useful as a surprise move to
turn the tide of battle.
Note
that during a kick you are vulnerable yourself. While it uses
no mana, kicks can only be performed when you have both blades
ignited (if you try to Kick while your Saberstaff is off,
it will automatically ignite). Front, Back, and Side kicks
(using the strafe keys) are possible.
You
can "turn" while kicking with the mouse, but it
doesn't seem to make landing the move any easier.
Note
that players using "Melee" mode with g_debugmelee
1 command on (on the server) can also perform
kicks.
Jump
Kick
While
in mid-air, hold direction + Alt Attack
This
is identical to Kick, except it occurs in mid-air. Once you
land from the move, there is a slight pause as you get your
bearings, thus leaving you momentarily vulnerable. Can be
done forward, left or right (using the strafe keys).
Butterfly
Attack
Strafe
Left/Right+Attack
Uses
25 force mana points,
doing a spinning half-cartwheel kick and saber attack. You
can "turn" with the mouse partway through the move
(practice to see what you can come up with). The move sends
your body "forward" continuously however, so be
careful not to fall off a cliff. Kicks are unblockable, but
leave you vulnerable at those points.
Stab
Forward (aka
Rolling Stab)
Crouch+Forward
then attack (as roll completes)
Uses
25 force mana points,
thrusting your blade forward after a roll. Can be dodged,
but is difficult (if not impossible) to block. Without sufficient
mana, the move cannot be performed.
Once
you have become familiar with the Saberstaff, you should review
the Force Powers and Weapons
pages in our other sections.
|

