|
|
|

The Zerg Swarm - Units and Structures
Scourge
| | 
Strengths:
Inexpensive; frightfully powerful; fast moving; hatched in pairs
Weaknesses:
Cannot attack ground units; killed on contact; easily destroyed |
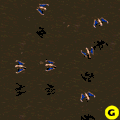
The aptly named Scourge are feared by all pilots in the known galaxy. These tiny and unassuming bat-like creatures are known to crash headlong into enemy spacecraft and burst in a deadly acidic explosion, always fatal to the Scourge and usually just as deadly to the target. Even the impressive Terran Battlecruisers and Protoss Carriers cannot survive more than a handful of Scourge. Scourge may only attack aerial targets.
| Hit Points/Size | 20/small | | Time to Build | 30 | | Cost (minerals/Vespene Gas/control) | 25/75/1 (per pair) | | Weapon/Strength | Suicide 110 | | Armor/Strength | Zerg Carapace 0, +1 per upgrade |
Scourge are such a simple genetic strain that two are hatched from each Larva egg. They are produced quickly, and since a Zerg Hatchery supports three Larva at a time, you may build as many as six Scourge in short order at a relatively low cost. Keep this in mind should enemy air power attack your base.
Do not waste your Scourge. If you fly them head-on against the enemy, he will likely kill many of the physically weak creatures before they reach their target. Be especially careful of ground forces in the area that can safely eliminate Scourge from below. Instead, use these fast-moving suicide bombers in support of your other forces. Send fleets of Mutalisks and Guardians against the enemy and follow with Scourge and a Queen close behind. Try and keep your Scourge in small groups rather than one big cluster, so you can send a few at each target. If your Mutalisks and Guardians come under fire from enemy air power, send in the Queen and use her Ensnare ability to slow the attackers. Then send in the Scourge. You probably won't need more than two against each flying target, though Terran Battlecruisers and Protoss Carriers can take much more of a beating. As a general rule, Scourge work great in combination with the Zerg Queen since her Ensnare ability not only makes it impossible for the enemy to flee from the Scourge, but decreases their rate of fire such that the Scourge are more likely to fly past their weapons.
In most cases, you needn't make Scourge until you know you need them since they build so quickly. Keep in mind that while individual pairs of them are inexpensive, huge fleets will really tax your resources. Since Scourge are expendable by design, make certain you are using them in support of your other air power and air defense units rather than deploying them on their own. Scourge are difficult to use properly, but under capable command, they are perhaps the deadliest force in the sky.
Next: Mutalisk 
|


