|
|
|

The Zerg Swarm - Units and Structures
Hatchery
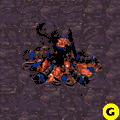
The Zerg Hatchery is the focal point of every Zerg headquarters. Not only does this structure generate a blanket of Creep on top of which other Zerg facilities may be positioned, it is also the feeding ground for the docile Zerg Larva that metamorphose into every other Zerg strain. The paradox behind the Hatchery lies in the fact that, while a Hatchery is required to support Larva, and a Larva may in turn morph into a Drone, a Drone is required to build a Hatchery in the first place.
| Hit Points | 1,250 | | Time to Build | 100 | | Cost | 300m 0g | | Requires | N/A | | Special Options | Select Larva
Control provided: 1
Evolve Burrow 100m 100g Time 80
Mutate to Lair 150m 100g Time 100 Requires Evolution Chamber
|
Do not dwell on the topic for too much time, for it is more worth your while to consider the Hatchery's other features. The Hatchery is where Drones deliver gathered minerals and Vespene Gas, so you must try to position your Hatcheries as near to resources as possible. A Hatchery supports up to three Larva at a time, so you can hatch three separate Zerg units simultaneously. Producing a second Hatchery within your headquarters is often a good idea, so that you can generate even more forces quickly.
For a small fee, you may evolve the Burrow ability from your Hatchery that lets most Zerg ground units dig underground. And after you produce an Evolution Chamber, you can mutate your Hatchery into a Lair, which in turn opens up more production options for your Drones. Since your Hatchery not only takes in resources but also generates all your units, it is imperative you keep it safe.
Next: Lair 
|


