|
Weapons
Here
you will find specific descriptions and strategies for using
the various weapons in JK2. For information on the Lightsaber,
see the specific Lightsaber pages
for strategies on using the elegant weapon.
Click
below to skip to a specific section:
***WARNING!
Read this before proceeding!***
Players
new to JK2 should realize that the Multiplayer mode is substantially
different from the Single Player mode. In particular, the
weapons, items, power-ups, and other features are different
in many ways from their offline counterpart. We strongly recommend
playing against Bots (AI simulated multiplayer opponents)
as training for internet or LAN games, as they represent the
type of gameplay you will experience online. However, there
is no substitute for the unpredictability and inventiveness
of human opponents, so eventually you must venture out if
you expect to master the game! Players migrating over from
other FPS games will have many new challenges ahead, including
learning Force Powers,
the Lightsaber, as
well as the different nuances of the game. Even veteran players
of other Dark Forces series games (JK, MotS, etc) will
have many new things to learn. In short, you must "unlearn
what you have learned," to quote a wise Jedi Master.
; )
The
site will be presented with the assumption that players have
already read over the official JK2 manual (that comes
with every legitimate copy of the game) and the readme
documentation. Some material from these sources may be covered
in more detail however.
Explanation of tables:
Non-saber
weapons fall into three categories: melee, projectile, and
explosive device.
The
Stun Baton sits alone in the melee category (the only
other weapon of this type other than the Lightsaber).
It has no secondary firing function, cannot be lost in combat,
and uses no ammo. The explosive device category includes Thermal
Detonators, Det Packs, and the Laser Tripmines.
All other weapons fall into the projectile category (basically
what we'd call "guns").
Ammo
type indicates the type of ammunition the weapon uses, as
there are several types in the game, that can be picked up
to replenish your weapon's firing chamber or explosive count.
Melee weapons are starting weapons, that do not use ammo.
Ammo use indicates the number of units each mode of fire uses
up (if any).
Every
weapon but the Stun Baton has two firing modes, Primary and
Secondary (accomplished by pressing the appropriate fire buttons
in your control setup).
The
Rate of Fire, Range, and Damage as based on relative comparisons
with the other weapons in your arsenal and are not exact figures.
When
a player is killed, the weapon they were holding at the moment
of their death (unless empty) is dropped, and can be picked
up and used by other players, the exceptions being the Stun
Baton, Bryar Pistol, and the Lightsaber.
Even though a player may be killed while their saber is in
flight (from a Force Saber Throw) this handle cannot be picked
up or used.
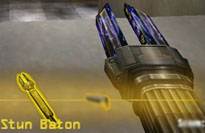
Stun
Baton
|
Weapon
Type
|
Melee |
|
Ammo
Type
|
N/A |
| Ammo
Use |
N/A |
|
Primary
Fire
|
Thrust
(with zapping effect) |
| Secondary
Fire |
same
as Primary |
| Rate
of Fire |
Medium |
| Range |
Poor
(close Physical Contact) |
| Damage |
Medium |
|
Danger
Level
|
None.
Cannot harm user |
The Stun Baton is an electrical prod that replaces the Lightsaber
as the default melee weapon in your arsenal if you do not
apply in Force points to the Lightsaber (at the bottom of
your Player setup).
Primary
and secondary firing modes (both identical) can be held down,
to do rapid attacks with the weapon, hitting opponents at
close range, and covering their bodies with electrical charges.
The
device gives off a constant electrical crackle (warning of
your presence) and can only strike at very close range (physical
contact). It uses no ammo, and cannot be lost in battle, nor
can it be picked up.
Normally
I avoid using this weapon in favor of the Lightsaber, a much
more versatile weapon, which also grants some special abilities
that the Stun Baton lacks (see Lightsaber
section for more information). It can be a nice weapon to
humiliate opponents with, and the extra points you save by
not carrying a saber can be put into your other Force Powers.
It is also more stealthy than the Lightsaber (which casts
a bright glow and a louder hum).
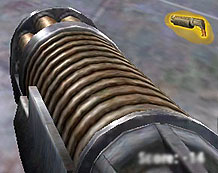
Bryar
Blaster Pistol
|
Weapon
Type
|
Projectile |
|
Ammo
Type
|
Blaster
Pack |
| Ammo
Use |
Primary:
2 units per shot Secondary: 8 (fully charged) |
|
Primary
Fire
|
Semi-automatic
energy shot |
| Secondary
Fire |
Chargeable
energy shot |
| Rate
of Fire |
Medium
(Primary) to Slow (Secondary) |
| Range |
Excellent
(until solid object or end of map) |
| Damage |
Low
(Primary) to High (Secondary) |
|
Danger
Level
|
Medium
to High: blocked shots can be reflected back at user. |
Kyle's
personal modified weapon, and your starting sidearm (in addition
to your melee weapon). Like the starting weapons in many games,
it is accurate, but not that powerful. Primary fire is one
of the more accurate firing modes of any gun in the game,
but the shots are fairly low powered. Secondary on the other
hand, when fully charged, can kill an enemy in one shot (unless
heavily shielded). Be warned however, that a Lightsaber can
deflect that fully charged shot back at you!
The
Secondary firing mode, which fires a larger energy bolt, when
charged, makes a distinctive sound, and a glow appears at
the barrel. After holding it for about 5-6 seconds, the shot
is forcibly discharged if you have not released it already.
To
cancel a charged shot without wasting the ammo (or giving
away your position) simply switch to another weapon and release
the button as soon as the animation of the weapon changes.
I
tend to avoid using this weapon for the most part, since most
guns are better, although occasionally I'll use the charged
secondary shot to humiliate an opponent.
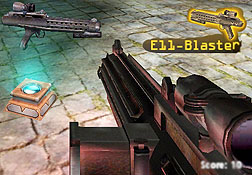
Stormtrooper
E11-Blaster Rifle (ST Rifle)
|
Weapon
Type
|
Projectile |
|
Ammo
Type
|
Blaster
Pack |
| Ammo
Use |
Primary:
2 units per shot Secondary: 3 units per shot |
|
Primary
Fire
|
Semi-automatic
energy shot |
| Secondary
Fire |
Full-auto
energy shots (with somewhat random dispersal over distance) |
| Rate
of Fire |
Medium
(Primary) to Fast (Secondary) |
| Range |
Very
Good (Primary) to Medium (Secondary) |
| Damage |
Low
(Primary) to High (Secondary with multiple shots hitting) |
|
Danger
Level
|
Medium
to High: blocked shots can be reflected back at user. |
The
preferred weapon of the Empire's galactic troops, hence the
name.
Basically
the ST Rifle is a "blaster machine gun." While it
doesn't look that powerful, it can be quite useful in combat.
The
ST Rifle is a favorite weapon of mine, especially its Secondary
fire, which (though not very accurate) is effective at gunning
down enemies in a relatively short time. The fast rate of
fire means that you have to be careful around saber users,
but aiming below the belt, or while they have their back turned
spells instant disaster for my enemies. The gun itself is
also fairly easy to find in most maps, making it an excellent
choice for middle range combat.
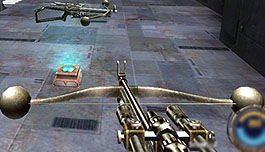
Wookie
Bowcaster
|
Weapon
Type
|
Projectile |
|
Ammo
Type
|
Power
Cells |
| Ammo
Use |
Primary:
25 (fully charged) Secondary: 5 units per shot |
|
Primary
Fire
|
Chargeable
energy shot (1-5 shots in horizontal spread) |
| Secondary
Fire |
Single
surface-reflective energy shot |
| Rate
of Fire |
Very
Slow (Primary) to Slow (Secondary) |
| Range |
Very
Good (Secondary) to Medium (Secondary) |
| Damage |
Medium
(Secondary) to High (Primary, if multiple shots hit target)
|
|
Danger
Level
|
Medium
to High: blocked shots can be reflected back at user. |
The
Bowcaster's Primary fire can be charged for up to five shots,
and makes a distinctive noise while charging up. Also a green
glow appears on the barrel when a shot is charged. If the
shot is not released after a certain amount of time (about
6-7 seconds) it is forcibly ejected.
The
Bowcaster is a weapon I tend to use for special situations,
but not one I run around with (unless its my only weapon).
It is often a poor choice for sniping, since the shots are
somewhat slow and noisy in Secondary Fire, and Primary Fire
is again, too slow, and often inaccurate. What it is good
for are angled shots (takes lots of practice) when enemies
are hiding in hard to reach places, and you don't have time
to scope them with the Disruptor.
Another
important feature of this gun is the charged shot. If you
know your opponent is right around the corner, or has his
back to you for some reason, a fully charged shot can be released
at point blank range, killing all but a heavily shielded opponent
in one fell swoop. One of the worst things you can do with
this gun is to release a fully charged Primary at a saber
user on his saber side. ; p
To
cancel a charged shot without wasting the ammo (or giving
away your position) simply switch to another weapon and release
the button as soon as the animation of the weapon changes.
While
the reflective Secondary shots will pass through you harmlessly
if they bounce off a wall, they will damage you if they bounce
off of a Lightsaber.
Imperial
Heavy Repeater
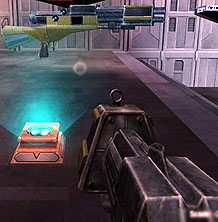
|
Weapon
Type
|
Projectile |
|
Ammo
Type
|
Metallic
bolts |
| Ammo
Use |
Primary:
1 unit per shot Secondary: 8 units per shot |
|
Primary
Fire
|
Full-auto
charged bullets with medium dispersal |
| Secondary
Fire |
Lobbed
energy burst |
| Rate
of Fire |
Very
Fast (Primary) to Very Slow (Secondary) |
| Range |
Good
(Primary) to Poor (Secondary) |
| Damage |
Medium
to High (Primary, if multiple shots hit) and High (Secondary) |
|
Danger
Level
|
Medium
to High: blocked Primary shots can be reflected back,
and Secondary explosions can harm user. |
1.04
Patch Notes:
(Quoted
from LucasArts
patch page)
"Adjusted
ammo usage of the Imperial repeater alt-fire."
Approximate
Adjusted values:
Ammo
Use |
Primary:
1 unit per shot Secondary: 15 units
per shot |
For
the rapid-fire enthusiast, the Repeater is probably the best
choice.
While
the ST Rifle has a certain finesse, the Repeater fires even
more shots in a shorter amount of time (though the individual
shots are quite weak) and is more accurate than the ST Rifle's
secondary fire. The Secondary fire is both hated and feared
among the ranks of Lightsaber users, and is an excellent weapon
for Flag Base Defenders in CTF.
Be
warned, however, that Force Push can send your Secondary shots
back into your face! The Secondary fire also has a bit of
blasting effect, that can send bodies off of ledges, making
it even more dangerous in those types of situations.
Tenloss
DXR-6 Disruptor Rifle
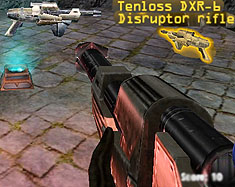
|
Weapon
Type
|
Projectile |
|
Ammo
Type
|
Power
cells |
| Ammo
Use |
Primary:
5 units per shot Secondary: 27 (fully charged)
|
|
Primary
Fire
|
Energy
beam |
| Secondary
Fire |
Scope
Zoom (Charged Energy beam) |
| Rate
of Fire |
Slow
(Primary) to Very Slow (Secondary) |
| Range |
Very
Good (Primary) to Excellent (Secondary). Both are instant
hit. |
| Damage |
Low
(Primary) to Very High (Secondary) |
|
Danger
Level
|
Medium:
Player may be vulnerable while using the Zoom function. |
The
Disruptor is one of the most powerful guns in the game, with
regard to damage, as a fully charged Secondary shot can kill
a fully shielded enemy in two shots, and will disintegrate
an unshielded enemy in one.
I
find this to be another situational-use weapon. The primary
fire is virtually useless to me (though sometimes one can
get lucky), as it is incredibly slow, and not that powerful
(it would make more sense to use a charged Bryar pistol).
Secondary fire requires relative cover and safety to prevent
being sniped yourself as you line up your shot. It also takes
a few seconds at minimum to charge and get a bead on your
target. The fact that blocked shots are not reflected back
at the user is somewhat in its favor, however.
Holding
down the Secondary fire key activates the zoom. The longer
the key is held down, the more it zooms in (it goes quite
a distance). Once you start to charge up a shot, the zooming
stops and you can't zoom in any more until you've fired. If
you try to walk while the zoom is in effect, but not charging,
the gun will automatically switch back to your standard point
of view. If you are charging a shot, you simply won't be able
to move. Will in scoped mode, you can look around (with the
mouse) and crouch, but you can't walk, run, or jump. To cancel
a charged shot without wasting the ammo (or giving away your
position) simply switch to another weapon and release the
button as soon as the animation of the weapon changes.
Where
this gun really comes in handy is in Team games. When defending
your base, guarding an item/weapon spawn (also known as "camping")
for a teammate or to deny it to the enemy, this weapon is
an excellent choice. Multiple team members with charged Disruptors
can effectively deny any long range area from the enemy.
When
sniping, I like to get at such an angle to my opponents, that
I can strike the broadest part of their body as possible.
Head shots are nice, but often unnecessary (and in the case
of saber users, very difficult). Some players are good enough
to be able to get off close range zoomed shots, but most of
the time this is suicidal.
The
Lightsaber is a good defense against this weapon, because
while the glowing blade makes you an easier target to spot
from a distance, the blade itself can block even a fully charged
disruptor shot (though the beam simply disappears, it does
not bounce back). Other than that, Force Speed and Persuasion
are good ways to avoid the shots, and Level 3 Force Seeing
has a type of "dodging" ability for this weapon
when you have mana (you'll hear a "whooshing" sound
as your body auto-sidesteps the beams), but only against charged
shots.
Destructive
Electro-Magnetic Pulse gun (DEMP 2)
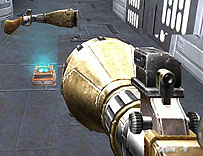
|
Weapon
Type
|
Projectile |
|
Ammo
Type
|
Power
cells |
|
Ammo
Use
|
Primary:
8 units per shot Secondary: 30 (fully charged)
|
|
Primary
Fire
|
Energy
ball |
| Secondary
Fire |
Charged
expanding energy explosion |
| Rate
of Fire |
Slow
(Primary) to Very Slow (Secondary) |
| Range |
Very
Good (Primary) to Excellent (Secondary: instant hit) |
| Damage |
Medium
(Primary) to High (Secondary) |
|
Danger
Level
|
Low:
blocked Primary shots can be reflected back at user. |
The
DEMP 2 is a modified version of the familiar gun used by the
Jawas in the Star Wars films to disable droids.
This
weapon is often difficult or impossible for a Lightsaber to
block or send the shots back with Force Push, making it good
for surprise attacks against certain Jedi. The shots do extra
damage to shields, and secondary fire is an "instant-hit"
expanding effect, that can knock enemies back.
The
gun has a slow rate of fire, so isn't great for close quarters.
The barrel glows and a distinctive sound is produced when
the Secondary fire is charged, but the shot hits instantly
and creates an expanding ball of energy to damage targets,
making it good for hitting tightly packed groups of people.
To
cancel a charged shot without wasting the ammo (or giving
away your position) simply switch to another weapon and release
the button as soon as the animation of the weapon changes.
This
gun is rather noisy, and poor for sniping, though it's often
tough to discover where the Secondary shots are coming from,
aiding in stealth. I use it occasionally for those purposes.
Merr-Sonn
PLX-2M Portable Missile System
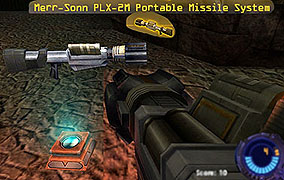
|
Weapon
Type
|
Projectile |
|
Ammo
Type
|
Rockets |
|
Ammo
Use
|
Primary:
1 unit per shot Secondary: 2 units per shot |
|
Primary
Fire
|
Rocket
propelled explosive |
| Secondary
Fire |
same
as Primary, but can be held down to "track"
a specific target |
| Rate
of Fire |
Slow
(Primary) to Very Slow (Secondary) |
| Range |
Good
(Primary) to Random (Secondary) |
| Damage |
High |
|
Danger
Level
|
High:
Explosions can harm user |
The
Merr-Sonn is your basic Rocket Launcher with a twist. The
Secondary firing mode has the added ability to track enemies.
While
you cannot effectively "rocket jump" with this weapon
as you can in many other FPS games, it does have a nice solid
blast radius. The downsides to this gun are fairly severe
though. It has the lowest ammo count of any gun, and pickups
are scarce. The shots are slow and noisy, and the Secondary
tracking shots requires you to get a good lock on an enemy,
and even then the tracking ability is rather poor (a player
can easily dodge it with Speed or go around a corner). The
noise made by the tracking shot as it locks on is only heard
by person holding the gun.
This
Rocket Launcher can be good for firing into crowds (especially
groups occupied in saber battles or trying to snipe somebody
else) and the explosions ability to throw bodies around can
come in handy to knock people off ledges.
The
Merr-Sonn is perhaps the second most dangerous weapon in the
game to use (second only to the Trip Mines, in my opinion)
because the Rockets can be easily Force Pushed (by a person
with decent aim) back at you, and you pay a heavy price for
being too close to their explosions.
When
I use this weapon, I like to get as much ammo as possible
before using it, since often two out of three shots you fire
will miss completely (or get pushed back), and if I'm going
to use the Secondary fire mode, I keep the button held down
as I move, so I can lock on a track to my enemies at anytime.
Often simply firing a barrage of rockets at one area to "deny"
it to the enemy is the best use of this weapon. You cannot
of course "Rocket Jump" in JK2, so don't bother
trying (although you can "mine jump" with the Det
Packs after 20 seconds).
The
Infamous "Rocket Bug"
This
next point I will start off by saying, is a controversial
one. I have held off posting about it until now, however considering
that another official patch seems unlikely at this time, I
figure I should "fight fire with fire." The following
(like the mid-air blue stance uppercut) is a known "bug
exploit" in the game.
Normally,
secondary ("tracking") rockets are slower than primary
rockets. This method allows you to use them at full speed
(with normal ammo consumption).
1) With the Merr Sonn selected and with some ammo (at least
2), "lock on" to your enemy.
2) While still locked on, switch to another weapon (for example
the saber). The red circle will stay on them, even though
you no longer have the Merr Sonn selected. You do not need
to hold down secondary fire while holding another weapon.
3) Switch back to the Merr Sonn (and as you do so make sure
you're holding down secondary fire), continuing to hold down
the button, and then release when ready to fire. Secondary
fire must be released while the red circle is still on your
target, if you wait too long the Merr Sonn will "lock
on" a second time and you will have to start over. Timing
is key, but with practice it can be done.
This makes the rockets much harder to avoid and they don't
use double ammo. They can still be dodged with Speed or Rage,
and can be pushed back at the person who fired them. This
greatly increases your chances of hitting a single person
with this weapon.
Keep in
mind that this technique is considered "cheap" by
many players, and may (like some other techniques) get you
kicked from certain servers. Be respectful of the rules of
each server. The move is posted all over the forums and I've
had it sent in by several players, so I think the community
has a right to know, cheap or not. Email
me your thoughts.
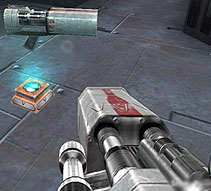
Golan
Arms FC1 Flechette Weapon (Flechette)
|
Weapon
Type
|
Projectile |
|
Ammo
Type
|
Metallic
bolts |
|
Ammo
Use
|
Primary:
10 units per shot Secondary: 15 units per shot |
|
Primary
Fire
|
Dispersed
shot of Surface-Reflective Flak |
| Secondary
Fire |
Dual
lobbed bouncy explosive orbs |
| Rate
of Fire |
Medium
(Primary) to Slow (Secondary) |
| Range |
Good
(Primary) to Poor (Secondary) |
| Damage |
Medium
(Primary) to High (Secondary, and with multiple shots
from either) |
|
Danger
Level
|
Medium
to High: Reflected Primary shots can harm user, as well
as explosions from Secondary fire. |
The
Flechette is another multiplayer favorite, and devastating
to saber users in general.
The
primary "flak" bursts will bounce off of walls,
but not hurt the user. While a Lightsaber can block the flak,
it takes a high level of defense (and often the use of the
Blue saber stance) to block ALL of the heated metal chunks.
Often even if shots bounce back and hit you, the Jedi will
be worn down faster, as the bits get through and hit him.
The flak shots go surprisingly far, but are very inaccurate
over long distances, with a high rate of dispersal.
The
Secondary shots remind me of Thermal Detonators and can be
difficult to Push back (but it is possible). Firing a barrage
of Secondary orbs into an enclosed space is usually a bad
idea.
This
weapon, like the Repeater, is an excellent weapon for defense
in team based games such as CTF, and for denying an area to
the enemy. It is not ideal for close quarters except against
users who lack lightsabers or have weak defensive capabilities,
but is excellent for medium range.
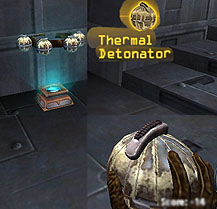
Thermal
Detonators
|
Weapon
Type
|
Explosive
Device |
|
Ammo
Type
|
Thermal
Detonator belts |
|
Ammo
Use
|
1
unit per throw, both modes |
|
Primary
Fire
|
Thrown
bouncable explosive that detonates after a few seconds
or upon impact with enemy body |
| Secondary
Fire |
Thrown
explosive that detonates on impact with any surface |
| Rate
of Fire |
Slow |
| Range |
Varies |
| Damage |
High |
|
Danger
Level
|
High:
Explosions can harm user |
Thermal
Detonators are the throwable grenades of JK2.
They
will make a series of beeps to indicate they are being armed,
and the longer the button is held down, the greater the distance
they will be thrown. Jumping and moving forward while throwing
can increase the distance and height as well as looking up
or down to adjust the angle as you release.
A
"readied" Thermal Detonator can only be held for
a certain amount of time before you are forced to throw it
(about 6 seconds). Secondary fire is more dangerous, since
it explodes almost instantly, and so great care must be made
to give it adequate distance to avoid blowing yourself up
with it.
Thermal
Detonators are extremely difficult to Force Push back at the
thrower, but it is possible for the quick and skilled.
In
various situations, Thermal Detonators can be excellent against
Lightsaber users, since they are difficult to block or Pull
away, and have a decent blast radius. However, they are horrible
for close range combat, and should be thrown while backpedaling,
or from a higher elevation than your target. They can be great
for clearing hallways or tossing into crowded rooms when mines
are not available or there isn't enough time. They are also
less easier to notice in the heat of battle than Secondary
Flechette shots, so they can often take your enemies by surprise.
One
thing you'll notice after using them for awhile, that the
Secondary (explode on impact) mode can be quite deadly against
Saber users, once mastered. Practice tossing them at bots
until you've gotten a feel for the ranges and the amount of
time needed to toss it so it hits them just right. You may
find this even more useful than Primary mode, which is more
of a situational use weapon.
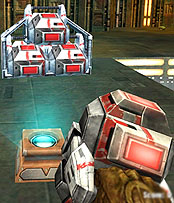
Detonation
Packs (Det Packs)
|
Weapon
Type
|
Explosive
Device |
|
Ammo
Type
|
Det
Pack packs |
|
Ammo
Use
|
1
unit per placement (max 20?) |
|
Primary
Fire
|
Placeable
explosive device |
| Secondary
Fire |
Detonates
all placed explosives |
| Rate
of Fire |
Slow |
| Range |
Varies |
| Damage |
High
to Very High (with multiple explosives in close proximity) |
|
Danger
Level
|
High
to Very High: Explosions can harm user |
Det
Packs are my favorite explosive weapon, mainly because of
their versatility and the satisfying explosion that several
well placed mines can make.
Det
Packs, like mines in previous Dark Forces games, can be stuck
on virtually any surface (while placing, simply walk up to
the wall, jump up to the ceiling, etc and if you are close
enough it should stick). While they are somewhat rare and
you cannot hold a lot of them at once, each one produces a
sizable explosion that can be devastating in close quarters.
I like to use Det Packs in front of doorways, in tight, high
traffic hallways, right next to the Flag, or next to precarious
ledges. When detonated, if the explosion itself doesn't kill
them, often they will be thrown by the blast, and killed in
some other fashion. While Det Packs cannot be stacked (they
blow up in your face if you try), they can be placed in all
sorts of patterns, to trap your enemies and deny important
areas. Good mining techniques are essential for good defense,
I feel, in game types like CTF. There is an upper limit to
the number of Det Packs that can be placed in a level (it
seems to be about 20).
The
only real downside to the packs is that they eventually explode,
without warning, on their own (20 seconds after being placed),
or if the player who placed them dies or leaves the game.
They can also be triggered by a well placed shot or two from
virtually any weapon (it is a good idea to trigger packs placed
by your enemies, since they will get the kills if somebody
is blown up by them). Do so from a safe distance of course!
Det
Packs are also great for chain reactions. Firing a rocket
at a cluster of mines, or combining with Trip Mines or Thermal
Detonators can create some massive explosions, that even a
heavily shielded character cannot survive. Det Packs, interestingly,
provide more "lift" from the explosion if they are
allowed to explode on their own (after 20 seconds), allowing
you to use them to "mine jump." Let the explosion
toss you into the air (it's a good idea to put one mine under
you and a circle of them on each side, to prevent it throwing
you horizontally) and you'll go much higher than is possible
with Level 3 Force Jump. Just be sure you have plenty of shields
when you attempt this (and watch out for falling damage coming
back down if you miss your target)!
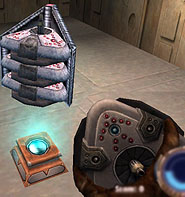
Trip
Mines
|
Weapon
Type
|
Explosive
Device |
|
Ammo
Type
|
Trip
Mine stacks |
|
Ammo
Use
|
1
unit per placement (max 20?) |
|
Primary
Fire
|
Placeable
explosive that detonates when Laser beam is tripped by
body. |
| Secondary
Fire |
Placeable
explosive that detonates after aprox. 2 secs. |
| Rate
of Fire |
Slow |
| Range |
Varies |
| Damage |
High
to Very High (with multiple explosives in close proximity) |
|
Danger
Level
|
High
to Very High: Explosions can harm user. User can set off
own trips. |
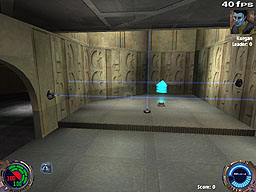
I
feel that the Trip Mines are the most dangerous weapons in
the game for several reasons.
The
main one is that when they are placed (like Det Packs, they
can stick to virtually any surface) the Laser beam in Primary
fire activates a split second later, and if any body (including
your's) is in its path, it will detonate. Many beginning players
will be blown up trying to place their own mines in this fashion.
In addition, you can be knocked or Force Pushed or Grip levitated
into your own Trip Mines (you can use this to your advantage
however, by Pushing people into the Trip Mines you've placed).
It's also funny to give somebody a self-kill by knocking them
into the mines they've just finished carefully placing.
The
blue laser beams of Primary fire give away the position of
the mines, so watch out for them. However, in low light areas,
blind corners, or in areas with similar colored lighting,
and from a distance, they can be very difficult to spot (sometimes
it pays to scope out an area with your Disruptor's scope just
in case, if you know there are Trip Mines around). A good
way to help spot Trip Mines is to use Force Seeing, which
make the blue laser beams glow much more brightly. Of course
Secondary mode has no lasers, but then they explode after
2 seconds anyway.
Like
Det Packs, they can be set off by well placed shots from virtually
any weapon. There is an upper limit to the number of Trip
Mines that can be placed in a level (it seems to be about
20).
Unlike
Det Packs, once placed, Trip Mines will stay in the map until
the end of the game if they are not detonated, making them
permanent hazards to be avoided. Eventually a level can be
choked off with mines, making traveling various areas undamaged
virtually impossible. Force Speed is no defense against the
mines, but Force Jump can be used to Jump over the beams (rolling
under the beams is also a neat trick to avoid them when being
chased through). Protection may offer some extra survival
time if you must run through a patch of mines, but I'd rather
risk detonating them first with a shot or two.
Secondary
fire is okay when you are being pursued, to throw off those
chasing you, but it takes several seconds for them to explode,
so sometimes its better to use Primary fire for this. Secondary
Trip Mines can be stacked, though they explode before
long anway, so this isn't too much more useful.
In
most cases, I tend to use Det Packs instead, but there are
times when Trip Mines are nice, such as in CTF, for sabotaging
blind corners and base doorways (but unlike Det Packs, you
can't actively discriminate between teammates and enemies
like you can with Det Packs). It may be possible to do the
"mine jump" trick with Secondary Trip Mines, but
I have not attempted this.
benpva16
had this to say:
It is possible to
"mine jump" with the trip mines. Just use the primary
attack mode, "fire" and when the beam is active,
run over it. Just make sure you're heavily shielded :P
Once
you have become familiar with the basic weapons of the game,
you should move on to learn about the Lightsaber
and Force Powers in our other
sections.
|