Chapter 5 - Map Strategies
This section provides specific strategy for Quake Wars' twelve multiplayer maps (though you can play against the computer as well). Each map features its own primary and optional objectives; we cover tips on completing all of these objectives and how GDF and Strogg teams can work collectively to conquer the competition.
Succeeding as a team means combining all game factors—basic training, class tips, and map strategies. Although many of these elements are covered in the map strategies, the list below provides some general tips for winning across all maps. These are important fundamentals. Look for more tips in the basic training, class, vehicle, and map strategy sections of the guide.
- Teamwork, teamwork, teamwork. Communicate with your team. Provide support. This isn't deathmatch.
- Destroy objectives require soldiers or aggressors. Construction objectives require engineers or constructors. Hacking objectives require covert ops or infiltrators. If your team lacks the necessary class to complete an objective then you're in a no-win situation. Don't hesitate to switch classes if the team needs it.
- Covert ops and infiltrator players should deploy radar immediately. If your team doesn't have radar, request it! If the enemy has radar and your team doesn't, you're at a huge disadvantage.
- Forward spawn points are always important. Be the team player that goes for the forward spawns immediately. Don't forget they must be held from the enemy. Place a deployable nearby or use mines. Radar will help you discover when the enemy gets behind the lines.
- Medics and technicians aren't built for combat—if they were, they'd carry a rocket launcher. These are support classes. Aid your teammates with medpacks and Stroyent. Revive teammates. Strogg have a long reinforcement time, which makes the technician's spawn host ability vital to both offensive and defensive tasks. The medic also features a unique ability: the supply drop. Do not neglect to drop a crate near an attack or defense position to replenish teammates' health and ammo quickly.
- Gain experience by completing optional objectives such as constructing guard towers or destroying barricades. Check the list of missions for other tasks, such as destroying an enemy deployable or repairing one of your own. Elevating experience unlocks valuable rewards. This is especially valuable on a three-map campaign game.
- The artillery interceptor turret can be one of the most valuable turrets and it's often underused. Use this turret to protect your defense against field ops or oppressor fire support bombardment. This can mean the difference between maintaining a strong defense or falling apart quickly under a rain of artillery fire.
Area 22
The GDF have captured a Strogg slipgate and are about to make a major breakthrough in understanding the sinister technology. The Strogg are now determined to destroy the captured slipgate before the GDF can uncover its secrets. The GDF must defend their underground research facility at all costs!
Objective: A Strogg Aggressor must destroy the jamming generator.
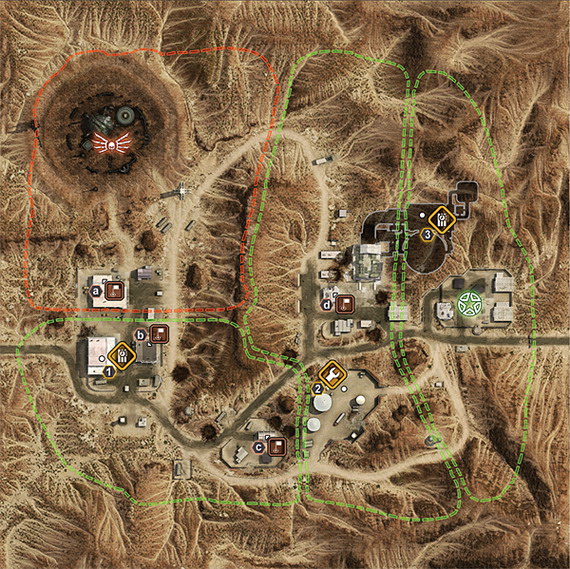
There are two forward spawn points close to the generator; one to the north and another to the east. Both Strogg and GDF players should capture their closest spawn point then organize mixed squads to liberate the other. Maintaining both spawn points can put a big squeeze on either the attacking or defending teams. There are plenty of vehicles available from start. Strogg players should pressure the area around the jamming generator and the GDF forward spawn point while avoiding the defensive turrets deployed by GDF Engineers. Both teams need to get radar deployed, of course!

When playing as GDF, have engineers deploy anti-vehicle turrets to depel the Strogg Desecrators and Cyclops. The anti-vehicle turret also counters the Strogg Icarus, which can be used to get on top of the building holding the jamming generator. GDF Field Ops utilize long-range fire support to bombard the area around the Strogg's forward spawn point. Send a covert ops sniper into the hills; maintain sight between the Strogg spawn and generator building and pick off attacking Strogg.
Attacking Strogg maintain constant pressure on the area around the generator building. Eliminate defensive turrets using fire support. If the GDF side fails to utilize an anti-vehicle turret, grab an Icarus and use it to reach the top of the generator building; there's an entrance here providing quick access to the upper catwalk overlooking the jamming generator. There are multiple ground routes into the structure; send teammates into multiple entrances to force the GDF to protect every route.
The Strogg should have several aggressors—to muscle the GDF defenders and deployables and to place a plasma charge on the jamming generator to complete the objective. GDF Engineers responsible for deploying turrets must be ready to defuse the plasma charge.
Objective: A Strong Constructor must construct the mining laser.
The mining laser is located in an open lot, though there's plenty of cover available for both attacking and defending troops. Strogg players should immediately move toward the compound spawn point and capture it. Vehicles will reappear closer to the jamming generator so select your spawn point accordingly.
This is a tough uphill battle for the attackers. Send vehicles in from multiple sides to force the GDF to divide their defenses. Strogg Oppressors use long-range fire support to bombard the area around the mining laser. Use the hills to the south as vantage point (a good place for Strogg Infiltrators using a railgun). Make sure your team has plenty of Strogg Constructors to reach and construct the mining laser to complete the objective.
GDF defenders will have plenty of vehicles at their disposal, including Anansi air support. Have GDF Field Ops bombard the area between the compound spawn point and entrance into the mining laser lot. Watch for vehicles approaching from the southern roads. Keep some troops inside the buildings near the mining laser to avoid howitzer strikes and to keep an eye on approaching Strogg forces.
Objective: A Strogg Aggressor must destroy the slipgate.
The final objective is indoors (the mining laser destroys the doors opening a route into the building). Strogg attackers need to capture and hold the admin bunker spawn point west of the building holding the slipgate.

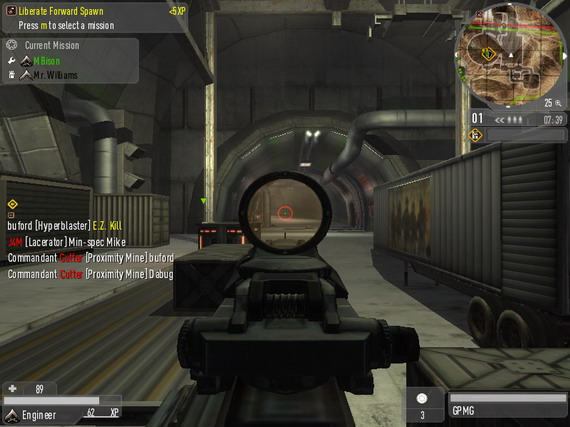
There are a couple key locations inside. For the GDF defenders, there's a machine gun nest protecting one of the paths to the slipgate; a GDF Engineer can construct the machine gun for additional defense. For the Strogg attackers, there's the service door. A Strogg Aggressor can destroy the service door with a plasma charge; doing so opens a faster route to the slipgate (and avoids the machine gun nest).
The route opens to the upper catwalks circling the slipgate. Use oppressor shields and toss grenades below to clear GDF defenders. A Strogg Aggressor is required to plant a plasma charge onto the slipgate. On the other side, GDF Engineers should stand by and prepare to defuse. Remember that even though the objective is indoors, both teams need to deploy exterior radar. On that note, seek out the enemy radar and eliminate it to gain a big advantage.
Ark
The remore GDF research station known as The Ark has made a breakthrough in analyzing Strong biotechnology. The Strogg must destroy the lab equipment in the underground laboratory before their secrets are made public.
Objective: A Strogg Aggressor must destroy the jamming generator.

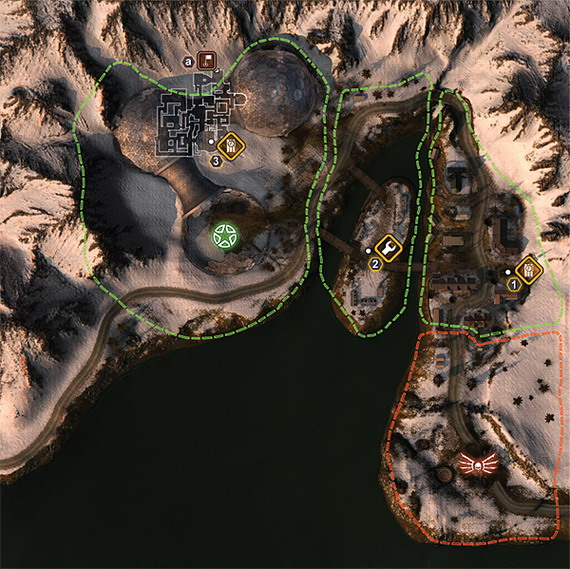
Strogg attackers spawn south of the jamming generator; GDF defenders spawn to the north. The generator is positioned on the eastern side of a small village. The village buildings provide ample cover for both Strogg attackers and GDF defenders.
Strogg attackers have several options approaching the village. Take advantage of multiple routes to the jamming generator. Split the Strogg attack groups to the western and eastern sides of the village. The hills to the eastern side provide an excellent vantagepoint to provide covering fire from a crouched Desecrator. A Strogg Oppressor can use this area to target long-range fire support to help weaken the GDF troops defending and approaching the laser from the GDF spawn point to the north.
GDF defenders must watch each Strogg attack route. Pay attention to the snowy hills east of the jamming generator for Strogg forces looking to flank the GDF defense forces. Place long-range fire support north of the jamming generator and away from Strogg attackers. The GDF Field Ops must make careful decisions on how to best use fire support against a spread Strogg squad.
Strogg Aggressors are required to complete the objective; the aggressor must destroy the jamming generator with an armed plasma charge. GDF Engineers will deploy defensive turrets but must also be ready to disarm the aggressor's plasma charge to keep the jamming generator intact.
Objective: A Strogg Constructor must construct the mining laser.
A short time after the Strogg successfully destroy the jamming generator, the mining laser appears on the small islet west of the village. The Strogg now spawn near the completed generator objective while the GDF spawn between the mining laser and the biodome to the northwest.
Vehicles and long-range fire support will be key for Strogg maintaining pressure on the GDF defenders. Target approaching GDF defenders and vehicles. If you gain an upperhand near the laser, form a perimeter on the northwestern side and battle approaching GDF forces there while Strogg Constructors make a run for the mining laser. Protect your constructors! Strogg Technicians create spawn hosts for teammates to return to battle quickly.
GDF Engineers and Field Ops must deploy defensive turrets and fire support to counter the Strogg attack. Engineers should plant mines near the mining laser and along routes the Strogg team are tending to use to reach the area.
Objective: A Strong Aggressor must destroy the lab equipment.
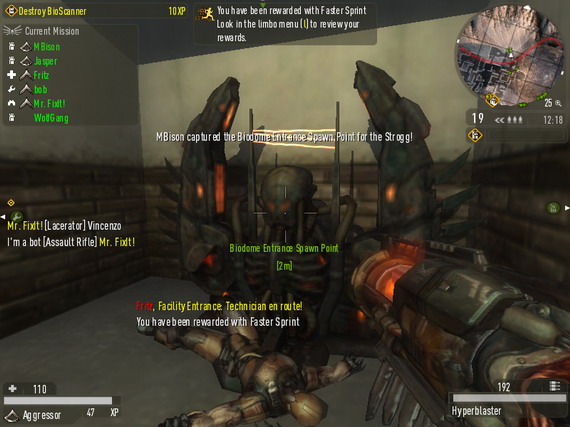
Once a Strogg Constructor finishes construction, the mining laser destroys the entrance into the biodome and provides access to the map's final objective. The Strogg spawn near the mining laser, which isn't close to the lab equipment inside the biodome. One of the Strogg priorities will be to capture the biodome entrance spawn point. This will cut down the time required to reach the lab equipment considerably. Plus the Strogg can avoid being harassed by GDF troops choosing to spawn outside the dome.

There are two entrances into the front of the biodome: the main entrance destroyed by the laser and a rear entrance on the northern side. Using the rear entrance can flank GDF defenders if they're crowding the area around the biodome entrance spawn. Use the path to reach the area above the spawn to aid in eliminating defensive forces. Note that vehicles can easily maneuver inside the biodome entrance.
Once inside the dome, follow the halls to the lab equipment. There are several routes; you can use the marked paths (yellow lines) to find the lab room. Strogg attackers should move as a group to push through the GDF defenders. Technicians can create spawn hosts on GDF corpses and a skilled infilitrator could steal a disguise and clear out some GDF troops with backstab. A Strogg Aggressor will be required to utilize a plasma charge to destroy the lab equipment.
GDF defenders should attempt to defend the biodome entrance spawn point for as long as possible. Maneuver vehicles into the diodome to increase defense. GDF defenders inside the final room should take cover and pounce on Strogg attackers. Medics and field ops must keep teammates healthy and supplied. Have engineers on hand to defuse the plasma charge.