Soldier
The soldier is the GDF's primary combat class and starts with greater health and weapon options than the other classes. You can equip the soldier with the assault rifle or shotgun—both of these weapons are available to other classes—or opt for heavier weaponry such as the GPMG (General Purpose Machine Gun) or rocket launcher. The rocket launcher in specific allows the soldier to serve as a mobile anti-vehicle or anti-deployable force in addition to other potential tasks. Note that you run slower with heavier weapons selected; if you're trying to quickly move point to point, equip the pistol to reach your destination faster.
Although the soldier can have specific map objectives to complete, the soldier should also provide important support fire for engineers attempting to complete construction tasks or covert ops trying to complete hacking tasks. Soldiers are also ideal for guarding objectives against Strogg classes, such as Strogg Aggressors attempting to blow up the salvage on Salvage. Support a defending soldier with Medic health kits and Field Ops ammo kits to keep the combat class healthy and supplied.

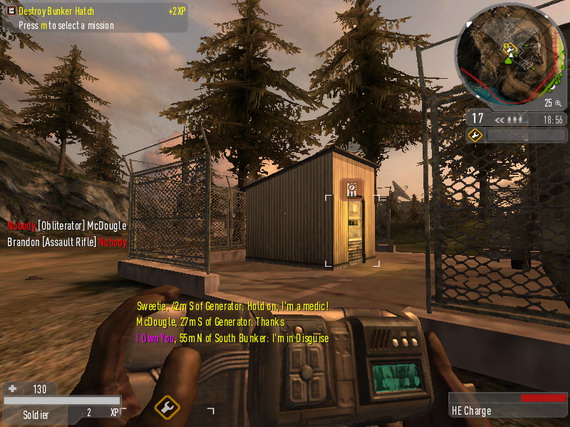
The heavily armed soldier is also responsible for destroying primary and secondary objectives with the HE charge.
As stated, the soldier is also required for certain map tasks (both primary and secondary), specifically those that require the destruction of objectives and structures. The soldier is equipped with the HE charge and arming device. Place the charge on an objective then use the arming device to set the charge. The timed charge will automatically detonate. Remember however that Strogg Constructors can remove the charge—don't leave the area expecting your work to complete unprotected. Take cover and ambush any Constructor hoping to disarm the HE charge.
The chart below reveals the campaign reward for the soldier class. These rewards are especially beneficial for the soldier's heavy weapons options (and faster rocket lock-on enhances its ability against enemy vehicles and deployables) as well as the soldier's role in destruction tasks when using the HE charge.
| XP | REWARD | DESCRIPTION |
|---|---|---|
| Level 1 | Faster Rocket Launcher Lock-On | When using the alternate fire button, the rocket launcher locks onto targets faster. |
| Level 2 | Gain Heavy Weapon Ammo | Increases the amount of the initial loadout of heavy weapon ammunition. |
| Level 3 | HE Charge Faster Arm | Arms the soldier's HE Charge at a faster rate. |
| Level 4 | Faster Heavy Weapons Movement | Increases the soldier's rate of movement while holding the rocket launcher or heavy machine gun. |
Medic
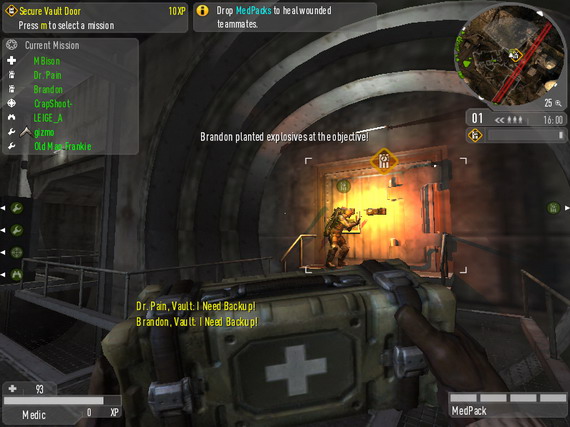
The medic's primary role is to provide support to other classes. The medic can drop medpacks to replenish a teammate's health, use defribillators to revive unconscious teammates, and use a special smoke grenade to call in a supply drop to restore health and ammo to adjacent players. The medic has limited offensive weaponry, only the assault rifle and shotgun, limited ammunition, and none of the experience rewards aid in combat. Your chief duties should be working behind the front lines and restoring health to attacking GDF forces, looking for unconscious teammates (which appear as possible missions), and using supply drops to keep vital teammates full of health and ammunition.
One of the medic's most important roles is to eliminate Strogg spawn hosts created by Strogg Technicians. Spawn hosts are created on GDF corpses and Strogg players can spawn at those locations making both offensive and defensive situations easier. If you're playing as a medic, you should seek out spawn hosts and destroy them with your defribillator to avoid making the Strogg task easier than it should be. Strogg reinforcement time is longer than GDF and spawn hosts help counter this; counter it back by destroying them.

The supply drop is another extremely important task for the medic (it's also unique to the GDF Medic; the corresponding Strogg Technician does not have this ability). The supply crate will replenish the ammunition and health of any player that stands adjacent to the crate. Drop a supply crate near an engineer tasked with constructing a bridge objective to replenish health or order a supply drop near a defense objective to keep defending soldiers stocked with rocket or heavy machine gun ammunition.
Although the medic has an unlimited supply of medpacks, you can't dispense an unlimited amount at a time. Tossing medpacks uses a medic's energy; you can toss four medpacks before you must wait until energy replenishes to toss another one. While you should be careful not to haphazardly toss medpacks, don't become conservative either. Find GDF teammates that require health and drop a medpack or two nearby to keep your team at as close to full strength as possible. Teammates may request medical attention as well; be ready to move quickly to support your team. You shouldn't select the medic class, ignore teammate requests, and assume a combat role—don't consider yourself the only GDF troop worth healing.
The chart below reveals the campaign reward for the medic class. These rewards emphasize the medic's role as a support class—none of these rewards provide combat benefits.
| XP | REWARD | DESCRIPTION |
|---|---|---|
| Level 1 | Large Medic Pack | Increases the restoration power of the medic's dropped medpacks. |
| Level 2 | Additional Supply Drop | This reward allows the medic to call two supply drops instead of one. |
| Level 3 | Shock Shelf (Health Boost) | Using the alternate fire with the defibrillators restores a small portion of the medic's health. |
| Level 4 | Full Health Revive | Revived teammates receive full health. |