Canyon
The Strogg have taken over an abandoned fortified base to develop an improved Stroggifier. The GDF must fight their way down the canyon and destroy the Stroggifier before it can be used to produce new armies of Stroggtroopers.
Objective: A GDF Engineer must construct the bridge.

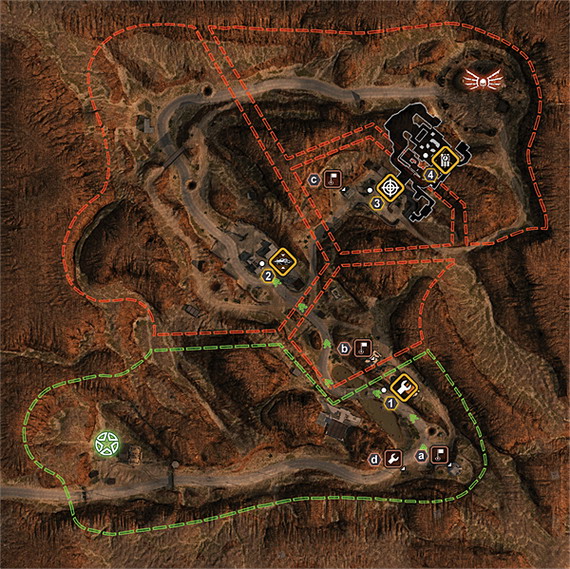
There's a forward spawn, the domed building spawn point, closer to the bridge. Immediately drive a Husky (using the sprint button for increased speed) east. As you approach the building, drive up the rocky incline on the right side to reach an entrance into the upper floor of the domed building—the spawn is inside the upper floor. Capturing this spawn point quickly and holding it is a GDF priority. The bridge is a long way from the GDF base! A couple GDF Engineers should also pile into a vehicle and make a quick run for the bridge in case Strogg defenders are disorganized.
The road to the bridge runs through a valley; there are two mountain roads to the west and east of the bridge. This provides a lot of defensive cover on the bridge point. GDF players must help clear out Strogg snipers and defenders from these areas or GDF Engineers will have a tough time staying at the bridge long enough to complete construction. Use vehicles postioned on the left side of the build point to provide cover from Strogg snipers; crouch or go prone to become a smaller target while completing construction.
Strogg defenders should capture the destroyed building spawn point on the mountain road just north of the bridge. Continuing south, the Strogg can drop off the mountain road into an alley adjacent to the bridge. Strogg defenders should push quickly to the bridge to avoid GDF Engineers getting a quick and easy build. After thwarting the initial rush, Strogg defenders should spread into the mountain road buildings to the east and west of the bridge and take aim on GDF troops and vehicles below. This is also an excellent spot for infiltrators and oppressors to aid with long-range support.
Objective: Any GDF class must drive the MCP to the outpost and deploy it.
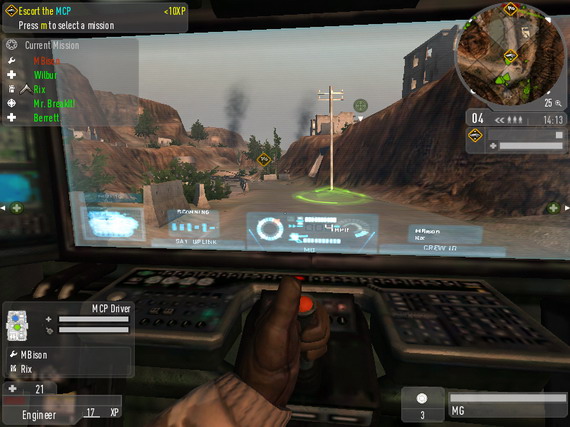
After a GDF Engineer completes the bridge, the MCP is dropped near the domed building spawn point. Any GDF class can drive the MCP to its destination, which lies across the bridge and well into Strogg territory. A second GDF troop can main the minigun atop the MCP and provide covering fire as the MCP pushes forward toward the outpost. Meanwhile, GDF forces should take the ruined building spawn on the eastern mountain road north of the bridge.
The biggest Strogg threats initially are aggressors and vehicles. Escort the MCP with vehicles in front to both draw enemy fire and overcome any hostiles. Field ops will be responsible for fire support ahead of the MCP. As you near the outpost, the path for the MCP forks to the left and right; the left path provides some cover from mountain rocks and is generally the quicker route to the outpost destination.

Strogg defenders should erect several defensive turrets on the roads leading to the east and west of the outpost. Anti-vehicle turrets can make quick work of the MCP and will soften up any escort vehicles as well. Strogg Constructors must keep these turrets active and running to keep the MCP from advancing. GDF attackers can use the mountain roads to attack any Strogg turrets from high ground. Once the MCP reaches the destination, it automatically fires the SSM—and the Strogg shield blocks it.
Objective: A GDF Covet Ops must have the Strogg shield generator.
The GDF now spawn in the outpost and follow an uphill road east into Strogg territory and the shield generator protecting the entrance to the Stroggifier. The challenging uphill battle will require GDF Field Ops to provide long-range fire support to weaken Strogg vehicles and deployables crowding the narrow road.
Strogg defenders have a longer trip to protect the shield generator. Ensure that the area is defended by constructor and oppressor deployables. Any Strogg Technicians should create spawn hosts for slain Strogg to rejoin the defense as quickly as possible. Mine the area around the generator to fend off ambitious GDF Covert Ops hoping for an easy hack.
Objective: A GDF Soldier must destroy the Stroggifier.
After a GDF Covert Ops hacks the shield generator, the MCP SSM destroys the hanger doors. Attackers should capture the hut spawn near the shield generator and hold it. A GDF Soldier will be required to place an armed HE Charge on the Stroggifier. The interior isn't complicated, though there are a few routes to the target. Make sure you have working radar to detect Strogg movements. After arming the charge, maintain position inside the room to repel any Strogg Constructors attempting to disarm the explosive.
Strogg defenders can attempt to hold the hut spawn and force the GDF attackers to travel long distance to reach the Stroggifier. This can be especially effective if the GDF fail to implement defenses around the spawn. Deploy a Psi Radar to track GDF movements and create spawn hosts on GDF corpses close to the Stroggifier to maintain a defense. There should be at least a few constructors on the team to disarm the explosive.
Island
Moore Observatory is the only surviving facility which still holds data on the appearance of the first Strogg slipgate. The GDF must recover this DataDisc and get it to the transmitter for broadcase to waiting GDF scientists.

Objective: A GDF Engineer must construct the generator.
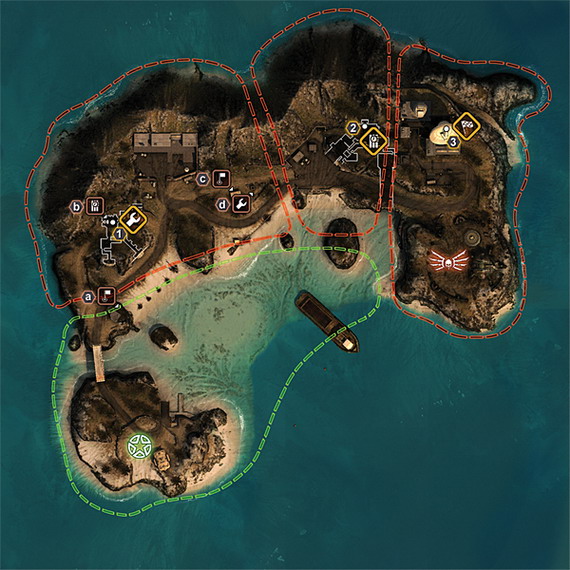
GDF forces start with a couple options approaching the generator: a high bridge route or a low water route. You can use vehicles to traverse both. The bridge route is a bit faster in reaching the bunker spawn point, which should be captured immediately.
A GDF Soldier and Engineer should take a Trojan across the bridge at high speed, capture the spawn, and then split up to their next respective targets. The GDF Soldier goes for the destructible bunker hatch on the hill above the generator; the Engineer proceeds inside the bunker to the generator to begin construction. Destroying the bunker hatch provides a fourth route to the generator; it drops down above the generator, and offers a potential ambush route on Strogg defenders inside.
There are three entrances into the bunker holding the generator (four if the bunker hatch falls) which means the Strogg must use turrets and long-range fire support to enhance defense. Deploy both an anti-personnel and anti-vehicle turret (can target GDF air units too) around the bunker to slow down the GDF advance. The task completes once a GDF Engineer finishes the generator.
Objective: A GDF Soldier must destroy the storage room door.
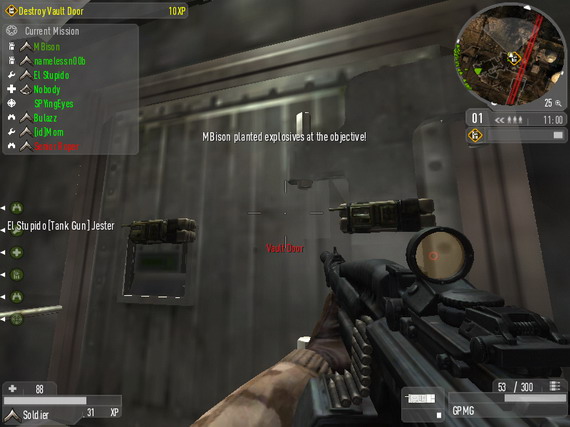
GDF forces will push east toward the vault entrance. Capture and hold the outpost spawn point just west of the vault. Field ops should remain at a distance and deploy fire support to bombard Strogg defenses around the entrance. A GDF Soldier will be required to plant an armed HE Charge on the storage room door to free the DataDisc.

Strogg defenders will likely crowd the tight storage room area. Beware of constructor proximity mines scattered through the tunnels and near the door itself (toss grenades to detonate the mines). Make sure to keep Strogg deployables away from the vault entrance to keep the battle inside the structure instead of outside. On the other hand, Strogg should keep the fight outside by using fire support and turrets to slow down the GDF push inside the vault. Make sure radar has been deployed to detect GDF troops getting inside and near the storage room.
Objective: Any GDF class must take the DataDisc to the transmitter dish.
The DataDisc is found just inside the storage room. Any GDF player must grab the disc and take it to the large transmitter dish in the northeast corner of the map. This section works somewhat like capture the flag. If the GDF player holding the disc is killed, the disc is dropped. Another GDF player can grab it but if a Strogg player touches a dropped disc, it's returned to the start location.
There are a few routes out of the vault area: through the front entrance, downstairs through a tunnel leading out to sea (also includes a Platypus), and upstairs to a path above the vault entrance. Penetrating an organized Strogg defense can be tough—the Strogg can maintain close quarters to the transmitter.
GDF fire support must bombard the area to weaken and eliminate deployables (including radar). Charging the dish from the western side can be predictable; consider using the Platypus or aerial transport to maneuver around the back of the dish where there's another path. This can be especially effective if the Strogg fail to deploy radar (or the GDF destroy it).